
The Succubus project began for me in July of 2012 when I began the first sketches of my alternate Legion spellcaster, and the journey from those initial scribblings to where I am now has been enormously educational for me. She is flat-out the best sculpture I’ve ever made, and I learned a lot about the casting process as I worked through it for the first time.
And now, I have brought the adventure to a close, as the Succubus has finally been added to the Legion army I initially intended her to join.

As it turns out, painting her was a bit of a struggle, as she’s based on the scheme of my very first Legion model, and I haven’t repeated that exact scheme in over a year and a half. So bear with me today as I try desperately to remember how I mixed a particular wash in 2011!
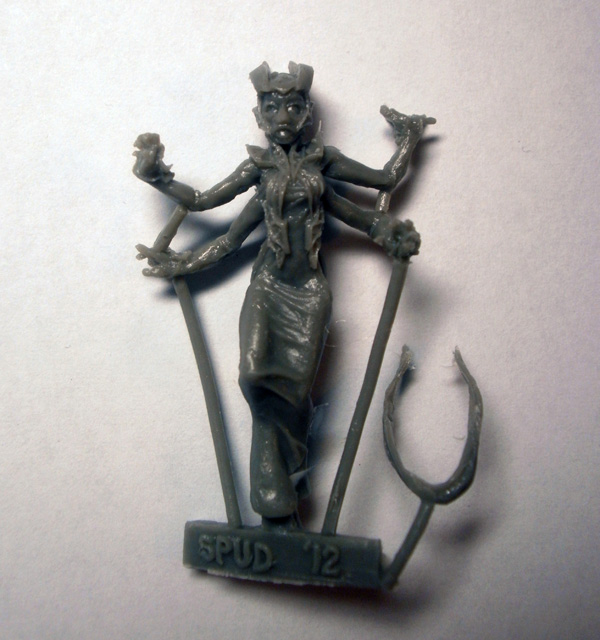
Here’s the base model I started with– a random resin-cast Succubus from the bundle Black Dragon Miniatures sent me in mid-January. I didn’t dig through and find the best one, or anything like that– if there were any problems, I resolved to simply deal with them. 🙂

I spent about half an hour cleaning up mould lines with a knife. They were surprisingly minimal compared to other resin minis I’ve seen in the past, but there were still some visible lines on the hips and between the arms.
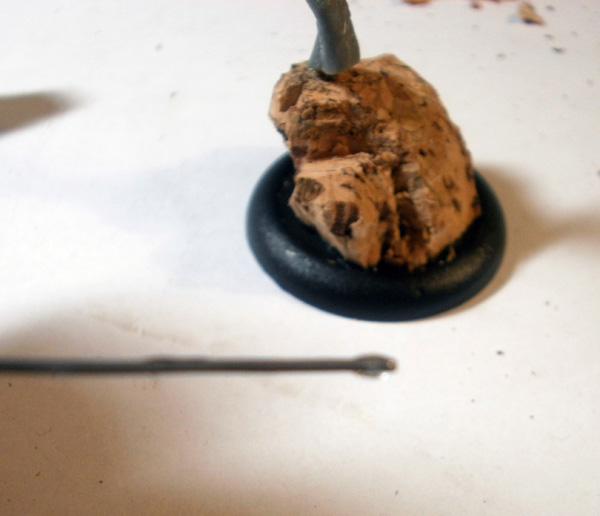
Once she was clearned up, I chopped off her tab and put her on her base. My Legion army are all based on snowy rocks; I start each one by chopping up a wine cork with clippers and knives until it takes an interesting shape, then cover that basic form with putty. Here I’ve cut up a champagne cork into a small ramp.

She’s attached to the base with a wire, which runs down through the cork and out the bottom of the plastic base, where it curls around the slot rim. This gives me lots of contact area to hold her still; I make use of it by slathering super glue all around the wire, then letting it dry for an hour in front of a heater.

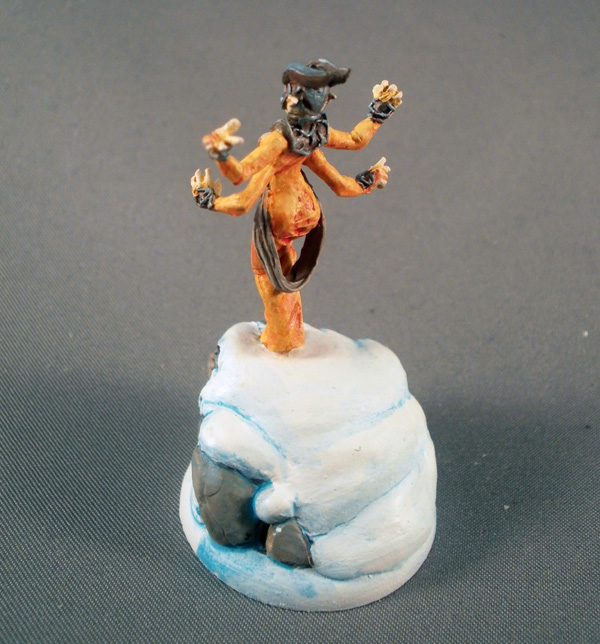
When I started sculpting the Succubus, I wasn’t planning to have her cast, so I ended up with a detail that was going to be impossible to mould in one piece– a loop of cloth behind her legs. I delicately separated it before I sent the model off to the caster, and it does technically fit back on now that it’s all cast, but it’s a very difficult joint to reattach, as you’ll see in a moment.
I applied the glue to the model by putting a drop on the end of a wire, then using that wire to apply the glue in the channels cut into her hips.
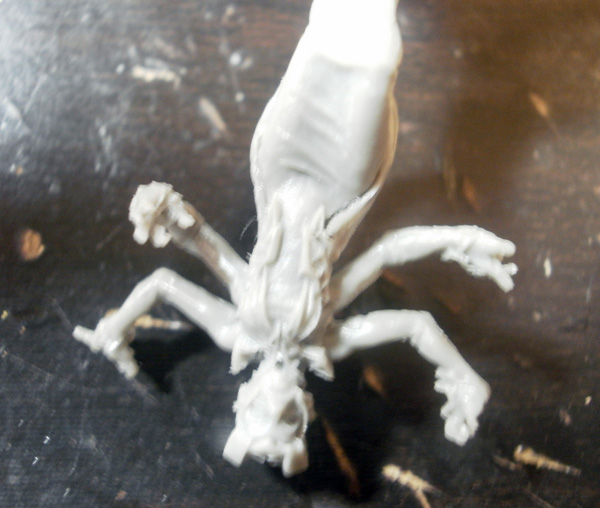
I squeezed it on with my fingers, but I ran into a problem– the sash is a few microns wider than the hips, so when you squeeze it around them, the resin wants to spring back to its original shape regardless of what the super glue is trying to tell it; as a result, it took me several days of intermittent trying to get it to finally attach.

Here you can see her finished putty base, which I didn’t get any dedicated photos of. I first sculpted the angular rocks on the sides, then put a layer of smooth snow over the top and balled up in the crevices. The rocks were mostly done with a hoe tool, while the top is smoothed with clayshapers.
…and then the sash snapped apart again when I touched it, so in frustration, I put putty in the join and squashed the ends together with an alligator clip. This finally gave me the joint I wanted…
…but it mashed up the sash, requiring some reconstruction work. 🙁
And after all that, I spoke with my associate Dan to whom I had gifted one of the completed Succubi, and he told me that he had found a far, FAR better solution: he dunked the sash in boiling water to soften it, squeezed the sash ends together slightly, and let the resin re-set in this new position. As a result, the sash willingly held onto the hips, preventing any of this nonsense.
>_<
So, lesson learned: if you’re one of the unfortunate souls who is stuck with a Succubus model, use Dan’s method, not mine. Because my method is idiotic.
*sigh*
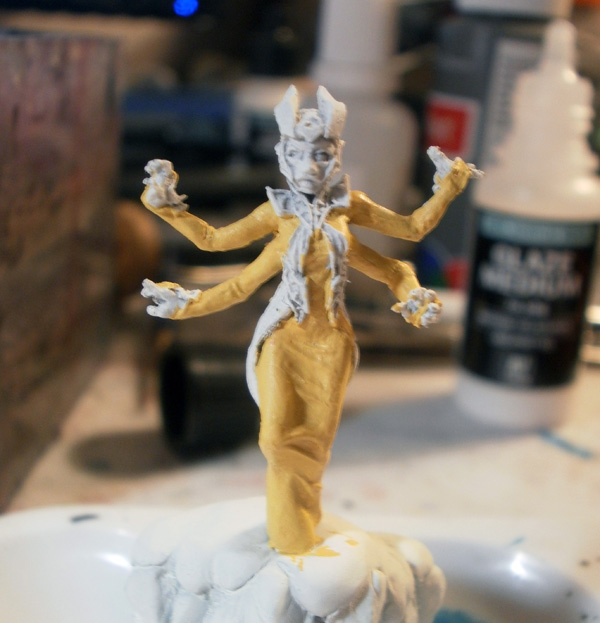
Aaaaaanyway. Once she was all rigged up on her base, I primed her white and got to work. The beasts in my Legion army are painted in a blend from pale orange to pinky red:
 |
||
| Base | Wet Blend | Wet Blend |
| 50% PP Sulfuric Yellow 50% PP Khador Red Highlight |
PP Khador Red Highlight | GW Red Gore |
The warrior models all use variations on this; I employ the same paints, but focus more on a subset of the gradient. So for example, my Ogrun Warmongers have no yellow at all on their leather, while Vayl’s silky cloth, which I’m reusing for the Succubus, has a lot more pure yellow at the highlight than the beast skin:
 |
|||
| Base | Freehand | Wash | Freehand |
| PP Sulfuric Yellow | 50% PP Sulfuric Yellow 50% PP Khador Red Highlight |
PP Khador Red Highlight | GW Red Gore |
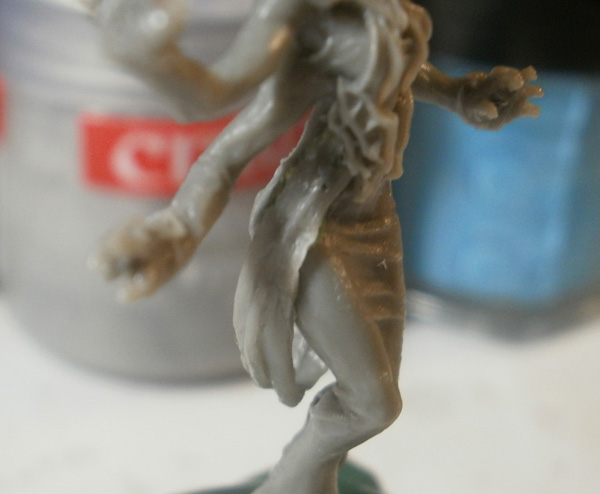
It didn’t photograph very well, but here I’ve gone through and freehanded jagged tracery all over her dress using the pale orange from above, then washed the crevices with the same shade to “eat up” the detail in the low areas and leave it only on raised surfaces.
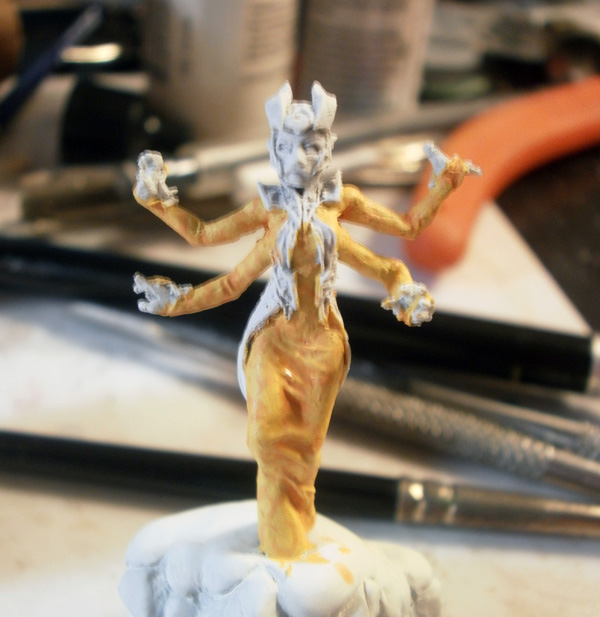
Next I did a wash of pure Khador Red Highlight. I would later realize that it wasn’t a heavy enough wash and go back and re-do parts of it, but for now it’s giving my crevices a deeper orange shade. Once that’s dry, I re-do the tracery lines in the deep areas in slightly watered-down Red Gore; thus, it looks like the pattern’s lines are changing colours according to the light conditions.
This was all being done the night before I headed off to Templecon, so #1, I was in a mad panic, and #2, it was the middle of the night and my painting area was really dimly lit, so I neither knew that the dress was really incomplete, nor could I do anything about it yet. So, pause here for the dress…

Aaaaaaaand I missed a mould line. >_<
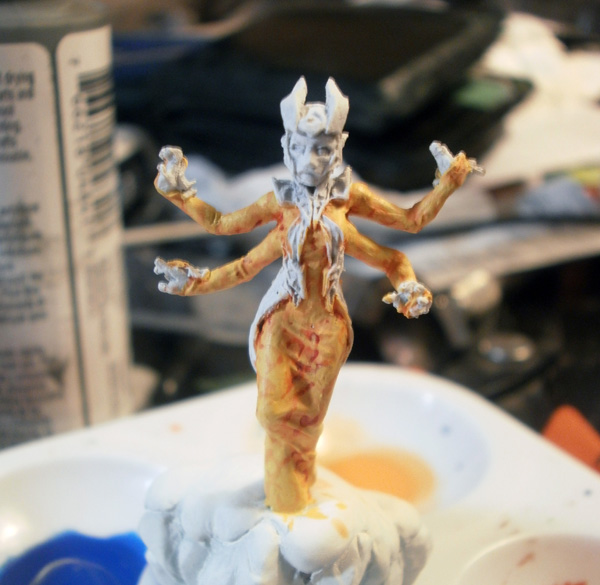
I then moved onto the other textures, starting with the cloth sash. I did this by borrowing the colours I use for the rocks in the army’s basing:
 |
||
| Base | Layer | Highlight |
| 2/3 GW Graveyard Earth 1/3 GW Fortress Grey |
1/3 GW Graveyard Earth 2/3 GW Fortress Grey |
50% GW Skull White 30% GW Fortress Grey 20% GW Graveyard Earth |
Those ratios are approximations, and I sometimes do more than three layers; I basically start with a blob of the basecoat on my wet palette, do one or two highlights by adding fortress grey to it, and then do one or two more highlights by adding Skull White. In the case of the Succubus’ cloth, I wanted the highlight to be very smooth, so I mixed a drop of matte medium in on the top layers to give them a silky finish.
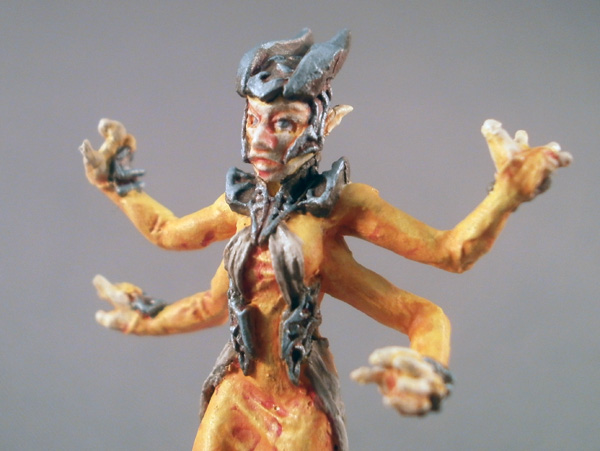
Here I’ve done the skin, which uses some paints I don’t use anywhere else in the scheme:
 |
||
| Base | Wet Blend | Lightly Wet Blend |
| 2/3 GW Skull White 1/3 PP Sulfuric Yellow |
1/2 PP Khador Red Highlight 1/2 GW Bronzed Flesh |
1/2 GW Tanned Flesh 1/2 GW Red Gore |

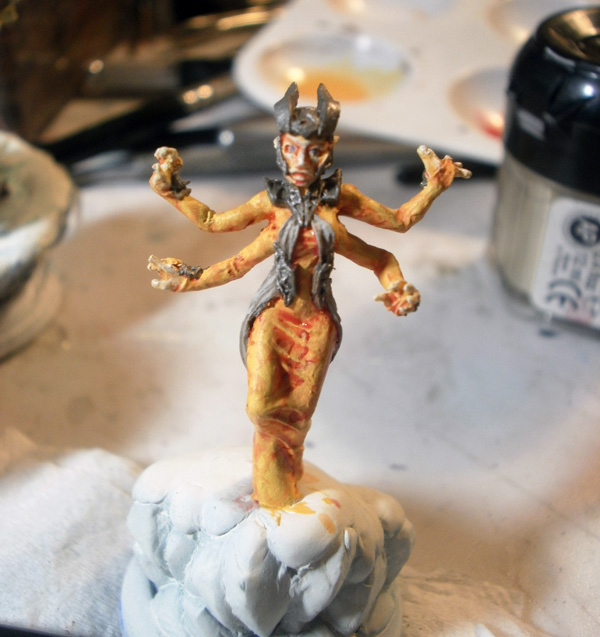
Finally, I did up her metals. In my army, metals and the beasts’ bony plates use an identical colour scheme, simply substituting silver or grey depending on which I’m doing:
 |
||
| Base | Layer | Highlight |
| 2/3 GW Graveyard Earth [1/3 GW Fortress Grey or 1/3 GW Boltgun Metal] |
1/3 GW Ice Blue [2/3 GW Fortress Grey or 2/3 GW Chainmail] |
1/3 GW Ice Blue 1/3 Fortress/Chainmail 1/3 Skull White |

And then, the finishing touches– the rocks use the scheme listed above, the snow is white with Ice Blue wet blended into the shadows, and I applied a heavier wash of Khador Red Highlight into the lower areas of the model to make her less yellow and more orange.
And at that point, she’s basically done. 🙂
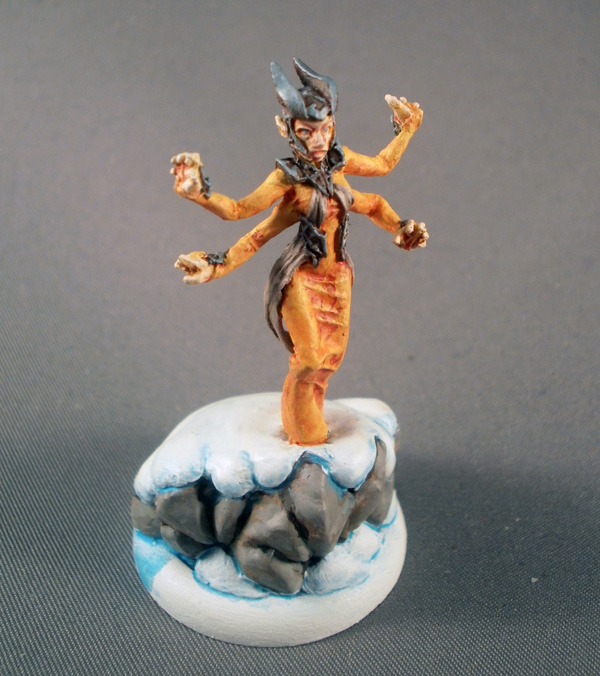
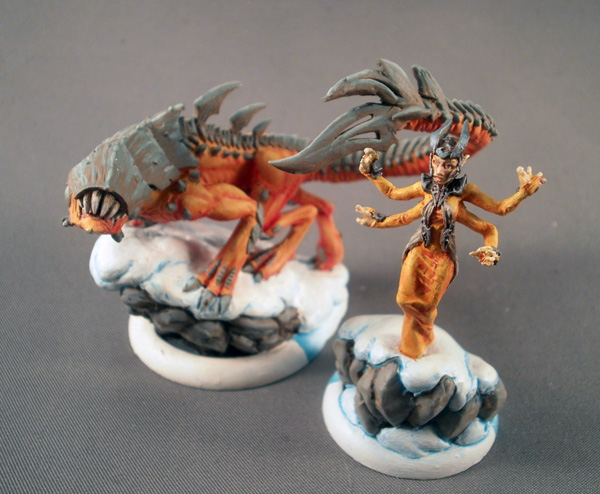
The Succubus was a long but very rewarding journey for me, and it’s a real thrill to finally see her finished, floating alongside her sisters for the greater glory of Everblight.
More to come later in the week. 🙂
I’m looking forward to assembling and trying to paint her soon. I’ll send you a link when I do so you can see pics. 🙂 My basing still sucks though; yours always look awesome.