
The Floor
My intention had always been to tile the station floor with concentric rings of panels. This would be a fairly complex process, as each ring would have slightly different angles and curves from the one next to it, requiring me to build templates for each layer.
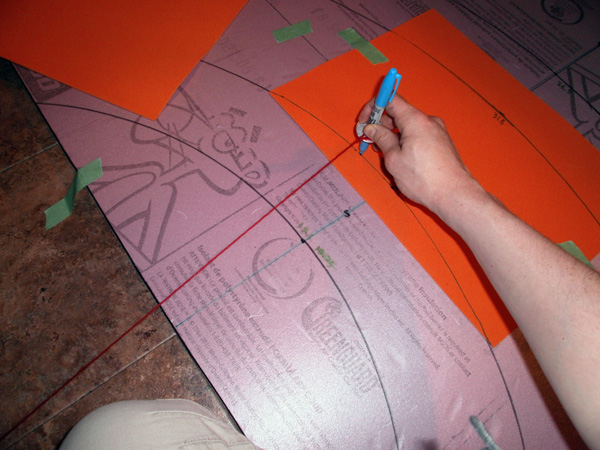
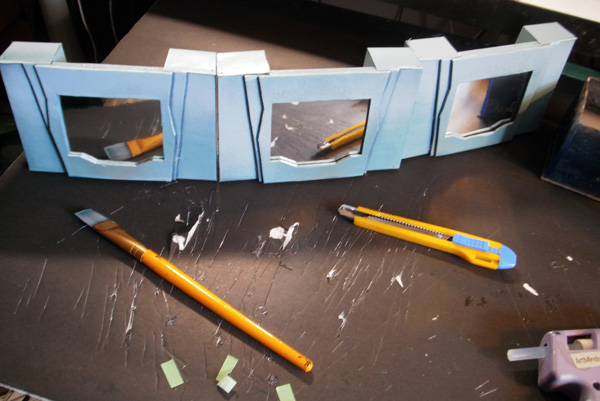
My first attempt to do this was with the same “string compass” method that I had used to draw the floor panel in the first place.
However, these first panels turned out to be a huge mess. I was working on my own, so I didn’t have anyone nearby to firmly anchor the fulcrum of my compass (need to instead pin it down with heavy objects). Also, the yarn I was using was slightly stretchy, so when I pulled it taut, my sharpie would wobble slightly in its distance from the anchor. And finally, I was drawing the lines on a four-foot-wide styrofoam panel, requiring me to hold my arm out quite far, which reduced my ability to draw clean lines.
With all of these errors combined, the panels were extremely wobbly and didn’t fit together nicely. So, I threw them out.
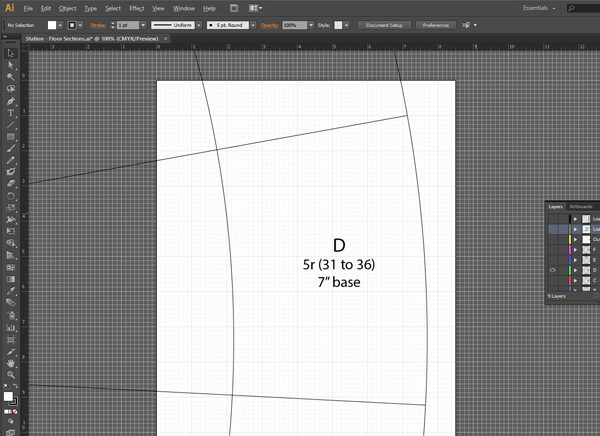
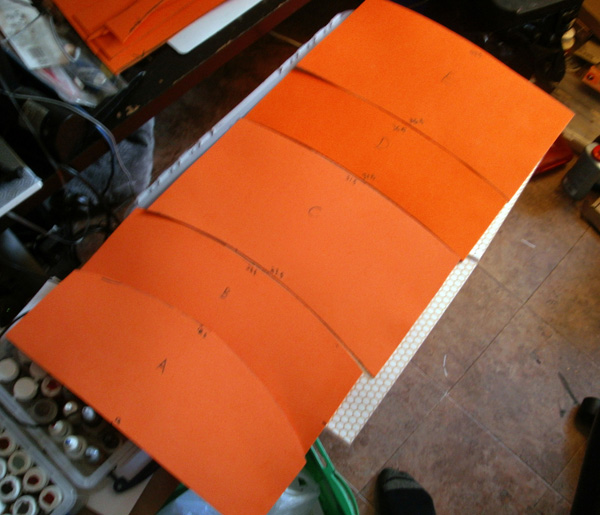
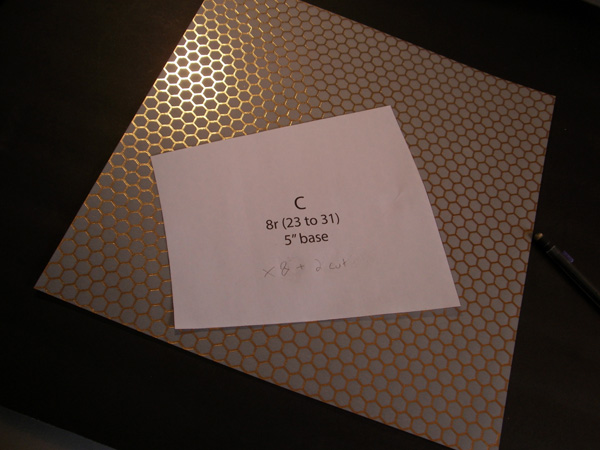
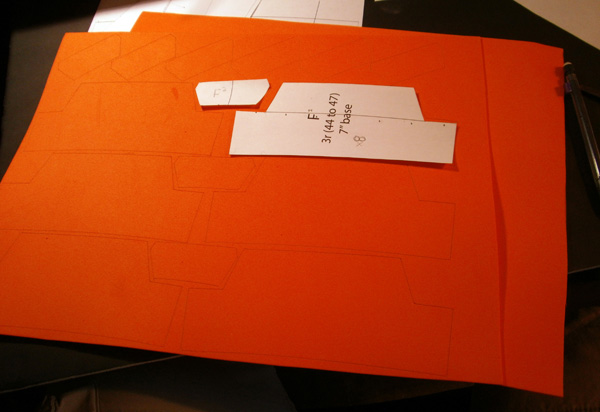
As with so many terrain design tasks, the correct solution was to use a computer. I fired up Illustrator and mocked up some mathematically-accurate panel designs. My station design alternated between 5″ corridor rings and 8″ room rings, and I varied the width of the wedges so that corridor panels were long (7″ at the inner edge) and the room panels were narrow (5″ at the inner edge).

These panels were a HUGE improvement, fitting together beautifully once they were all cut out.
Yay for computers. 😀
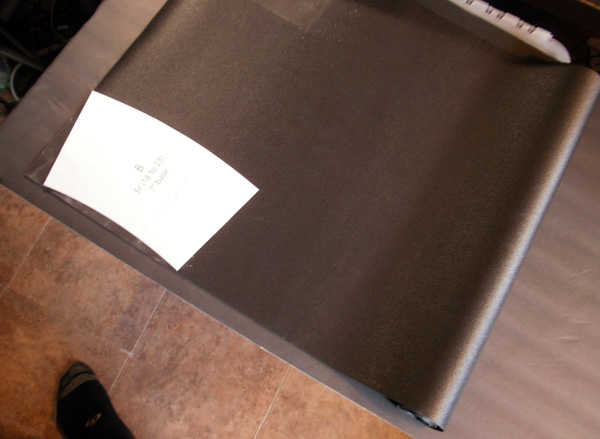
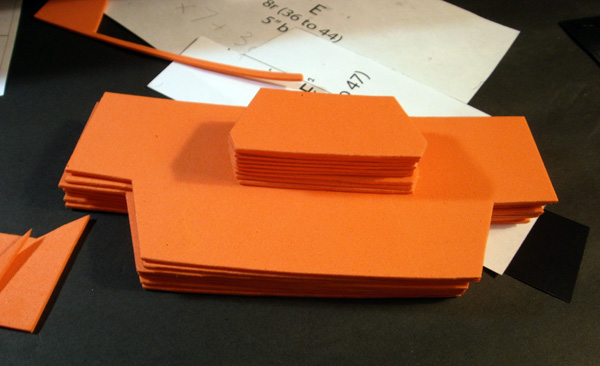
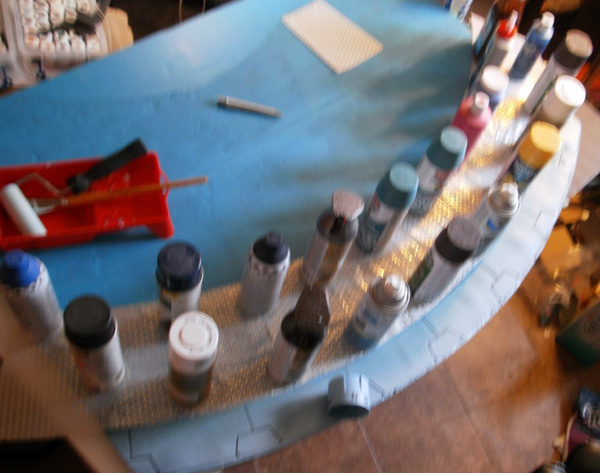
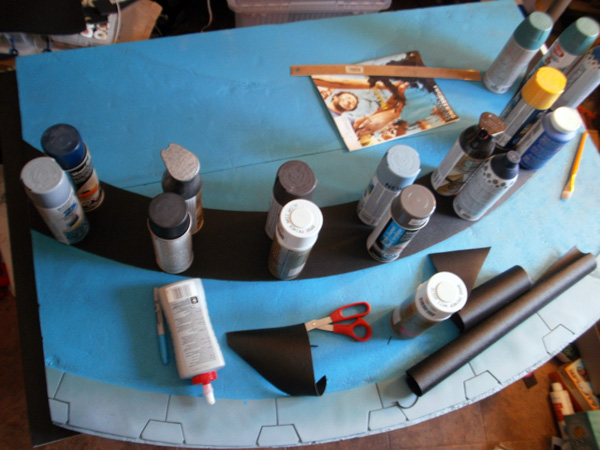
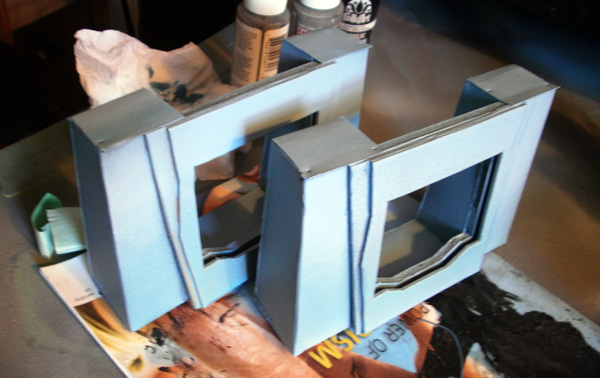
In addition to their different dimensions, I wanted to further differentiate the Room and Corridor floor panels by their material. The corridors would be paneled with bumpy black drawer liner, which I picked up in a large roll at a local dollar store.
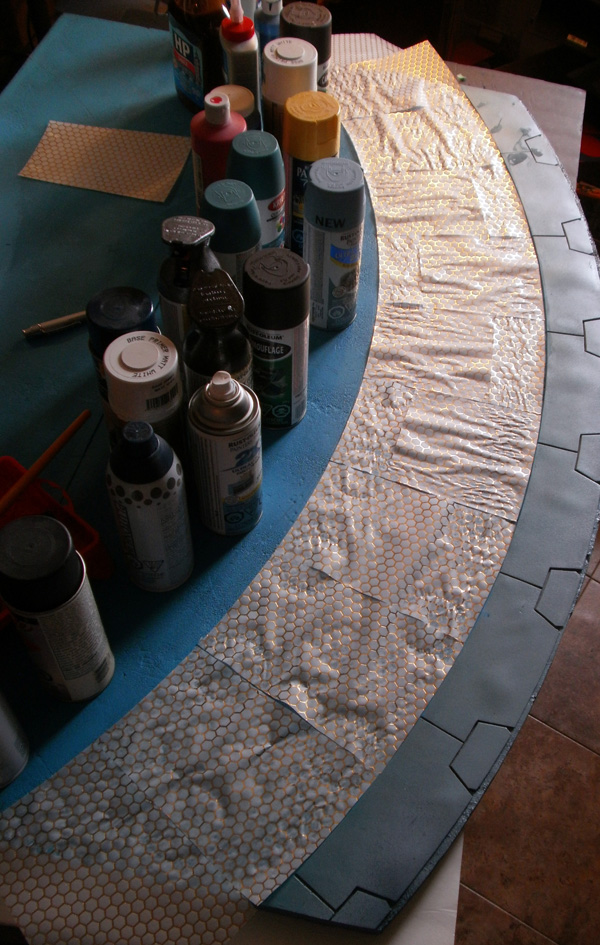
The rooms, however, would receive a very special treatment: shiny gold hex paper. 😀
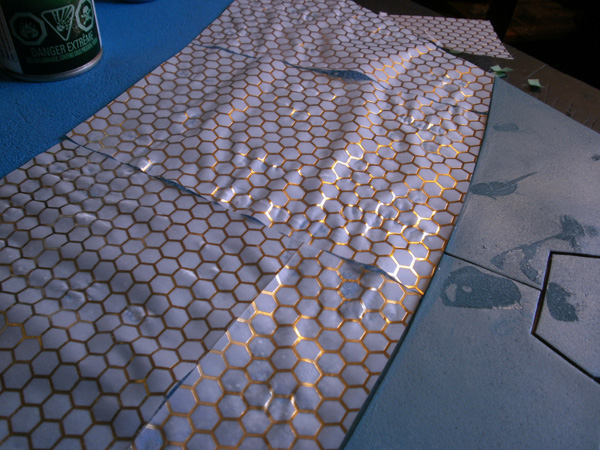
Scrapbooking paper can be a huge boon for terrain projects, as it provides large repeating areas of the same pattern that can be cut into whatever shapes you need. This particular paper was fairly expensive– almost $5 a sheet, and I think I needed something like 12 sheets in total– but the look was absolutely gorgeous, with translucent panels surrounded by gold foil hexagon lines. I was super pumped to see how this would look once glued into place.
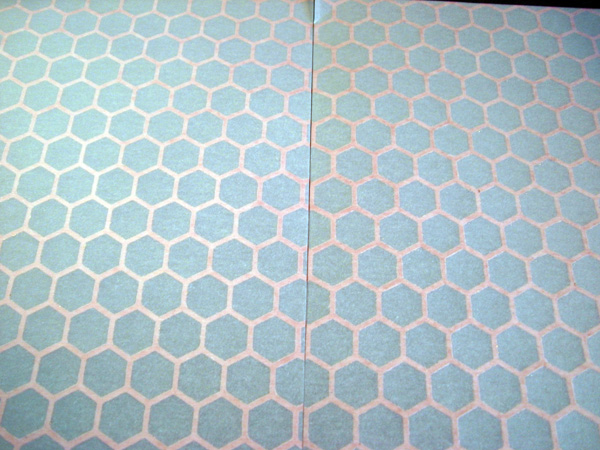
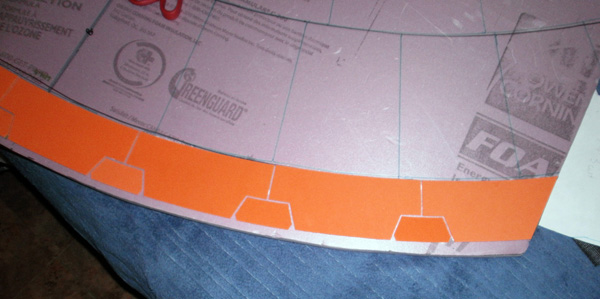
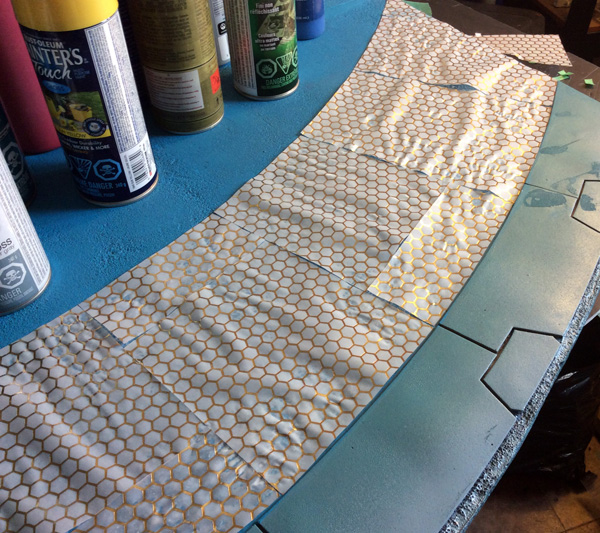
Like most scrapbooking paper, the hex paper came in 12″x12″ sheets. I laid out as many panels as I could entirely within one sheet, but most of them needed to span across the seam of two separate sheets. The paper doesn’t tile perfectly on its own as seen here, so I needed to cut the edges down to create better seams.
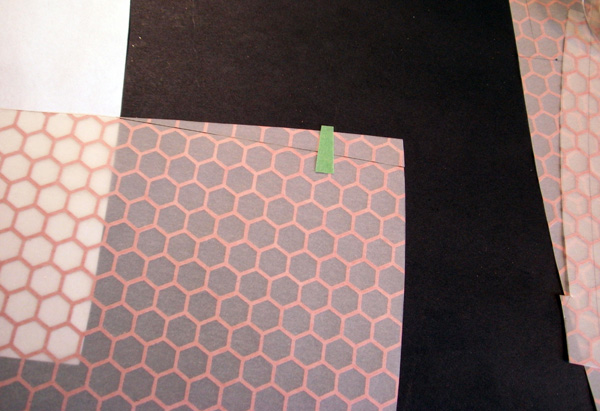
Drawing the patterns onto the hex paper and carefully cutting out the panels took an entire Saturday. As I cut pieces out, I used strips of painter’s tape to hold them together so that I didn’t lose any pieces or forget how the puzzle pieces fit together.
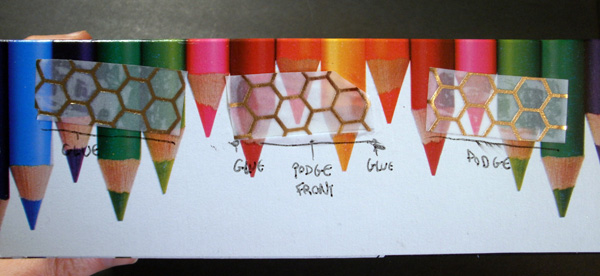
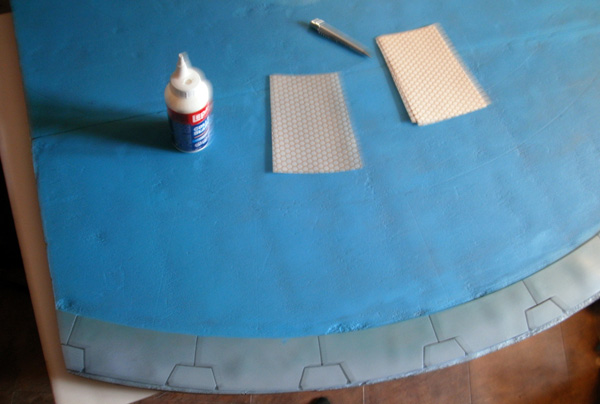
I wasn’t sure what the best way would be to glue the panels down, so I did some experiments. I glued down three test strips:
- A thin layer of glue under the entire area of the paper
- Glue at the edges of the strip (with no adhesive in the middle), and then Mod Podge over the top.
- Mod Podge under the entire paper
The first and third methods were about the same– they held eventually, but the translucent paper started curling as soon as it touched glue or podge. I needed to pretty the test strips back down several times while waiting for them to catch. The center panel didn’t work well, as the center of the strip bubbled up.
None of the tests was a roaring success, but I was reasonably confident that I could find heavy books or whatever to press down the panels if they curled during gluing.
(Audio note: CUE OMINOUS MUSIC)
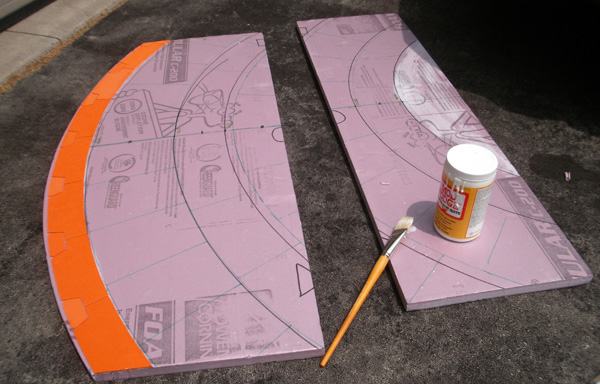
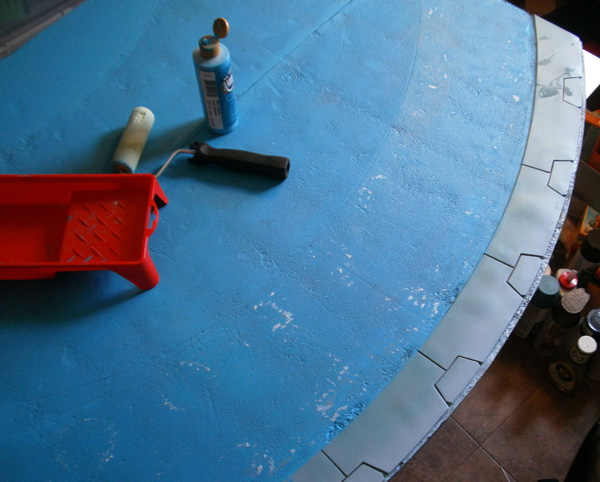
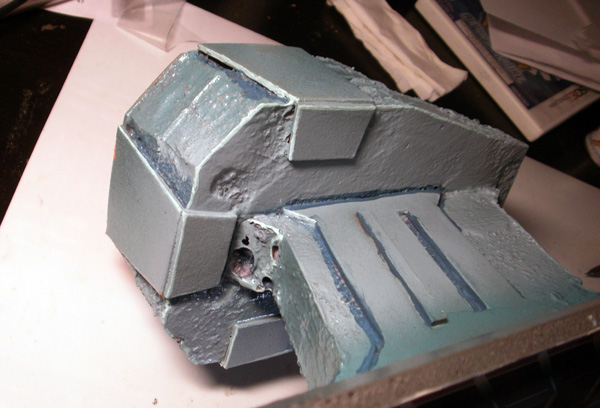
The last set of panels that needed to be built were the ones for the exterior of the station. The last 4″ of the board was meant to represent the outer hull, and I was planning to colour those areas with paint instead of papercraft. To add visual interest to these areas, I intended to cover them with craft foam paneling.
These were cut out with scissors…
…then glued down. My original outer edge from 2015 turned out not to be perfectly concentric with the newer floor rings, so I came back later with a knife and trimmed the bottom right corner with a knife to better match the arc.
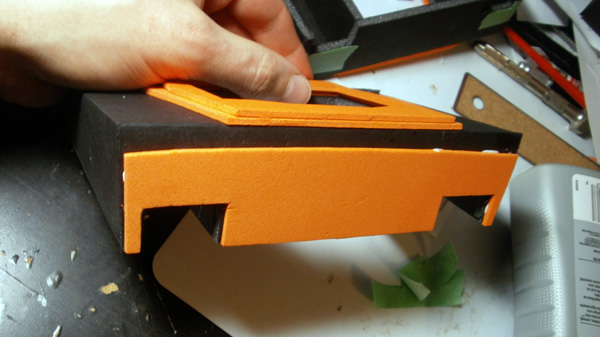
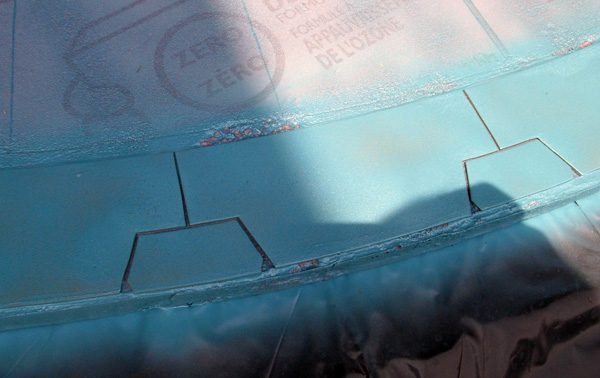
This craft foam paneling is very thin, but it’s just thick enough to make narrow things sit awkwardly on its edge, so I added a corresponding craft foam booster underneath the outer walls. Basically, the orange part lifts the black part up high enough to sit nicely on the edge of the floor panels.
Since the hex paper is translucent, I decided to paint the styrofoam underneath it and let the colour partially show through. I would be doing this with spraypaint, so I first needed to protect the styrofoam with Mod Podge.
Now, I’ve had very inconsistent results from spraypainting styrofoam in the past. Sometimes it eats the foam, and other times it smoothly coats it. I’ve been wrestling with the mechanics of this for ages, considering theories as wide-ranging as…
- It’s the kind of paint (It mostly isn’t– some paints are worse, but none are great for the foam)
- You have to spray from further away because it’s the propellant, not the paint, that eats the foam (Not true. It’s the solvents in the paint, so holding the can further back doesn’t help).
- It’s the kind of styrofoam (This one’s actually true! In retrospect, nearly all of my smooth spraypaint applications were over blue high-density insulation foam instead of pink low-density foam)
- The flat surfaces of the styrofoam have a coating that resists spraypaint. Only faces where I’ve cut into the inside will melt. (Total lies! I don’t know why I ever thought this was true, but I believed it for YEARS)
- You need to protect the foam with Mod Podge or another sealant (True, but not always adequate– even a light layer of podge won’t totally protect the foam)
It’s taken me almost a decade of randomly wrecking terrain to arrive at these conclusions, and even now I occasionally let myself fall for one of my debunked lies because that version of reality would be more convenient for me.
I bring all of this up partially because I can’t remember if I’ve ever comprehensively covered all of the dynamics of spraying foam before in one place, and also because I got lazy on this debacle of a project and decided to ignore things I absolutely knew, because of course I did.

In this case, I allowed myself to believe my own long-since-debunked lie about not needing to protect the flat surfaces of the foam sheet (#4 above), and sprayed directly into the foam.
Pictured: Predictable results. ~_~
The spray eating through the top surface stopped it from covering well, so I did a few coats of blue by hand. The colour was intentionally way too bright, as it would in theory only be slightly peeking through the translucent paper, and in the cracks between panels.
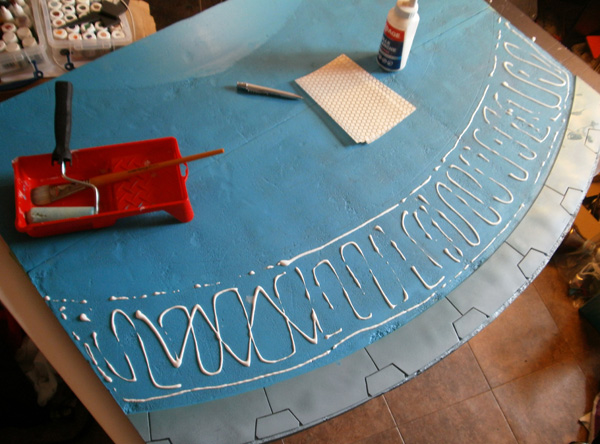
The first row was a “room row” with hex paper tiles. To stick it down, I dribbled glue over the intended area…

…then used a paint roller to smooth it out.
I then quickly laid on the hex paper panels, weighting each one down with spraycans and paint bottles.
Next, I…
*heart stops*
NOOO
NOOOOOOO NONONONONONONO
…
FFFFFUU****************************
…
*sigh*
FINE.
I DON’T NEED SIXTY DOLLARS WORTH OF GORGEOUS FLOOR PANELS ANYWAY.
EYE-STABBING BLUE IS BETTER.
IT’S FINE.
…
…
…
*hours of inconsolable sobbing*
So, apparently the minor curling I experienced with my small test strips becomes “large-scale crumpling and buckling” when applied at a larger scale, completely ruining all of my beautiful panels.
I had no ideas for replacement panels, and any drive to keep investigating the matter had been knocked out of me, so I just decided not to have panels in the rooms. I would at least come back later and re-paint the hideous blue, though.
Sigh. :/

So with that minor tragedy behind me, I set about prepping all of the accessories for painting. This largely consisted of Mod Podging all exposed foamcore edges and all flat styrofoam surfaces so that the spraypaint wouldn’t eat them.
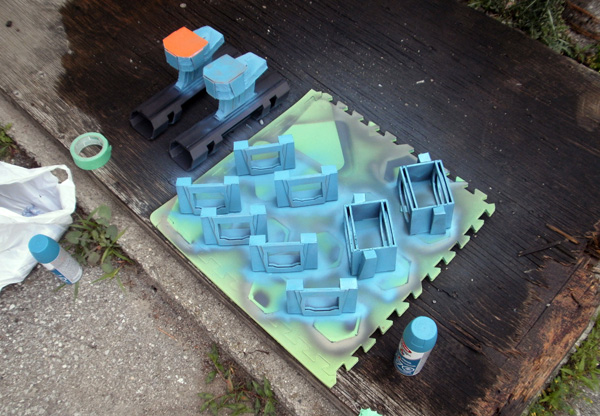
This turned out to be adequate protection for the foamcore edges…
, but even THREE full layers of Mod Podge weren’t enough to completely stop the degradation on the uprights for the cargo tubes.
Spray paint is some serious s**t, yo. 🙁
This picture is too washed out for me to figure out if I had done my shading and highlighting pass on the exterior walls yet. If it wasn’t here, it’s a few pictures down. *shrug*

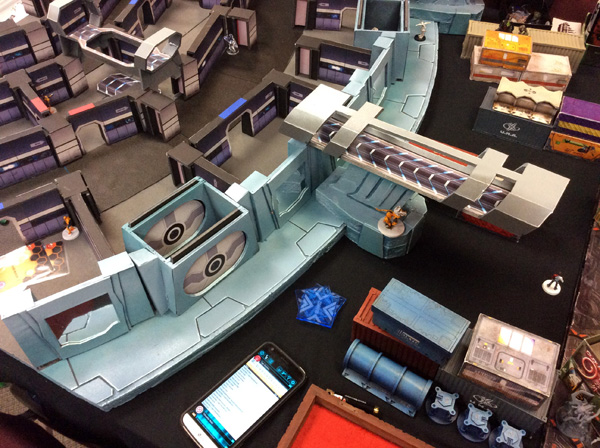
With the exteriors painted, I could not insert the reflective windows. I had designed these to use a simple rectangle of shiny scrapbooking paper, with the fancy shape being entirely a creation of the window frame.
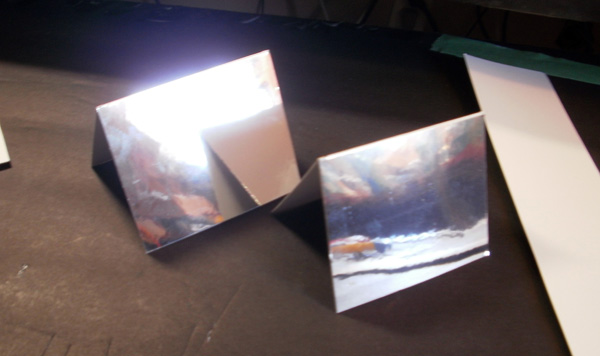
I cut these out and folded them in half…
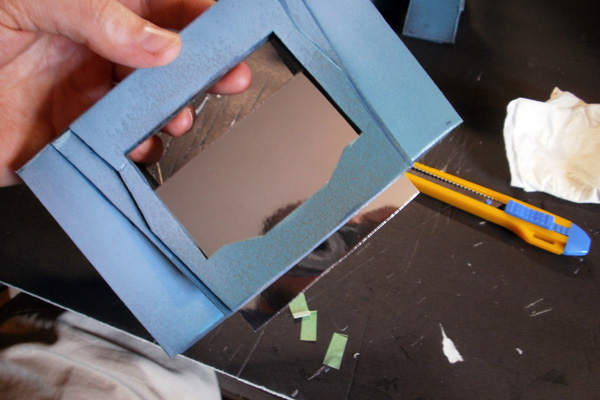
…and then slid them into the frames. Once the reflective sheets were inside, I hot glued the frames shut.
Ta-da!
I love reflective scrapbooking paper. 🙂
At this point things were getting REALLY close to being finished, with only a few final details remaining.
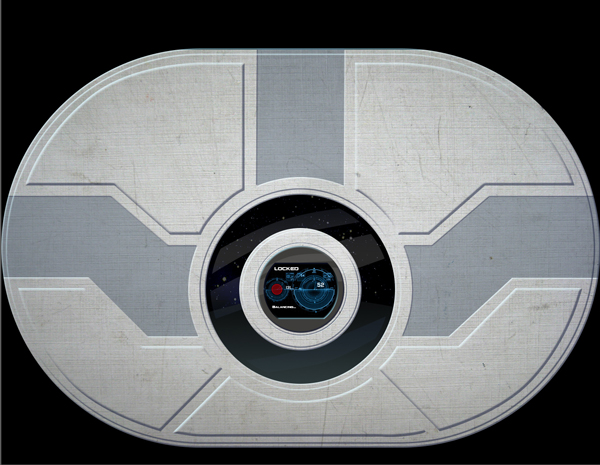
First up: airlocks! Like the interior walls, this design was done in Photoshop. I created both a “locked” and “open” version for each one, with the idea that each airlock would have one door locked and the other unlocked, because that’s how airlocks work.
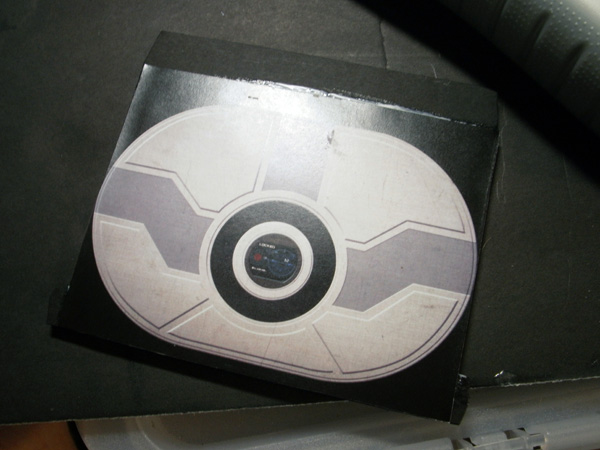
These were printed out and stuck to the slidy doors, which were in turn placed inside the airlock’s door tracks. I didn’t get a photo here, but you can see the end result in a sec.
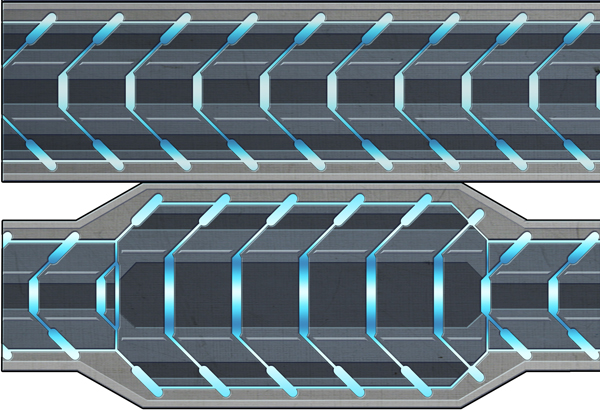
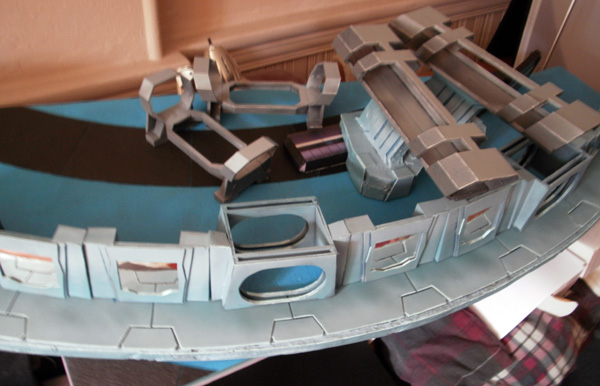
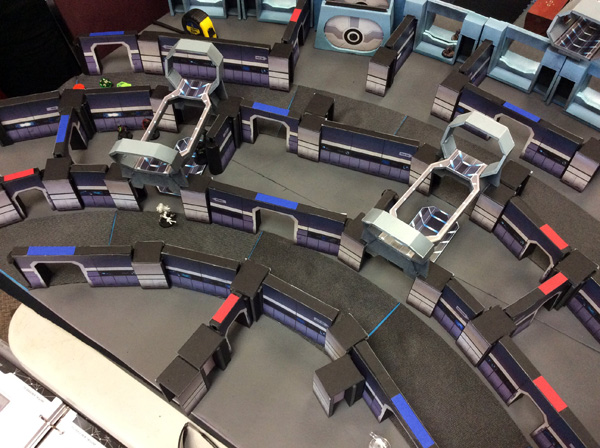
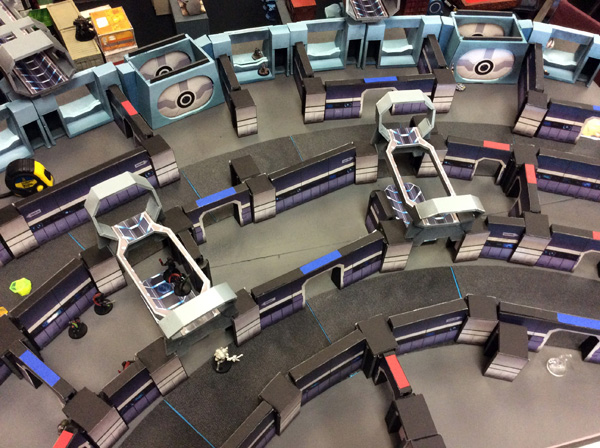
The last bit of papercraft I needed to build was the grav-track for the cargo tubes and elevators. I spent quite a while on this one; the elevator frame, in particular, has almost no repeats of the same panel (except for three of the dark chevrons in the center), with everything else needing manual adjustments to make it fit.
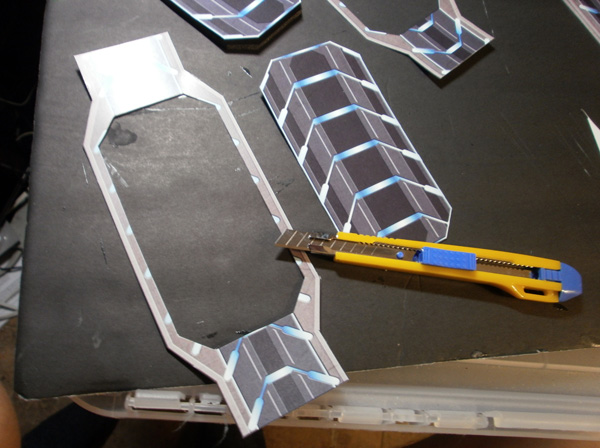
These were cut out and glued to the horizontal surfaces of the cargo mover accessories.
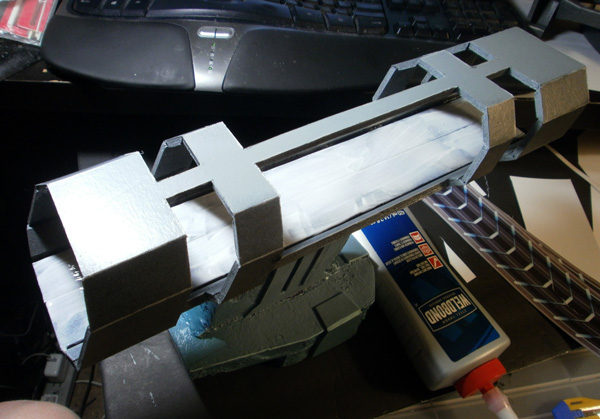
Here’s the cargo tube before the track was added…
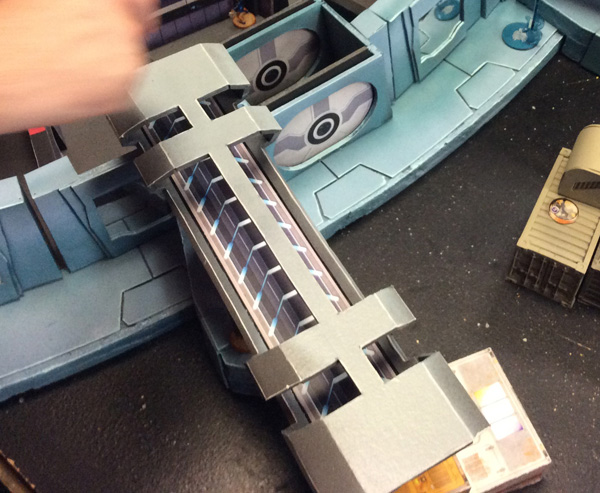
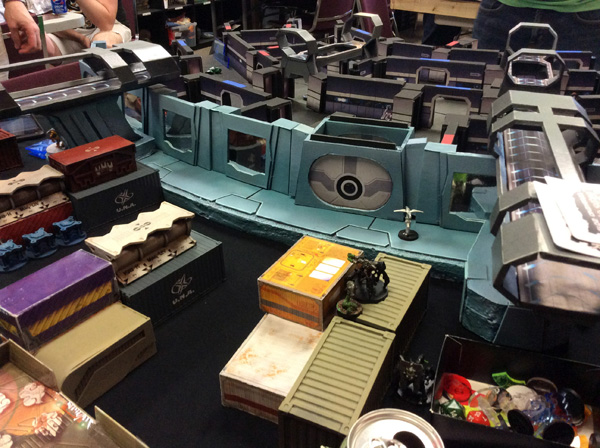
…and then after. I don’t love very much about this terrain set, but I LOOOOOOOOVE these cargo tubes. <3

To complete the set, I dug out a bunch of MDF and resin crates I’ve collected over the years and finally painted them all, so that the cargo yard in the space section could have some attractive boxes scattered around.
And that, my poor suffering readers, is the end of this particular road. This project was deeply flawed from the start and suffered numerous setbacks along the way, but somehow, the end result still manages to look pretty bloody badass:
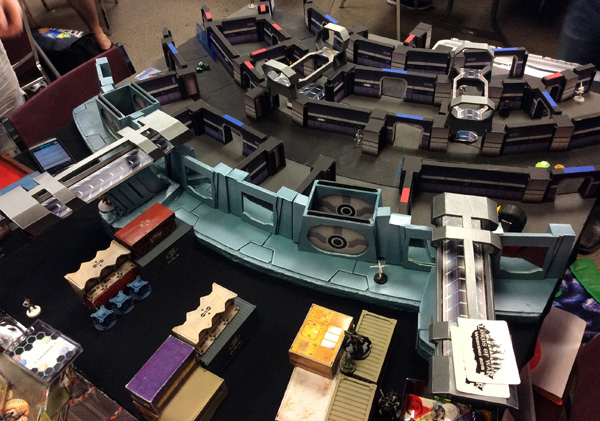
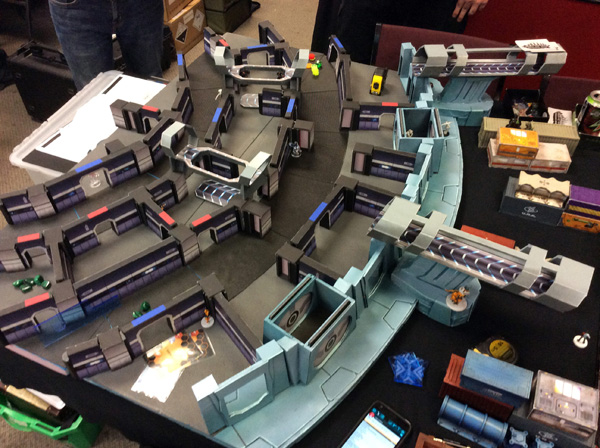


However, badass or not, this will forever remain a shameful project for me overall, because it could easily have been SO MUCH BETTER with just a bit more time spent on planning. Everyone I show pictures to says, “ooh, fancy curvy space station!”. But when I look at it, all I see is a lack of consistency, unintuitive functional designs (seriously, NO ONE figures the cargo tubes out), and endless missed opportunities.
I want to say that I’ll learn from the experience and plan every project to perfection for the rest of my days, but I try not to tell such easily falsifiable lies. This will not be the last project ruined by my laziness, nor the last time I complain about it in the project writeup.
…
I don’t even have a clever sign-off after that, I’m just really sad now.
-Spud
P.S: All of the papercraft templates from this project, as well as your VERY OWN PRINTABLE SPUDWAVE, can be found in this handy-dandy zip file. Because someone might as well carve something useful off of this project’s bloated carcass. ~_~
Really a great project!
I’m already looking forward to your next table project 🙂
Don’t be sad, great result!