
Alrighty… let’s build some walls!
The walls were built out of foamcore. I made them 3″ tall, with a 1″ base and a 1/2″ top. The wider base, combined with weights I planned to add inside, would keep the walls from falling over or sliding around too much.
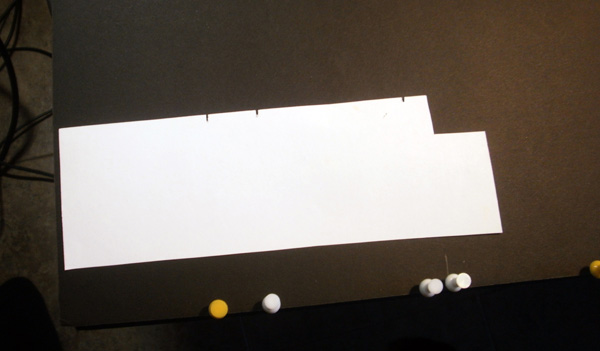
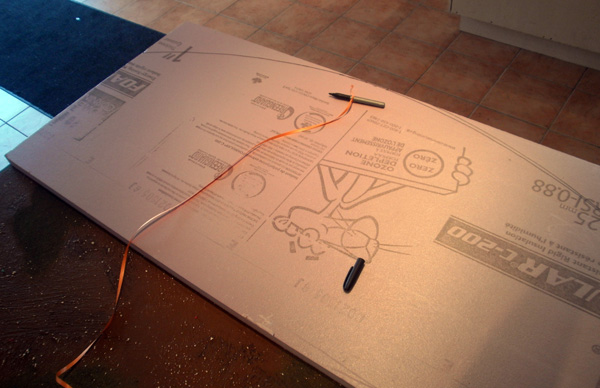
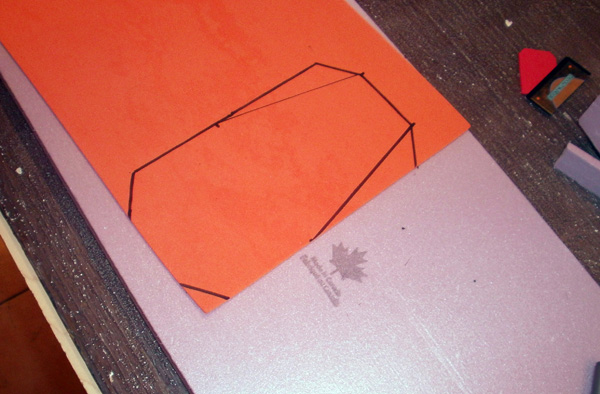
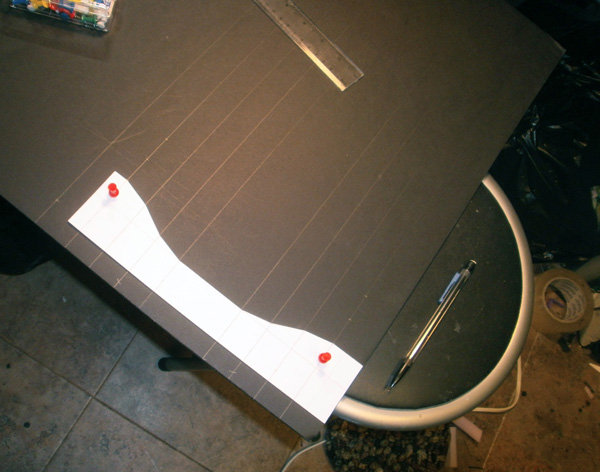
To get consistent measurements, I made myself a paper template with the cutting and folding points notched into it, then use the template to mark up an entire foamcore sheet.
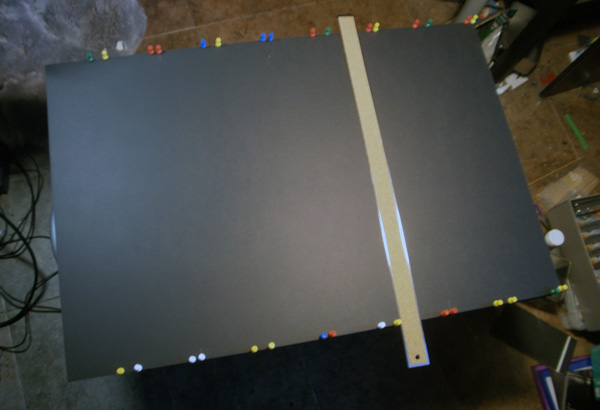
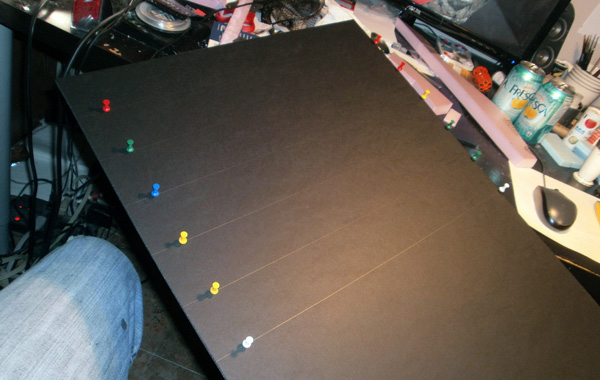
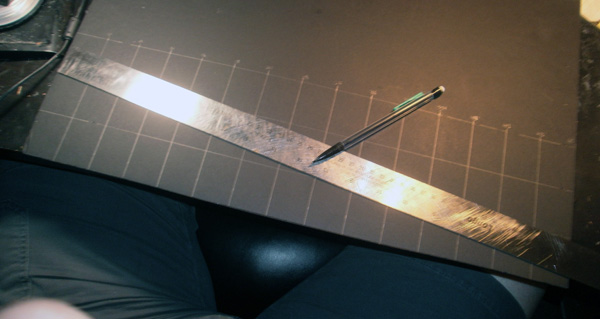
To get clean lines all the way across the 20″ foamcore sheet, I placed pushpins on the cutting points, which then held the ruler still while I drew my pencil lines.
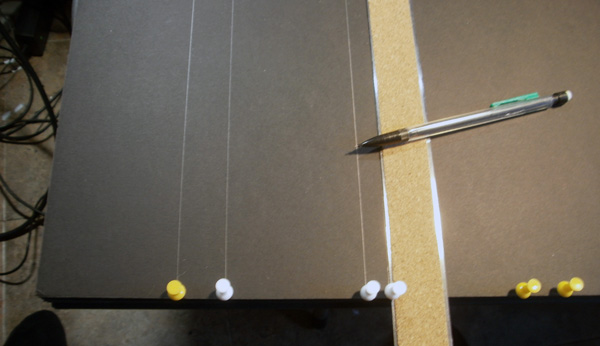
As usual, I was using black foamcore due to its generally more reliable quality, and a mechanical pencil for my marking since it’s reflective enough to see clearly against the black paper.
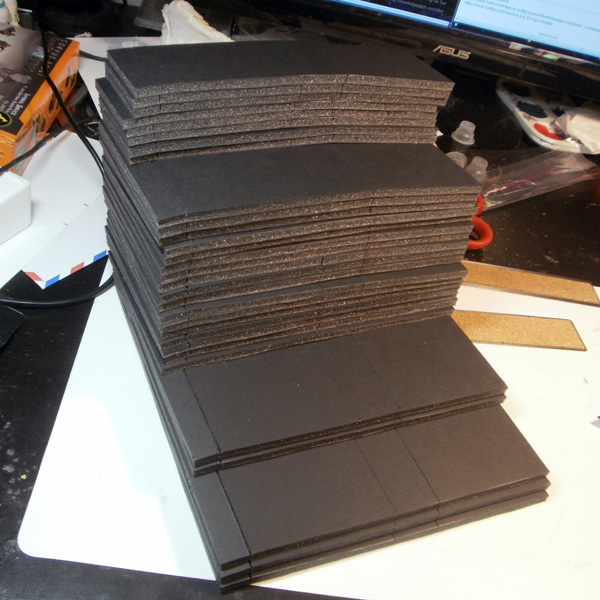
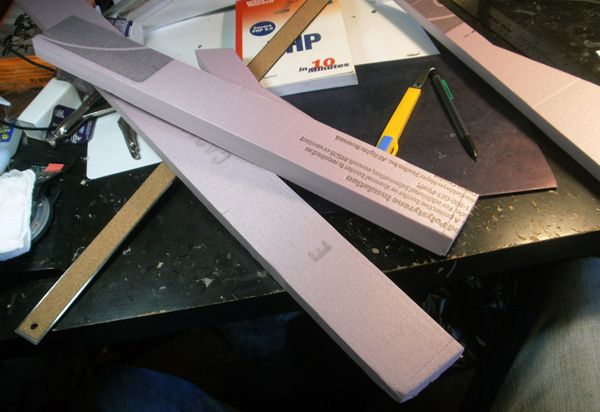
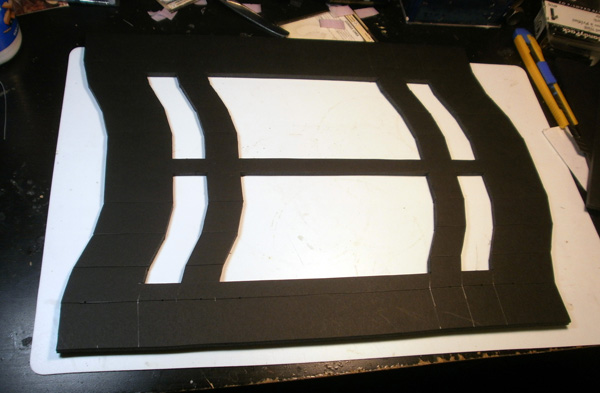
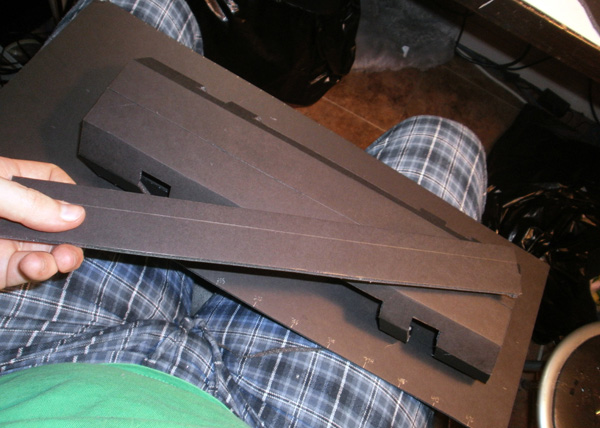
I cut two entire sheets into strips and scored the creases, then cut the long strips into the lengths that I figured I would need– small numbers of 8″ and 6″ walls, and lots of 4″ and 2″ walls. It would later turn out that 6″ walls were a bit more useful than 4″ walls, but I had no way to know that at the time, so I forgive Past Spud. 🙂
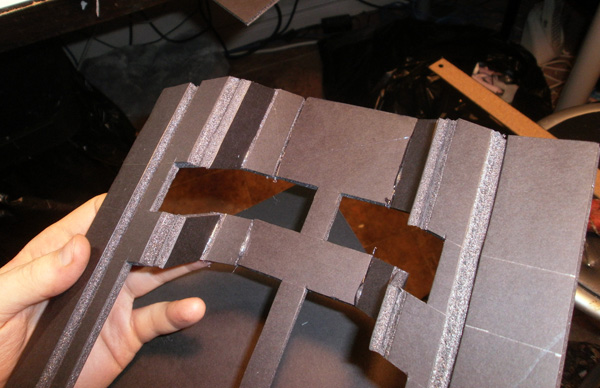
Cores were cut out alongside the crease lines to allow the wall segments to be folded inward. See my old foamcore cutting video for details on how this works.
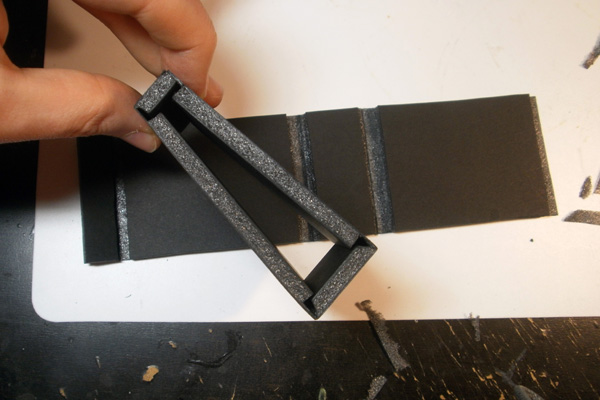
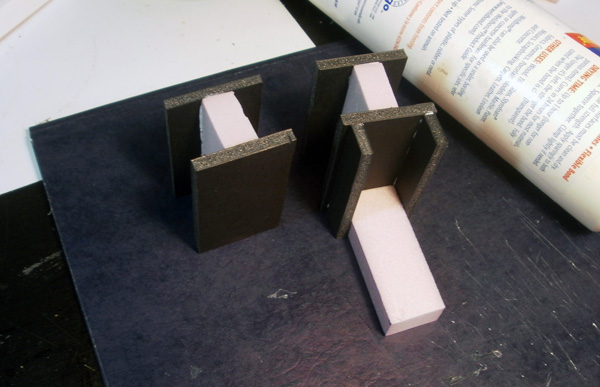
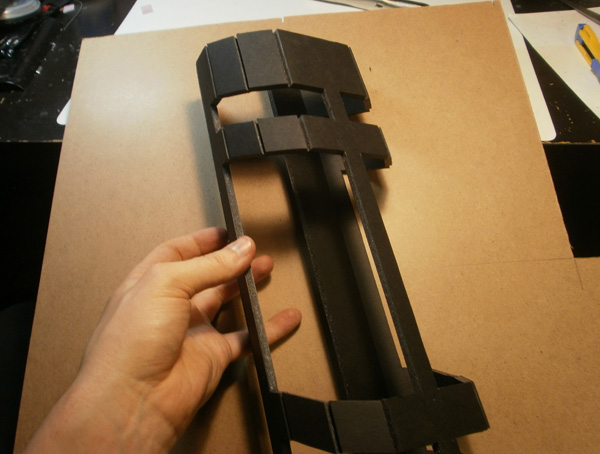
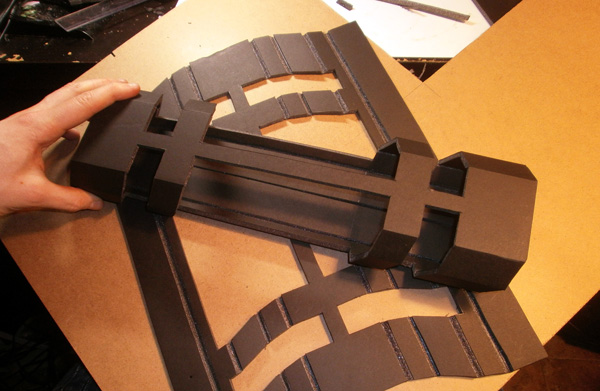
Once all of the walls were cut, cored, folded in, and glued into their trapezoidal shapes, I dig out some pink styrofoam to create the linkages that would connect multiple wall segments together.
The basic idea was to have every wall segment end in a round-ish “plug”, and then create a bunch of H-shaped coupling pieces that the plugs would socket into.To create the plugs, I created an assembly line process of:
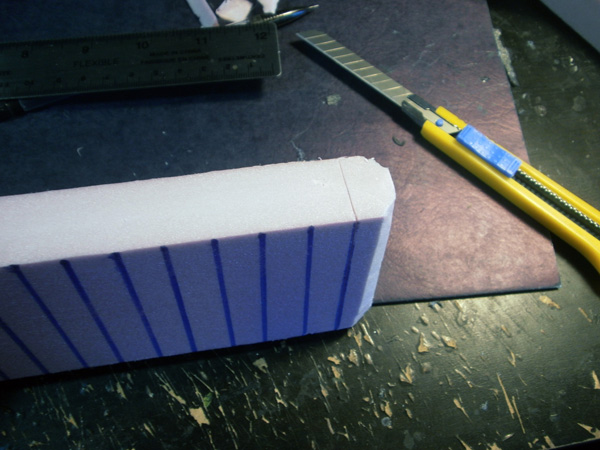
- Cut out 2.5″ strip of styrofoam
- Mark it into 1/2″ segments
- Round the end
- Cut along a segment line
- Repeat 3-4
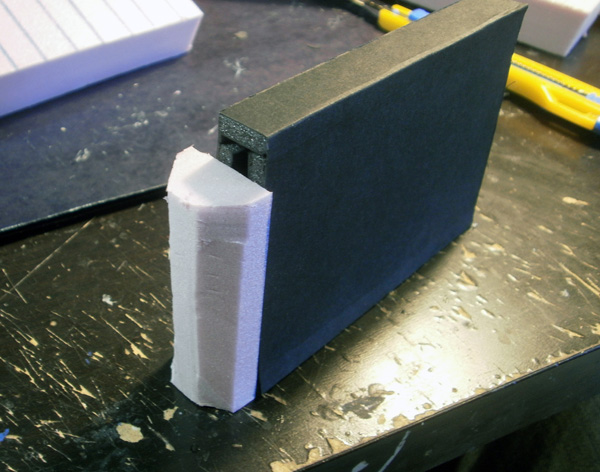
Eventually these plugs would be glued onto the ends of each wall segment, but first…

…I needed my big ol’ bag o’ rocks.
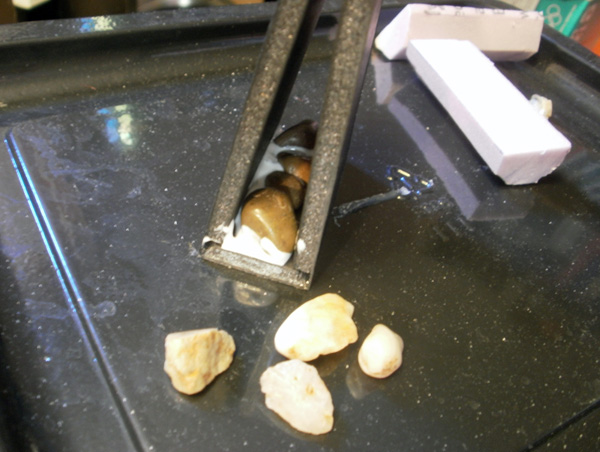
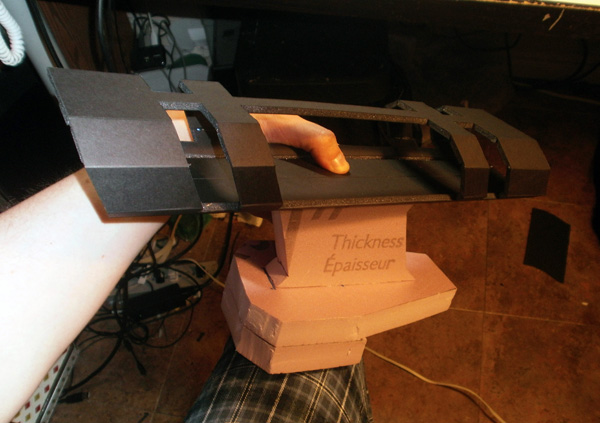
I squeezed some white glue into the bottom of each wall segment and filled it with small rocks, which would keep it upright as previously discussed.
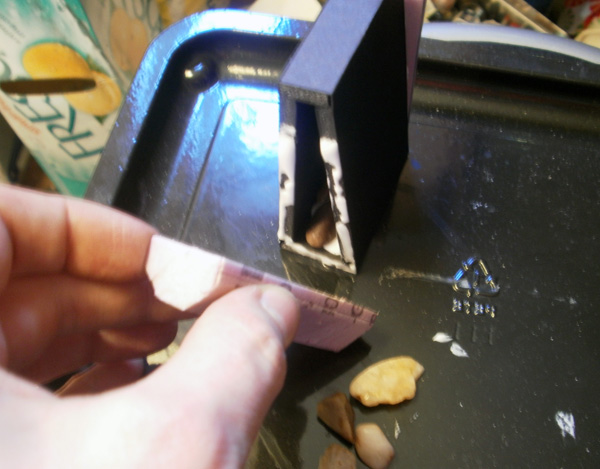
Once the precious cargo was loaded, the end plugs were glued into place.
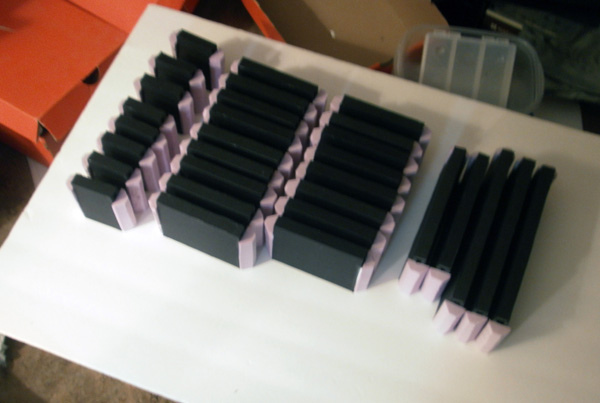
Rinse, repeat.
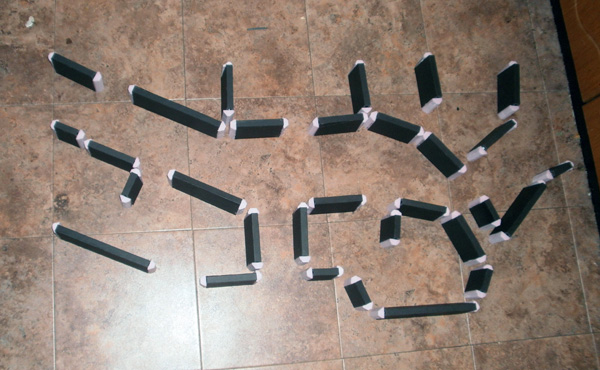
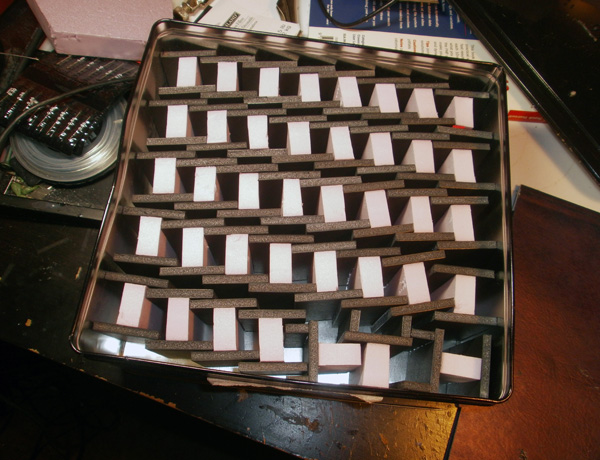
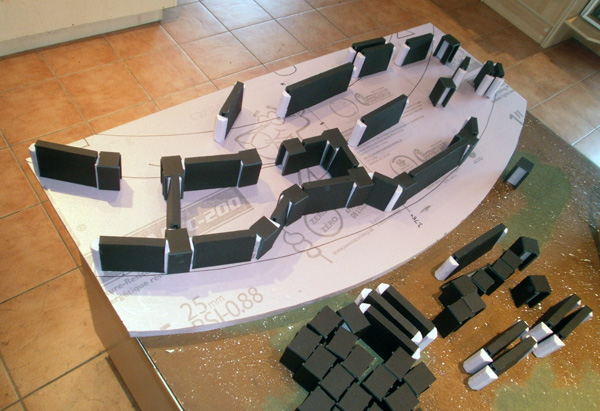
Once the walls were done, I needed to figure out how many connectors would be required to join everything together. To determine this, I laid the walls out on my kitchen floor in a plausible pattern…
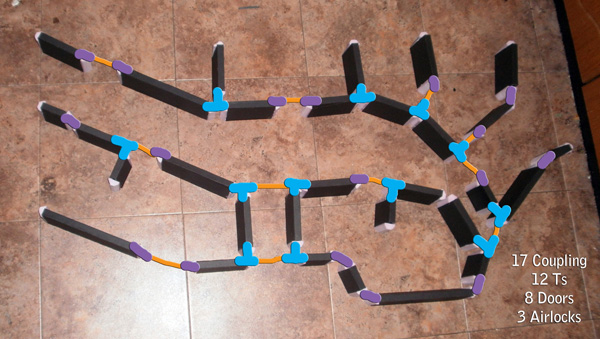
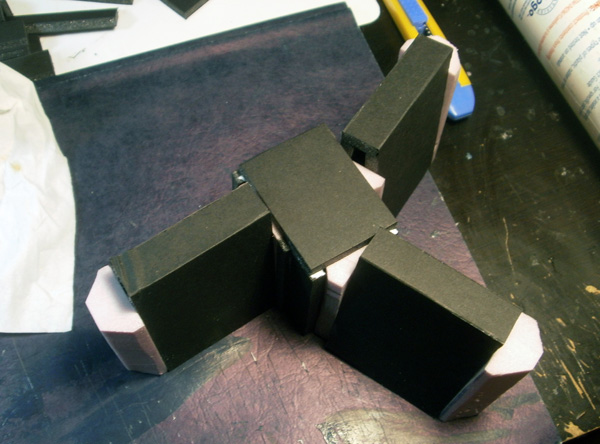
…and then marked where they joined together in straight couplings and three-way Ts. Different configurations of the board would require different numbers of connectors, but this exercise at least gave me a number to start with.
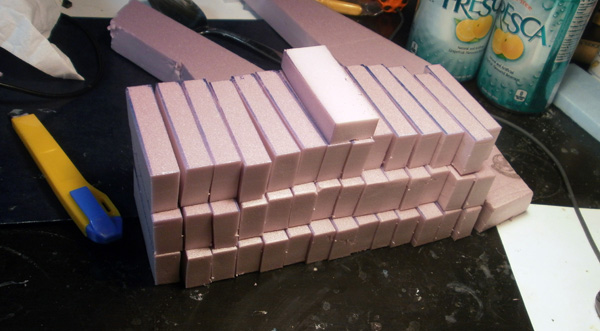
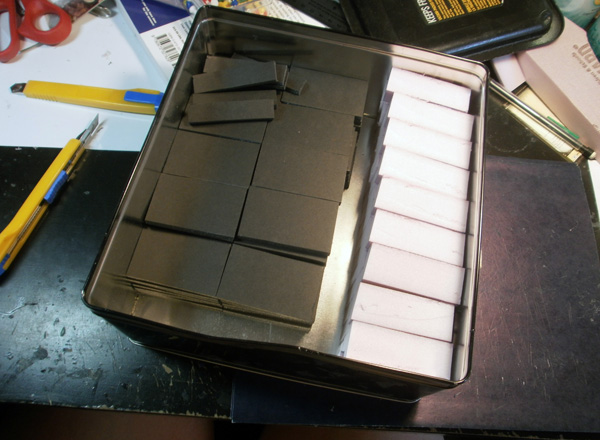
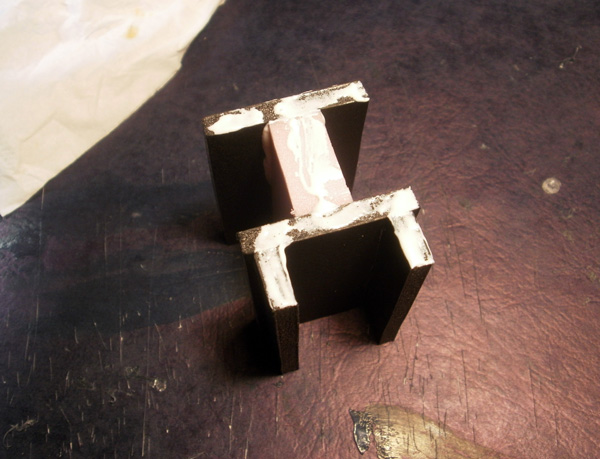
The joints would be formed around a styrofoam spacer, so I cut a pile of them out.
I then sliced a foamcore sheet up into 2.5″ high strips…
…which were in turn subdivided into two lengths of smaller strips.
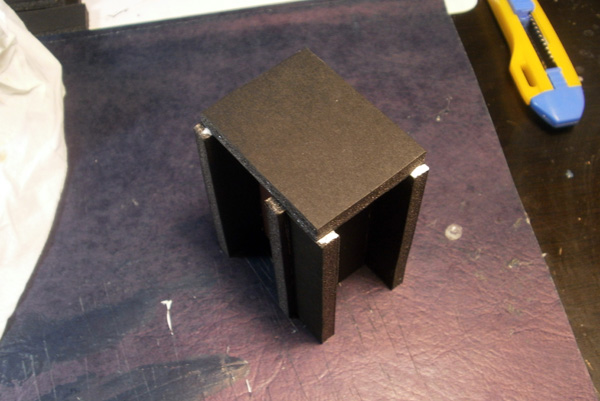
The plugs and the joint spacers were all 1/2″ deep and 1″ across, so the straight couplings were built from 1.5″ strips (leaving a slot perfectly sized for the round wall plugs), and the 3-way Ts had a pair of 0.5″ strips attached to one face.
Rinse, repeat. ~_~
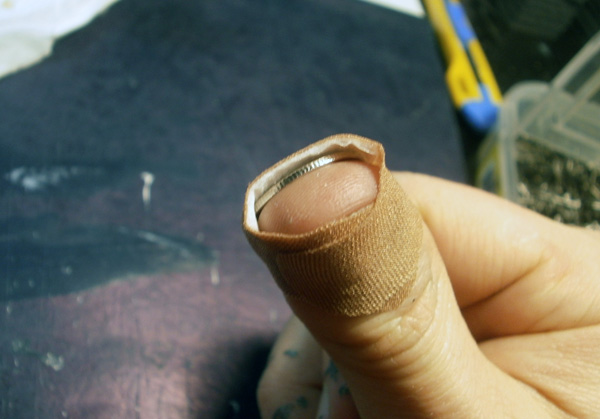
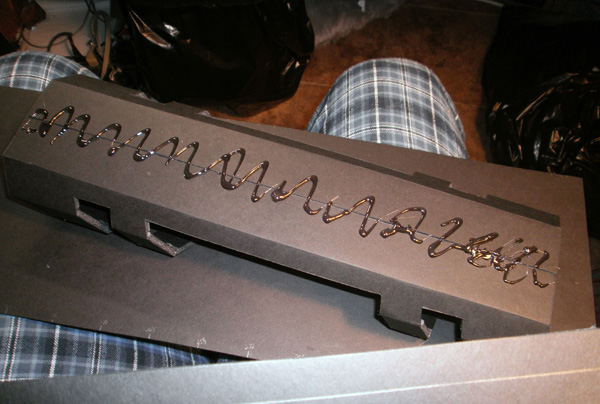
I don’t trust glue for permanent attachments, so I like to reinforce my foamcore construction with screws and nails wherever possible. I bought some 3/4″ finishing nails, and cobbled together a “nail pusher” by attaching a dime to my thumb with a band-aid.
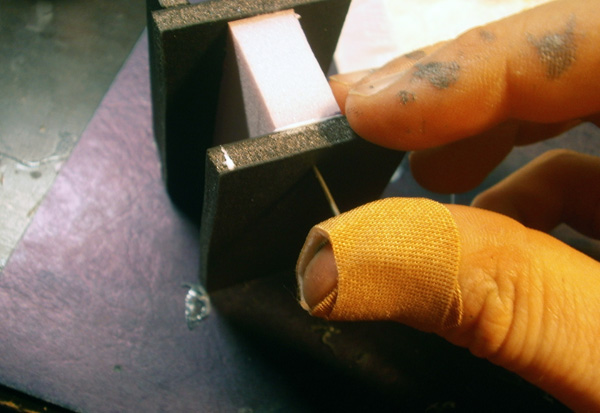
I think I did two nails on each face.
Finally, everything needed caps on top, so I cut out a whole bunch of small foamcore rectangles…
…smeared glue over the top of each piece…
…and capped them all off.
BAM! 🙂
Alrighty, one more major component before I could assemble everything: the base. I wanted to have a styrofoam platform to arrange everything on, which would feature curved floor patterns to suggest wall placement.
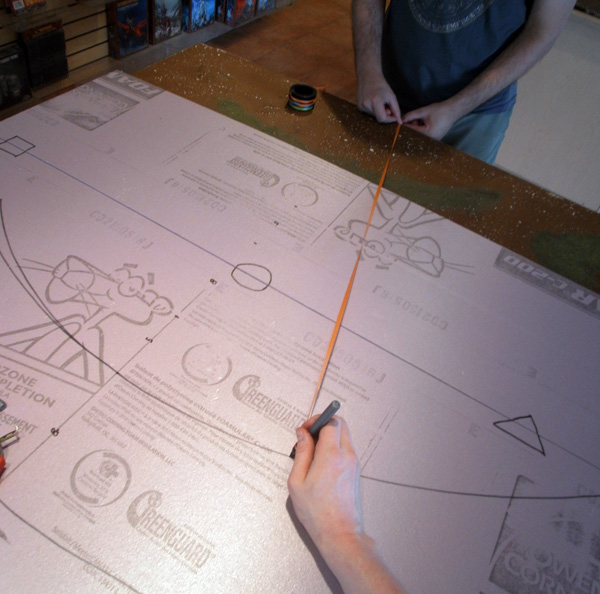
To create the shape, the ever-present Tom held down the end of a ribbon tied to a marker, and I drew concentric arcs onto the styrofoam sheets. The platform was broken into two pieces so that we could choose to have a “mostly station” board or a “mostly space” board, with a 1-foot extension piece being added or removed to accommodate.
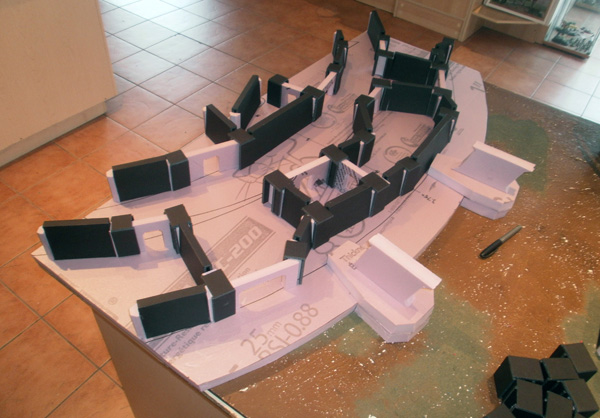
This finally let me assemble the walls into an approximation of their final positions. I didn’t have enough walls to fill both platform panels, but could do a reasonable arrangement on just the half-board. Filling out the second panel would need to wait until I completed the exterior walls, which I didn’t expect to have time for during the original league.
I figured I could get through the league with just the walls I had, but I needed one extra component for the mission I was planning: the cargo elevators. I tossed these together in the last day before the league started, mostly out of scrap foam.
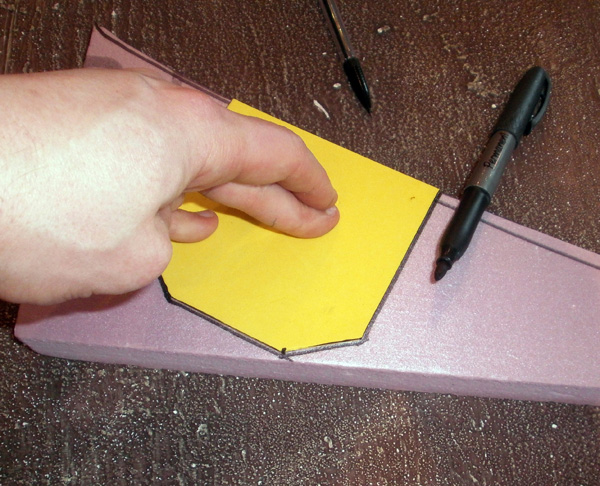
This orange-templated panel sits on top of the yellow-templated panel in the previous photo to create a base that hugs the edge of the station platform.
And then a slanted riser lifts the elevator tube above the walls.
As with everything else, I secure the various components together with metal for to improve durability– in this case, by pinning the pieces together with 4″ wood screws.
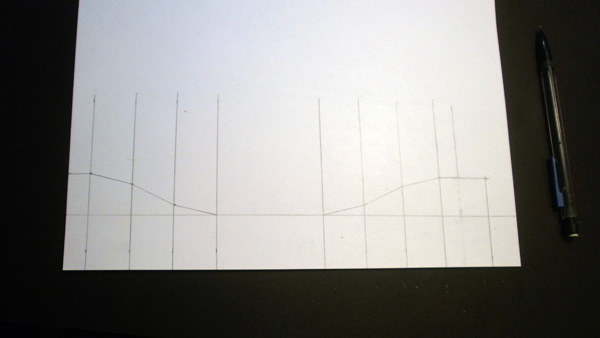
For the next bit, I present to you a small oddity that is probably my proudest achievement within this project: a polygon I would like to name the SpudWave.
A printable version of the SpudWave can be downloaded at the end of the article, so that you too can make your own amazing slanted octagons if that’s somehow a need that you have.
Once I had my Spud Wave template, it was quite easy to create my cargo tubes by tracing the same curve at several points along a foamcore sheet.

Here you can see the wave creating the multiple parallel “hoops”, and the connective bars that I left in place to keep the hoops linked up and correctly spaced.
The cut-out sections were then removed with a knife.
A quick backward test fold helped me confirm that everything was measuring up correctly; to do the proper final fold, I needed to cut grooves out of the foamcore next to each of the folds.
You can see the grooves cut out of the bottom piece, and the final tube as it appeared once folded into shape.
To assemble it, I very quickly put hot glue into all the creases and then curled the assembly in on itself as fast as I could before the glue cooled.
To clasp the two sides together, I cut out a foamcore strip…
…and glued it to the bottom.

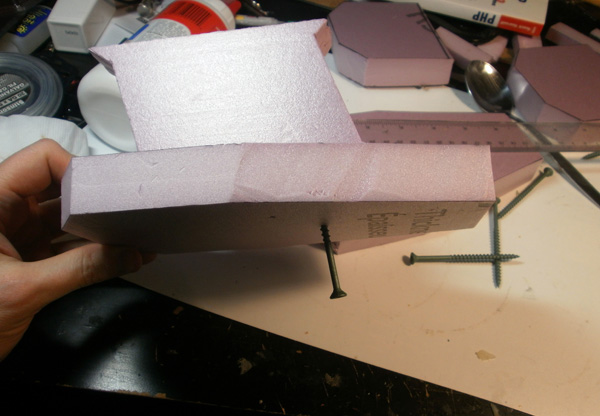
This bottom strip would be glued to the styrofoam risers you saw about ten pictures back, but I don’t trust a glue-to-styrofoam bond, so I glued and screwed a second thin strip down into the top of the riser to give a better contact point.
I then glued it all together, and it was a thing of beauty. <3 However, I’ve been digging through my photo archive, and I don’t seem to have a picture of it attached to the board at this time, so you’ll just have to mentally picture it jutting out from the semi-circle. Lame, I know. 🙁
At this stage of the work, the terrain set was still looking extremely rough in its black-and-pink nakedness, but was technically functional. And since the league had started by this point, I didn’t have any more time to allocate to working on it, so we just played out the relevant games on a black-and-pink space ship, which was fine.
I had initially intended to come back and finish the board, but a number of roadblocks gradually sprung up:
- The set works well in a game, and looks reasonably good, but it is INCREDIBLY time-consuming to set up, given that every single wall is a separate piece and needs to be strung together with connector pieces. An average Infinity board takes me about 15 minutes to set up, but an average space station board takes 45. All of the remaining work would have been focused on making the set look better, with no plans to make it work any differently, so even if I took the time to finish it up, this fundamental problem would never be solved.
- I started to understand how problematic my lack of pre-planning was becoming. I had a list of components– some already built, some only in my head for the moment– that seemed neat on their own, but I was starting to realize how poorly some of them fit together (i.e., the badass cargo tubes were too tall and had no way to link up with the inner sections). I saw two paths forward– continue making a clumsy terrain set, or stop and do a ton of planning for how to adapt what I’d already built– and neither sounded like something I wanted to do.
- I have ADD and the world is so very full of sparkling objects.
I never made an intentional decision to give up on the project, but at the same time, I felt no real drive to put more time into it. And so, the space station pieces were put in a bin, where they remained for two years…
Really a great project!
I’m already looking forward to your next table project 🙂
Don’t be sad, great result!