
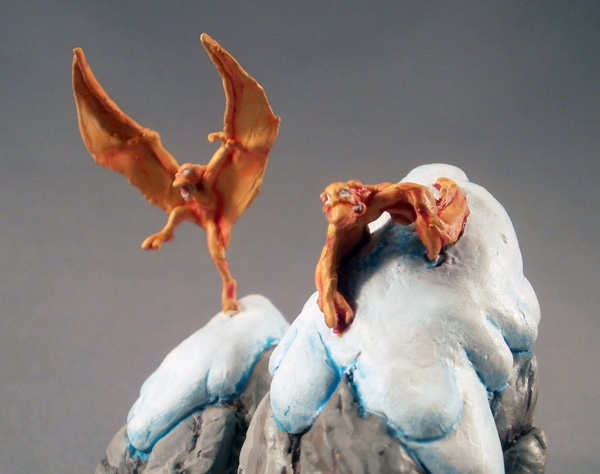
My Legion army runs a ton of beasts, so I needed two Forsaken to keep all that fury under control.
However, I have the same problem with the Forsaken model as I have with the Succubus– my Legion army’s elf ladies are refined and delicate, while the stock Forsaken model is a snarling hell-beast covered in spines and with wings for arms. This may be okay for your average Legion force, but for Vayl’s school of dragon handling, it simply will not do.
Unlike the Succubus, however, I did not solve the Forsaken Problem with months of sculpting and casting. Rather, I spent four days demonstrating the infallibility of my personal motto:
There does not exist a problem that cannot be solved with the application of more Gobbers.

The first step to sculpting Gobber Forsaken was to wire up a skeleton. I grabbed my standard 30mm skeleton reference and sketched a Gobber skeleton beside it to scale, aiming to have it come up to a human model’s waist.

I then grabbed the thinnest wire I have– 26 gauge, from the jewellery section of a local craft store– and, using the skeleton sketch, bent the wire into the correct shape. Note that this wire is very brittle, so you can’t bend, adjust, bend, adjust, bend, adjust like you could with a thicker wire on a larger skeleton; you have to be pretty precise and make every bend correctly on the first try, as any adjustment simply snaps the wire. As a result, you sometimes need to settle for slightly inferior proportions– the hips came out a bit narrow on the one on the right, for example.
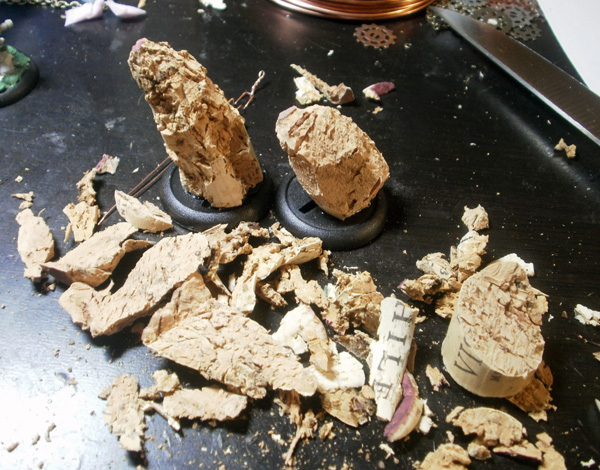
These models would be extremely small, so in order for them to be visible among my army of giant half-dragons, I sculpted them around very large scenic bases. Each of these is a wine cork which has been snipped apart with hobby clippers.
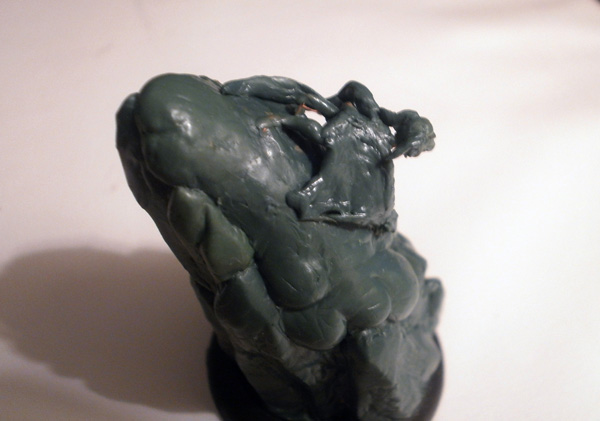
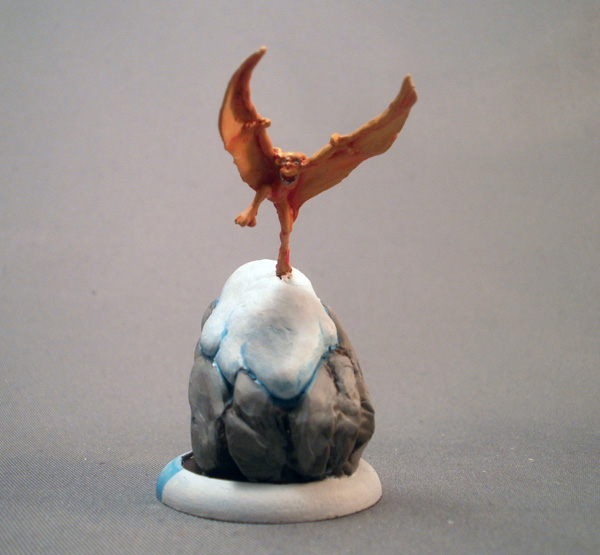
Each skeleton was then attached to its base. This one, which I’ll call the Crawler, is scrambling down a rock face like a bat. I mounted his feet into the cork, then bent his torso upward so that he would be looking upward.

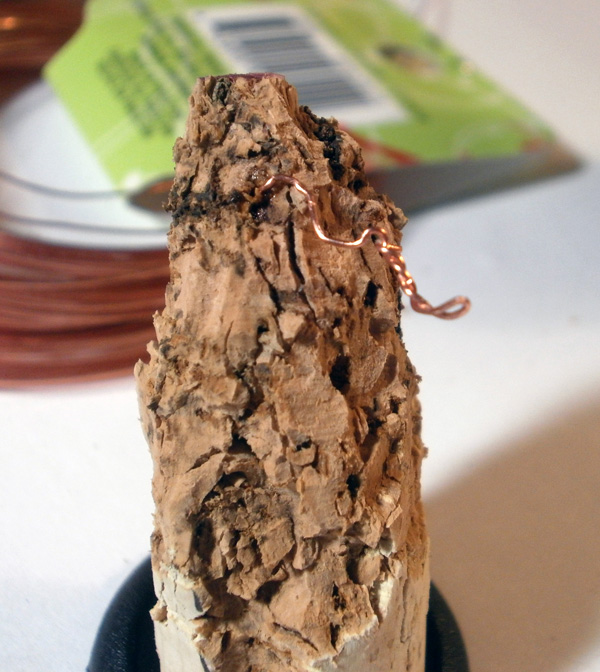
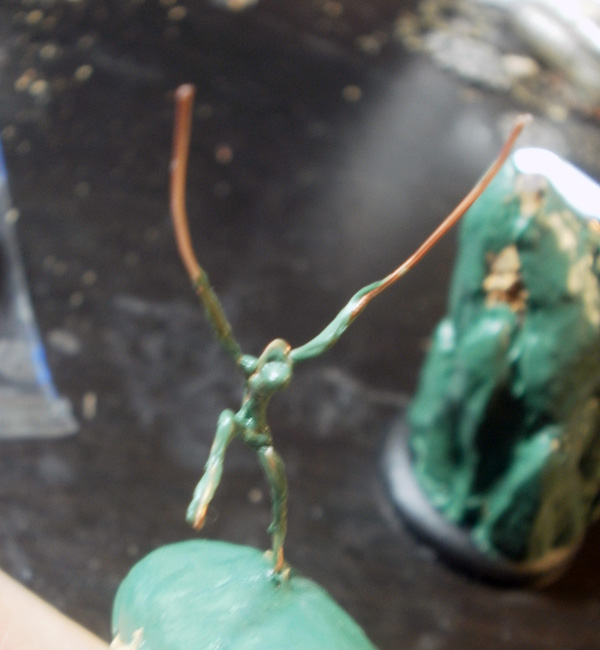
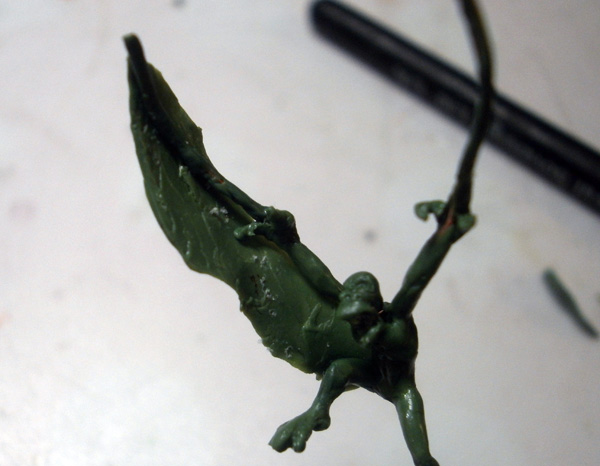
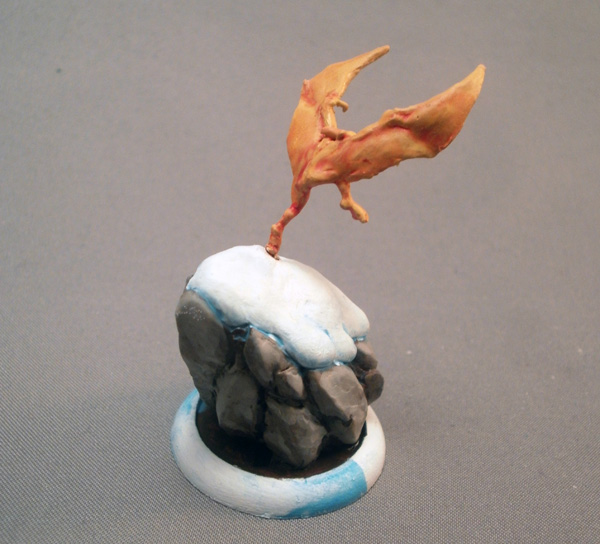
The second gobber, and definitely the more challenging one– which we’ll call the Flapper– would be leaping off his rock to take flight. To keep him solidly moored, I ran his wire all the way through the cork and wedged it into a crevice I had cut (which you can see in that photo), then super glued it the whole way through. There’s still a danger that the wire could snap off at the attachment point, but at least it won’t twist while I work…
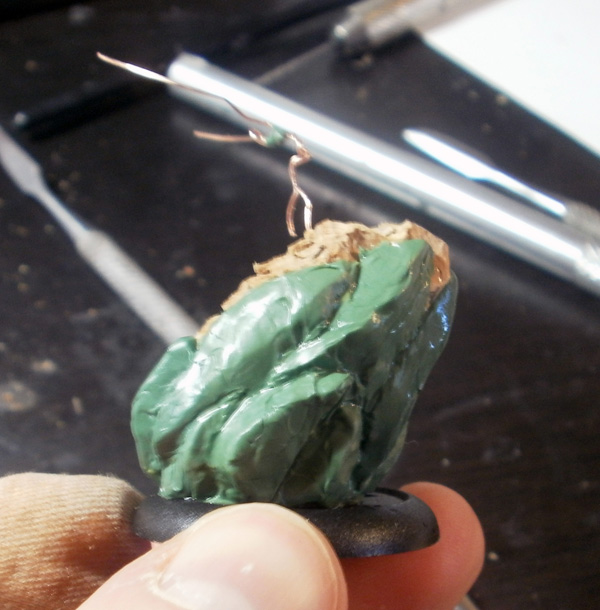
I was working on these models in a rush, so I did the basing and the models at the same time. Here I’ve constructed the rough stones for the base, and also attached the wing armature– I wound a wire around the torso, then puttied it in place so it wouldn’t move. This was allowed to set for several days to ensure solidity.

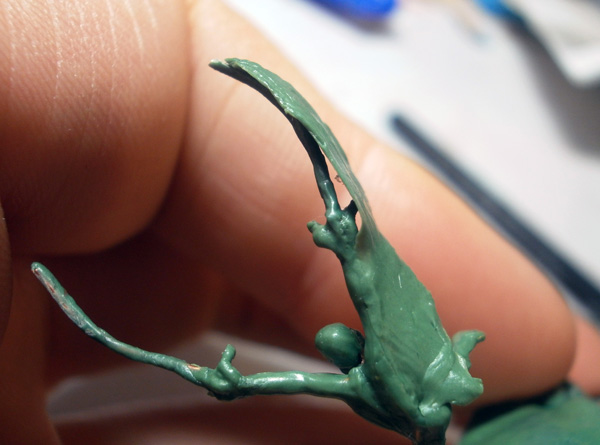
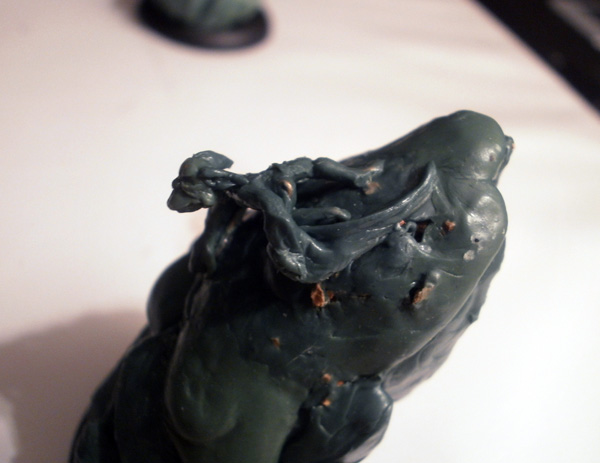
The Crawler’s wings were much easier, as I had a second mooring point to keep everything steady; wings are just webbed hands with long fingers, and I decided to leave my gobbers a few functioning fingers to use for gripping.
Once the arms were attached, I applied structural putty. This has two purposes– first, it immobilizes the wires and give them some added strength, and secondly, it gives me a more stable understructure to apply the higher layers of putty to. Putty sitting right on a wire tends to move around when you sculpt it (twisting, or being pushed straight off the other side of the putty), so by adding some very minor putty all over the wire, you give yourself a more “grippy” surface to work on. You have to be careful not to add too much at this stage, though– too much under-padding and the model will come out looking fat, which is intolerable for my emaciated Gobber Bats.
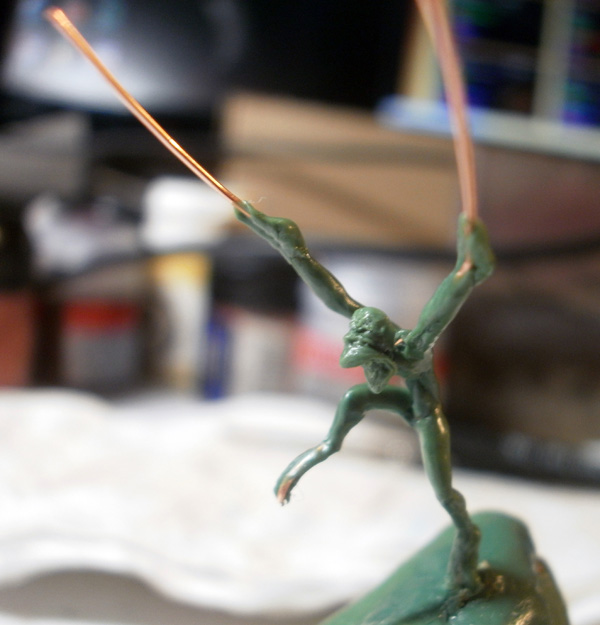
Once the structure had set, I started adding surface putty. On a larger model it would take me a few layers to get this far, but my gobbers are 1) naked, so the muscles I apply are the final detail; and 2) tiny, so there just isn’t room to apply their meat in several stages.
Here are the fingers I mentioned earlier. I started by putty on tiny almond-shaped putty wads in the center of each wing, then used a knife to shear it into separate fingers. The resulting digits were unbelievably wobbly and unstable (since they had no wire to support them), and very difficult to shape the way I wanted them, but I did my best. 🙁
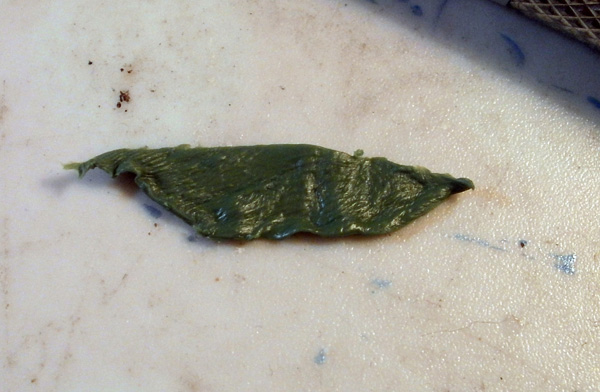
If I had had more time for these minis, I would’ve add more structure to the wings before webbing them up, but I was scrambling to complete these in the week before Templecon 2013, so I jumped ahead a few steps and tried to add the wings right away. Here I’ve put a tiny blob of putty on my desk and just squished it into a passable shape with my fingers (hence the prints). Note that the photo doesn’t really speak to the scale– this webbing is so thin that the putty is now translucent. I’ll be putting a smoother layer of putty on top of it once it dries, so I don’t worry too much about the surface texture right now.
I carefully lift the webbing off my work mat with a knife and transfer it to the model. I use clayshapers to press it into the armature.
I blend it into the skin as much as I can. Again, I’m planning to refine this later, so my current inability to control its exact shape and texture isn’t a huge deal.
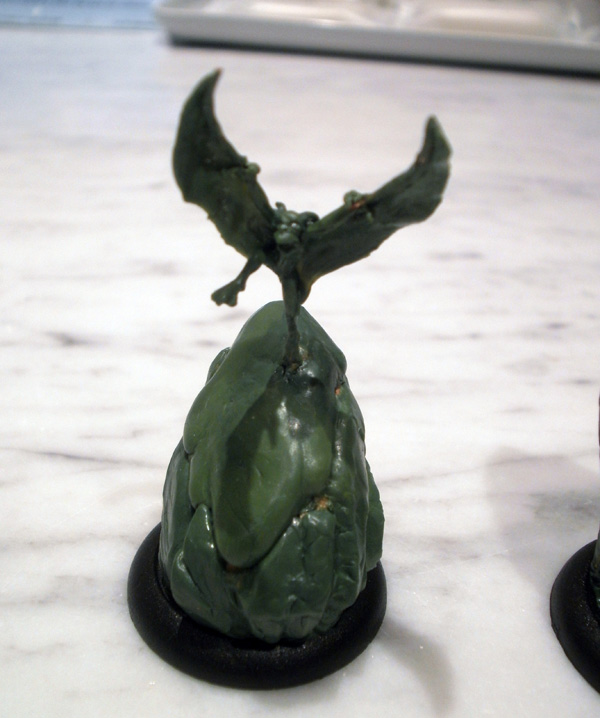
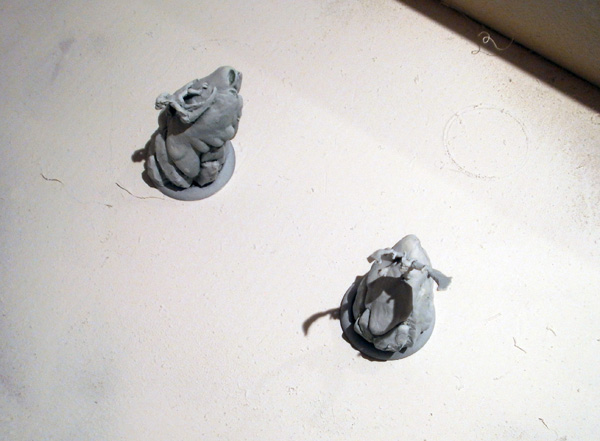
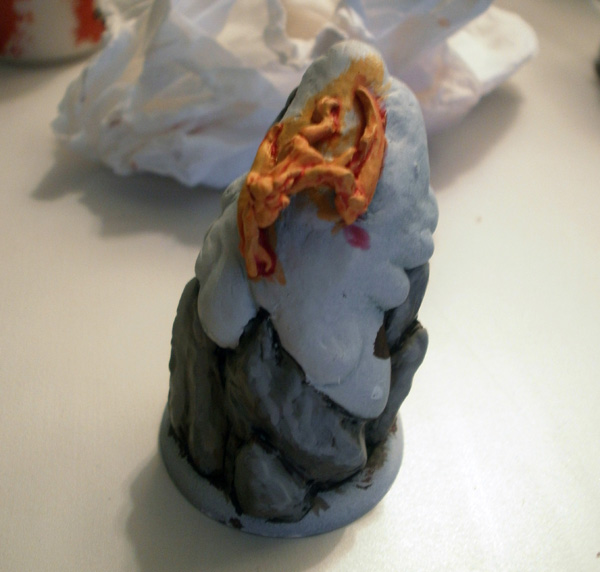
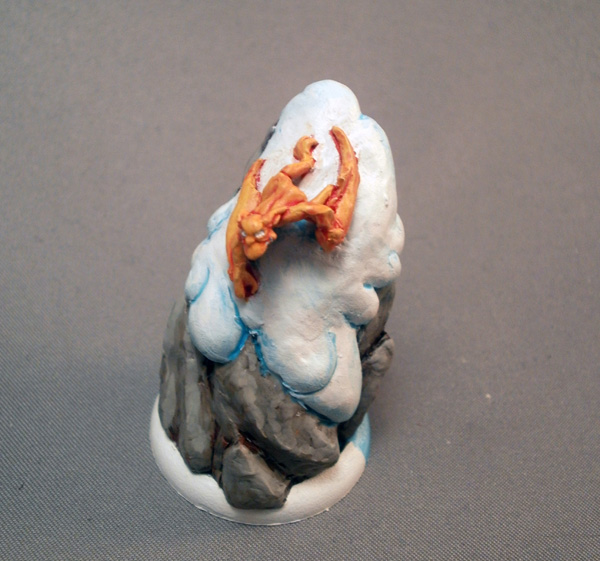
Here he is with both attached. Also, apparently I had finished his base’s snow by this point.
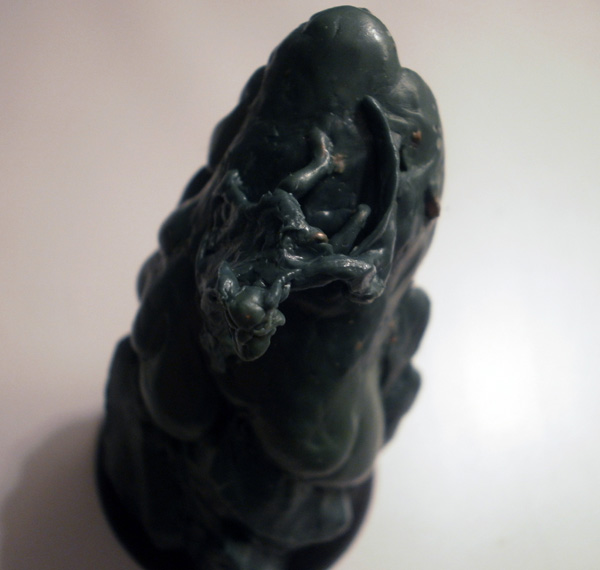
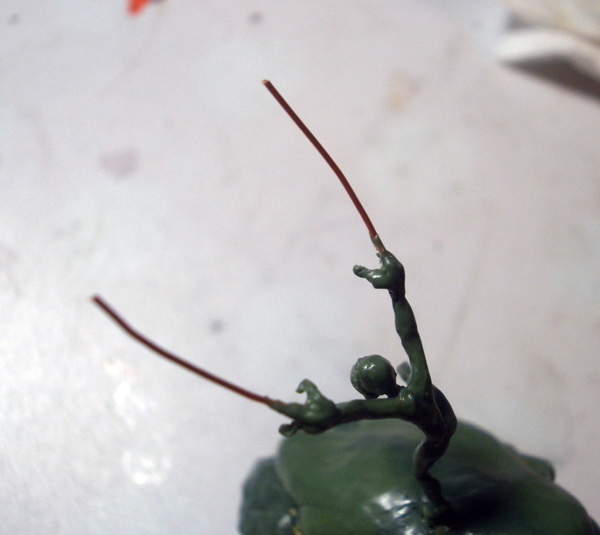
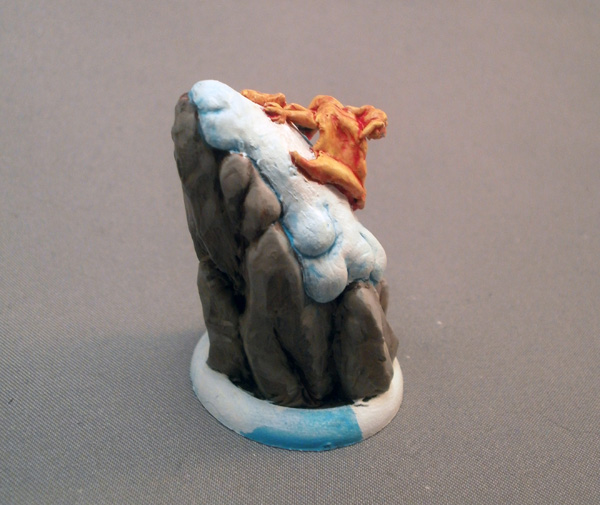
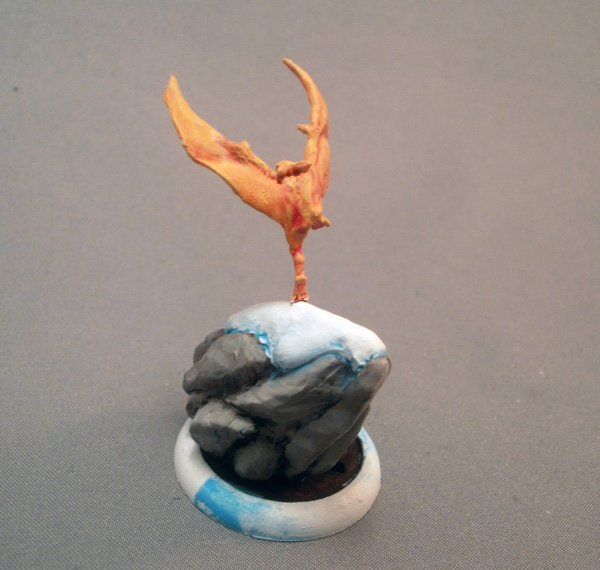
The Crawler was done similarly, except that his wings are folded up, so they were much easier to attach and shape.
I’m not terribly happy with his wings, though– I didn’t put all the bends and folds into the skin that I wanted to, so they come out a bit too smooth. I corrected it a bit at the next layer, but they still look a bit odd. 🙁
Here’s a good example of the bad folding– the “bubble” above his hand shouldn’t be there, and should instead be an inward fold running from the hand to the wingtip.
I finished the sculpting for these guys at Templecon– I did some sculpting at the steakhouse the night we got there, and then some more after we got back to the hotel. Paint was applied the morning of the first day; I set my alarm for 5:00, at which point I got up and, after checking for anyone watching, sprayed the models inside a shoebox out in the hallway. I don’t want that stinky smell in my hotel room, dammit. 😛

Paint was applied the usual way:
 |
||
| Base | Wet Blend | Wet Blend |
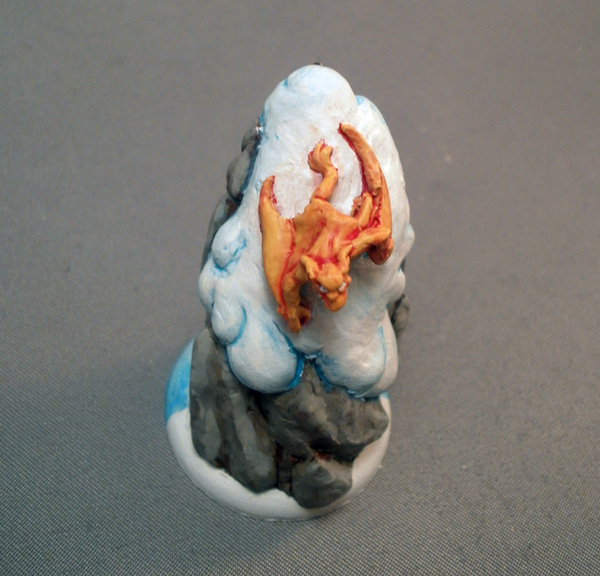
| 50% PP Sulfuric Yellow 50% PP Khador Red Highlight |
PP Khador Red Highlight | GW Red Gore |
This process is incredibly fast on such small models. I spent more time in the bathroom drying the washes with our room’s hair dryer than actually painting.
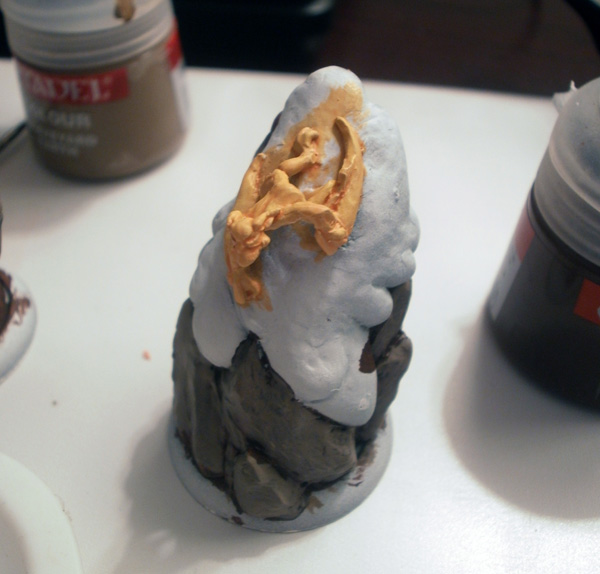
I was doing the bases at the same time. The usual stone colours were used:
 |
||
| Base | Layer | Highlight |
| 2/3 GW Graveyard Earth 1/3 GW Fortress Grey |
1/3 GW Ice Blue 2/3 GW Fortress Grey |
1/3 GW Ice Blue 1/3 GW Fortress Grey 1/3 GW Skull White |
The snow is simply Ceramite White (one of the new base paints, which coats extremely opaquely over my splashed washes) with some Ice Blue wet blended into it. I’m usually much cleaner about the snow washes, but I didn’t have the time here.
And with that, the models were done, a mere 2 hours before I would need to put them on the field. 😀
The Gobber Forsaken were very well-received by my opponents and by random passers-by, garnering the largest number of, “Wait… what the hell is that?” questions my armies seem to elicit. 😛
Are they the best models I’ve ever made? Hell no– they’re very sloppy, knocked together in under a week, with many shortcuts taken to save time. But do I like them? Hell yeah– I personally think they’re hilarious, and they make me grin evilly every time I sent them tear a heavy warbeast to shreds. People just don’t see that coming when your forsaken is an unassuming little gobber. 🙂
And those, folks, are the last models for my fixed 50pt Legion army. I’ll take some army photos and post them this weekend, and then you never need to hear me blather about this army ever again… well, until I paint my dragon, anyway. 😛
So that’s what they were! I was wondering while looking at the pics I took.
Very nice work – as usual! An extremely fresh take on the foresaken and I really like that they are not the grotesque theme that many of Legions models are now. Can’t wait to see what you do with a throne.
Also, I am really thrilled to see you on a dedicated site again. How often will you be updating this thing? Well, planning to, anyway…
The posting schedule is “whenever I finish things”. I’m just wrapping up three projects, so I should have some updates this week.