
Every year, I go to Templecon. It’s the only event to which I travel any significant distance– I won’t even drive the 90 minutes to events held by 3rd-Best-Toronto-PG Northblade, no matter how lucrative the proffered bribes.
Because Templecon is my “one big event”, I like to bring something new there every year– whether new models for an existing army, or a wholly new one that I rush to complete in time for the event. The past two years I’ve taken the latter road; last year yielded my orange Legion army full of conversions, scratch sculpts and retina-searing paint. When I built my Legion army, my goal was to build a collection of display models; I sculpted and painted every model to the best of my ability, resulting in an army that took 14 months (on and off) to build.
This year, however, I didn’t want to work very hard.
It’s okay, I know how it is. You’re a busy person. You don’t have time to read concentrated pearls of wisdom that would impart some measure of my unfathomable genius upon you, immeasurably improving what remains of your life.
It’s fine. Just click the links. I don’t mind.
- Siege
- Avenger
- Dude Jr
- Chick Jr
- Sword Knight
- Gobber
- Ranger
- Storm Knight
- Trollkin
- Gun Mage
- Allison Jakes
Seriously, don’t worry. I won’t think any less of you.
I mean, how could I?
The Legion army was a very draining project that shoved a lot of other potential work aside; this year, I wanted something that would just be a bunch of goofy fun and make people laugh. I briefly debated a full Cephalyx army, but with five months to go before Templecon, PP released a theme list that made me chuckle. Called “Trial by Fire”, the theme’s fluff tells a story about Siege taking a bunch of fresh young Journeyman Warcasters out for a test run in the field to give them some combat experience.
Or as I call it, “A Field Trip From Wizard School”. 🙂
As soon as I saw the theme list, I knew I had to build a squad of custom Journeyman Warcasters to take on their very own weekend field trip to Rhode Island. My busy schedule prevented me from starting the project until December, but given that this was always intended to be just a fun, goofy side project, I figured that would be plenty of time. As it happens it was precisely the right amount of time, because the last model in the army was painted the morning of Templecon Thursday.
That’s becoming something of a pattern for me; my last Legion model was also finished an hour before the doors opened last year. 🙂
So, two notes before we dive in:
- Everything here, from conversions to paint, was intended from the start to be “tabletop quality”. I didn’t want to make myself miserable with months of careful putty smoothing and complicated blended painting; I simply wanted to bash together some fun models and then slap on a fast coat of paint. The important thing on this army was not to show off the craftsmanship (which is of a much lower caliber than usual), but rather to make people laugh with models that look decent from a couple feet away.
- The glamour photos were all taken after the 30+ games I played at Templecon, during the course of which the paintjobs took a pretty heavy beating. I’ve fixed the most obvious chips, but I seriously doubt that I got them all, so do your best to ignore any ugly silver battle scars in the painted photos. 😛
The Learned Scholar

I’ve always really liked the Siege model– he has a really well-designed outfit, and the sculpting is really crisp and detailed. I don’t think I’ve ever seen a Cygnar colour scheme that didn’t make Siege look good. However, I have one major problem with the model: he’s wielding his hammer, AKA the weapon he might use one game out of five. Meanwhile, the rocket cannon that is his mechanical centerpiece is hidden away on his back.
Nay nay, said Spud. My Siege will be a Rocket Siege.
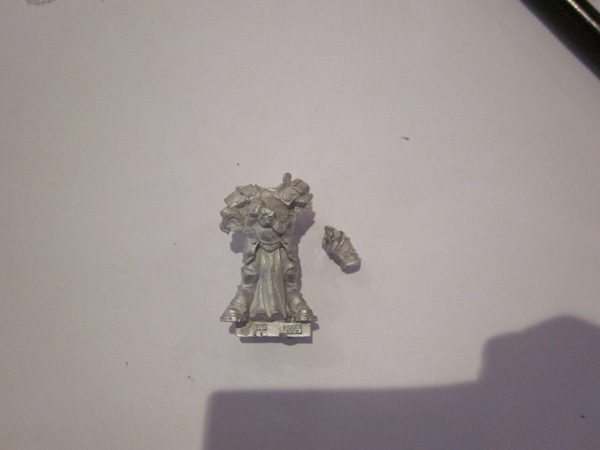
I started by cutting away all of the parts I didn’t want– the arms below the shoulders, and the head. I took care to inflict as little damage on the surrounding areas as possible to minimize later repairs.

The pose I would be going for would have Siege slinging his rocket cannon over his right shoulder while directing his troops with his left hand– a pose reminiscent of that iconically maintained by one of Siege’s former subordinates.
To let Siege hold the cannon, I would need to chop the entire existing hand off of his forearm, pin the handle to his wrist, and then sculpt a new hand grasping it from underneath.

DRILL BABY DRILL

Here are all the metal parts rigged up; I’ve run a wire down from the right shoulder, through the right forearm, and up into the gun. Similarly, the left pointing arm has a wire bridging the gap between shoulder and elbow. Once I’m happy with the separation and angles, I immobilize the pieces with some putty.

Once the skeleton putty was set, I added more putty on top to fill in the gaps– upper arm plates, elbow ribbing, steam tubes, and the missing half of an elbow hinge. Putty is applied in small scraps, squished into place with a hoe tool, and then shaped with an angle chisel clayshaper.
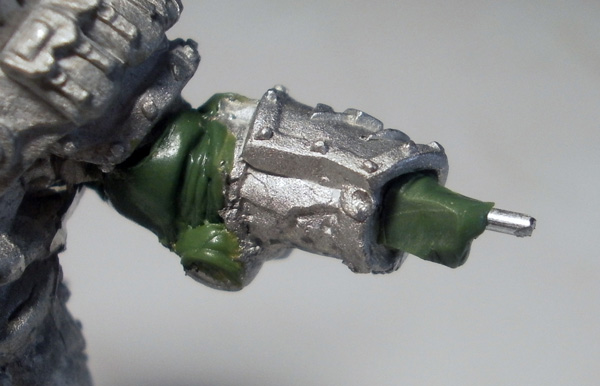
In preparation for later adding the pointing hand, I added a straight wire and a square-ish wad of putty to form the palm of his hand.
Back to this in a bit…

Before that, let’s take two detours. First, let’s turn the “two hands holding a hammer” bit and give it a clean handle for when it later gets hung at Siege’s waist.
Here I’ve started by carefully chopping around the two hands with a clipper.
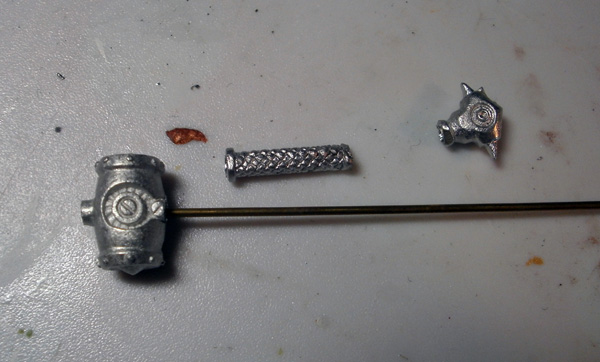
I reassemble the handle to roughly its original length around a brass rod.
Not shown: the two hours it took to slowly and carefully drill through the center part of the handle. I really hate drilling through metal. >_<
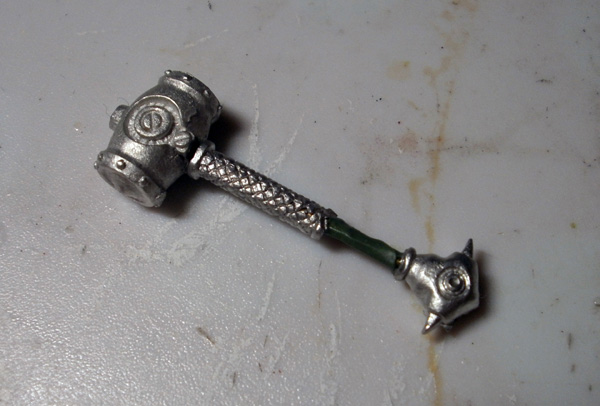
I glued the components around the rid, then added a small sheath of putty around the exposed brass rod to create a grip for the next stage.
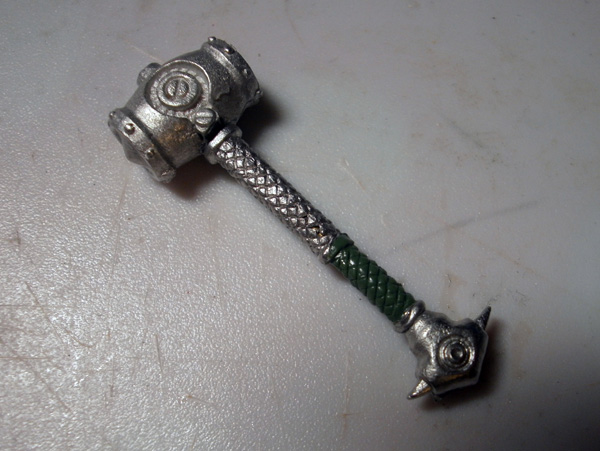
Once the sheath was dry, I wrapped it in additional putty (again, applying shreds and then squishing them together), smoothed it out, and then used a knife to press a diamond pattern into the putty to match the existing grip.
This gets attached to the model later on, but for now let’s take another detour and build Siege’s new head.
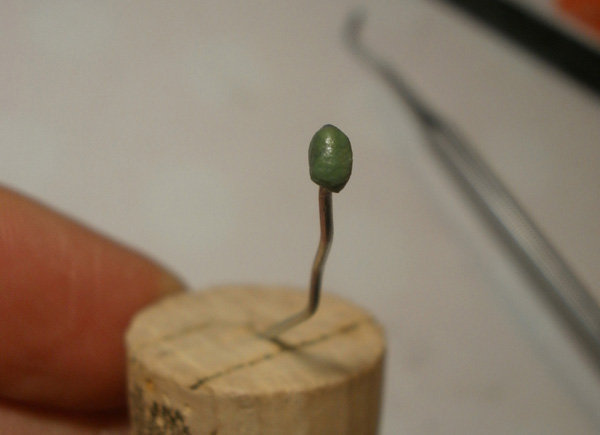
The original head on the Siege model isn’t bad at all, but it had two problems for me:
1) it doesn’t exactly match the face in Siege’s new Mk.II art, which has a smaller nose and sterner expression.
2) It kind of got destroyed when I was removing it. 😛
As a result, I determined that I would need to sculpt him a new one. As usual, I’ll be sculpting his head out of fimo, using green stuff to attach the clay to the wire armature.

Here I’ve wrapped the putty wad with fimo. Fimo on its own doesn’t grip metal very well, so here we’re using the putty as an intermediary to hold everything together– the putty grips the wire on one side and blends slightly into the fimo on the other side.
The fimo work all occurs while the green stuff is still soft, which lets me shove the putty out of the way anywhere I need to “dig deep”– eyes, jowls, mouth, etc.

I find it helpful to start male faces by defining the brow and nose (though both will require more material later to be fully bulked out; right now I’m just setting up landmarks). These areas are pressed in with a clayshaper.
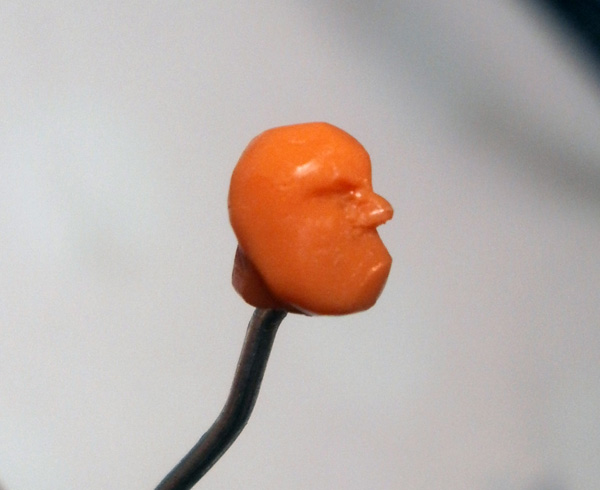
Next I define some of Siege’s bone structure. Siege has a “tough guy jawline”, so I apply a bit of extra material here to represent his jawbone and teeth.
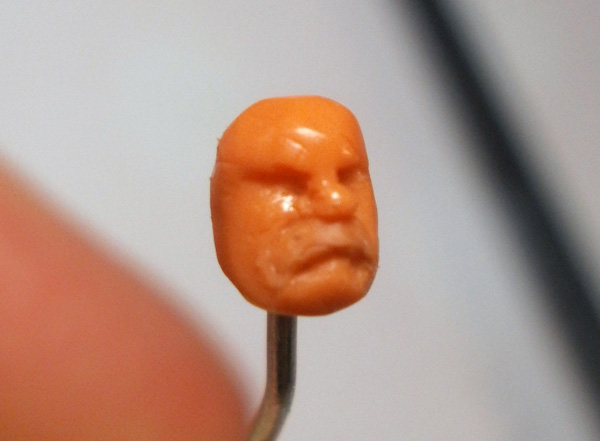
A mouth gets pressed into this area, as well as the begnnings of jowls up toward his nose.
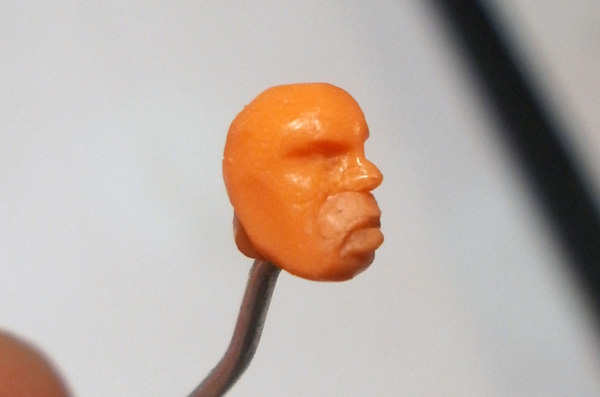
I add more material to his upper and lower lips; each lip is applied as a separate fimo shred and then squished into the rest of the face.

Aaaaaaaand let’s jump ahead to “the rest of the facial detail is pressed in”; I fully define his jowls, add more putty to form his nostrils, and then add a bit more to fill in his cheeks, brow, and eyelids. Everything at this stage has been “over-detailed”, as I find it easier to get everything defined and then smooth the skin back out with clayshaper afterward.
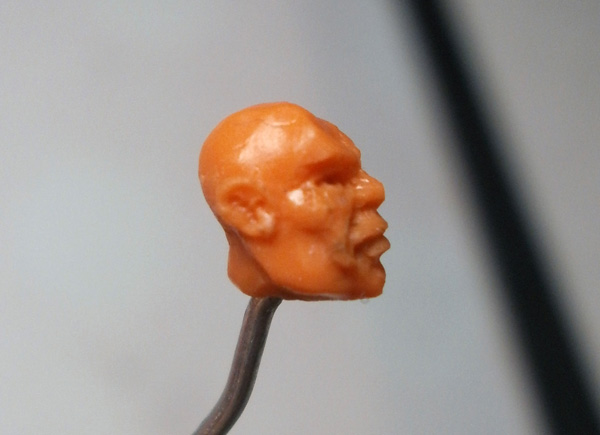
Here I’ve done some smoothing, as well as adding his ears.

Once I was happy with it, the head was baked and then transferred to the model.

The hammer was then attached to the former rifle strap, and with that, Siege was pretty much ready for paint.
(I’ll cover the painting and basing processes for the army, minimal as they are, when I get to the first journeyman a dozen or so pictures down. For all other models I’m just going to jump straight from modeling to glamour shots).
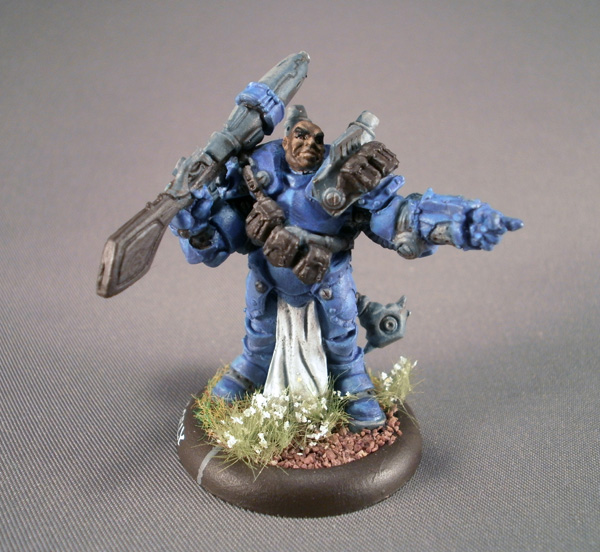


Aaaand that’s basically it for my army’s warcaster. Is he an awe-inspiring work of art? Not at all. But does he communicate “leader with a big gun”?
The Groundskeeper
I wanted the army I was building to really focus on the swarm of unaccredited apprentice magicians and their pets, but I still wanted to include one heavy warjack because THIS IS WARMACHINE, DAMMIT!
And while the Defender has long been Siege’s go-to sidekick, 2012’s Wrath book brought him a much more helpful buddy: the face-smashing, Jack-stunning, ground-shaking Avenger. Ever since it was released, it’s become my main Cygnar army’s default “Blech, I can only afford one ‘Jack” selection, and it happens to perfectly synergize with the assassination-heavy list that Wizard School was shaping up to be; the army wins by pumping boosted POW12s into casters, and the Avenger is one of the ways I can ensure that my child army can see who they’re aiming at.
I made very few modifications to the default plastic Avenger kit, but there were two slight alterations to make it a bit more visually interesting. First up, let’s run an experiment.
Go pick up a sword. Don’t have a sword? Fine, pick up a broom handle, or a paper towel roll, or a bottle of salad dressing.
Now, wiggle that deadly implement at an imaginary foe.
Now freeze.
How is your wrist positioned?
Is the weapon held perfectly perpendicular to your arm like every bloody melee weapon in the entire PP warjack line?
It isn’t, is it?
I do not understand why PP continues to produce models with that unnaturally rigid wrist position. When a humanoid figure wields a Pointy Object of Death, that wielder will inherently tip the weapon forward, turning it into a further extension of one’s arm and granting extra leverage with which to better mutilate the target of one’s ire.
The preponderance of this strange wrist post is especially confusing considering how blindingly easy it is to correct:
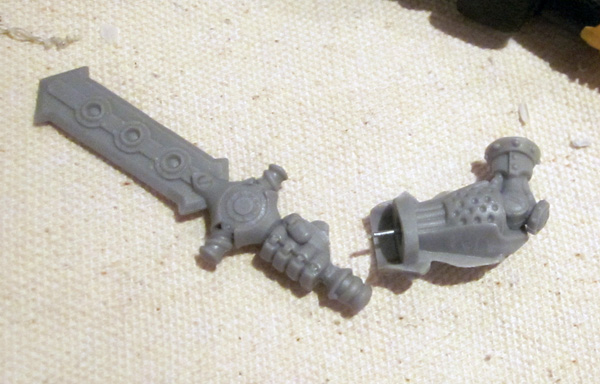
- Step 1: Cut off a bit of the heel of the hand on the bottom.
- Step 2: There’s no step 2. You’re done.
😛
Dear PP,
Can we maybe work on this for the next iteration of jack kits? The difference between awkwardly clutching a bread knife and menacingly waving a sword is a 45-degree angle. I’m pretty sure your talented sculpting team can work out the logistics to make this happen.
Lovingly yours,
-a potato

AAAAAAAANYWAY
The other change I made was to swap out the model’s knees. When the Centurion and Hammersmith were metal kits, the Hammersmith had a set of fairly badass-looking metal kneepads. I happened to have a set lying around from a previous project, so I opted to stick them onto my Academic Avenger for a bit of visual pop. To do this, I used clippers to chop out a space near the plastic kit’s knees, while being very careful not to completely sever the knee joint at the back.
Once I had an adequate space, I puttied the new kneepads in, and the Avenger was ready for paint.
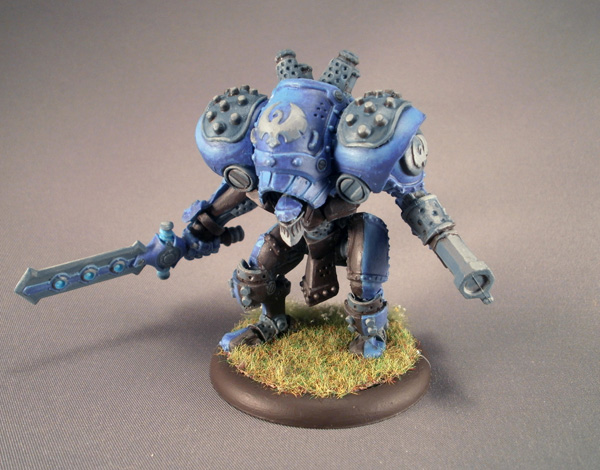

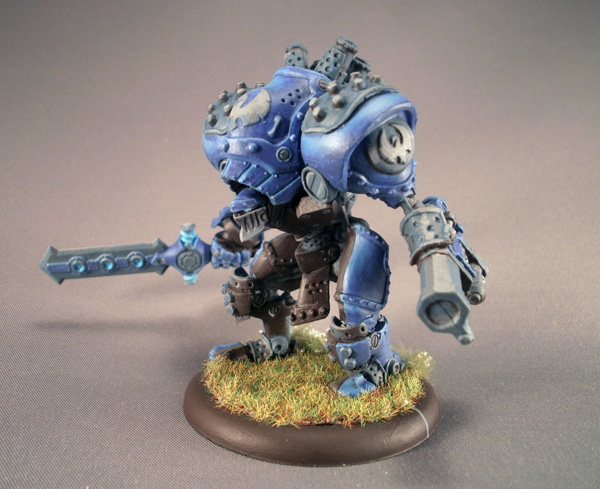

D’awwww, they look so cute together.
<3
The Child Army
The main core of the Trial By Fire theme list, of course, is the multitude of Journeyman Warcasters it allows you to play. And while Privateer has released two very nice-looking Journeyman Warcaster models, this paltry allotment would not do at all for this discriminating potato.
Nay nay, said the Spud. MY wizard school will be sending nine children on this field trip.

To supplement the two stock models, I would be building the remaining ones with the help of an $80 parts store order. You can see most of the parts laid out here, though I also picked up a stock of generic parts (extra weapons and costume details) for random detailing.
I can’t stress enough how excited I was to start this project. When I started my miniatures career, I was a child of the Space Marine, and my absolute favourite thing to do was to dump out the parts in their plastic kits and bash models together by gluing together all the leftover parts. I later made an entire Chaos army that contained no actual Chaos models, by combining plastic Space Marines with plastic Skeletons to form an army that had had its flesh stripped away by the loving hugs of Papa Nurgle.
The conversions were rough and kind of dumb-looking, but I didn’t care. They were fun. Building my own models is far more entertaining for me than painting up one that someone else provides to me, and building a bizarre Frankenstein’s monster out of glued-together parts is probably the simplest expression of this purely-for-fun exercise for me. It saddens me a bit that there aren’t many opportunities to do this type of scratchbuilding within Privateer’s game (due to the lack of wargear and the harsh tournament conversion policy), but it was nice, at least, to find this one excuse to dredge up my old kitbashing skills for this project– a bit like dragging your old forgotten box of legos down from the attic. 🙂
*wistful sigh*
I worked on all of the conversions at the same time, but for the purposes of this blog, I’m going to walk through each model one at a time. Let’s start with the most boring one: the stock BoyJr model I used to test my paint scheme.
Millard Rider, Generic Boy Wizard
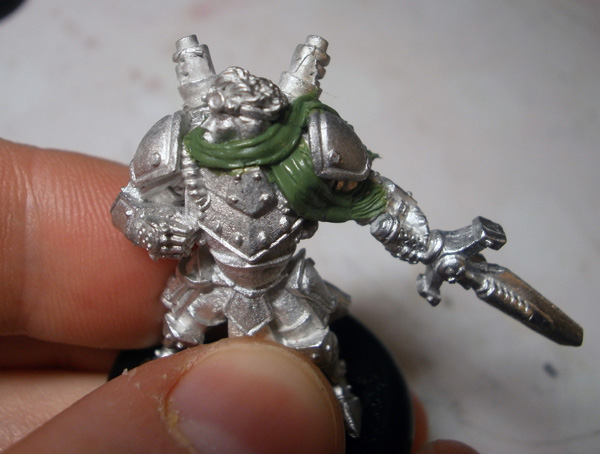
Millard received only one piece of conversion work: the quick application of the Dashing Scarf that I intended to be the visual signature of the army. The scarves are generally pretty easy to apply– I roll out a long putty snake, wrap it around the neck, and then let the rest of the snake hang down to the model’s chest or waist.

Another small putty snake is added to the other side. Everything gets smushed together, and then I add creases with a clayshaper and slice the tip up into strings using a knife.
Ta-da, instant scarf!
(If you haven’t figured out why I’m adding these… the army is called Wizard School. Figure it out. 😛 )
BoyJr was my test model for the army’s paint scheme, which came out like so:
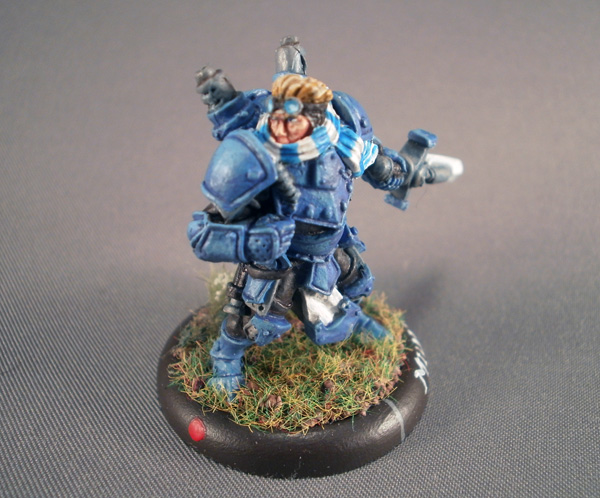
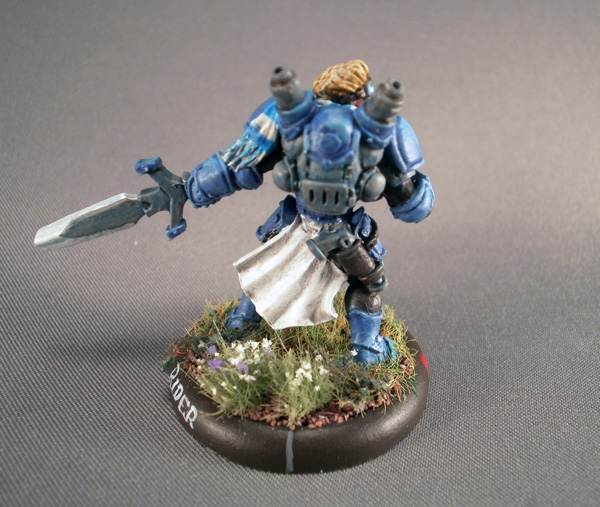


While I’m happy with the technical paintjob (it’s clean, the colours are snappy, and it looks decent despite intentionally being a rush job), I ultimately have a strong dislike for this army simply because the colours didn’t work out in practice like I wanted them in my head.
This is because, in my head, the army was supposed to be purple, not blue.

This was the “paper doll” I rigged up back in January to plan out my colours. The coloured panels are basecoated in a muted light blue, and then given a very heavy wash of bluish-purple over about 80% of the surface area. The intention was that the army would visually “read” as purple with blue highlights, but due to the interacting of the light blue and my purple wash, the army just comes across as “blue shaded to blue”. Nobody I showed the models to was even able to pick up a trace of purple in the shadows– they all said the models were simply blue.
The most frustrating part is that I did this experimentation and quizzing after completing only one model, so in theory I should have been able to make adjustments at that point and swing the paint scheme more purple-ward. However, the conversion portion of the army took longer than I expected (3 of my available 5 weeks), and I simply didn’t have the time to run more experiments. So I dove ahead and painted the rest of the army with the colours I had, already knowing that the result wouldn’t match my concept and that that fact would forever piss me off.
With Templecon 18 days away, I had to decide between two options: a finished army that bothered me, or an incomplete army in the colours I wanted. With a heavy heart, I bit the bullet and chose completion.

The actual painting process was designed to be very fast, with each colour area being a basecoat, a shading wash, and a highlight. Everything was primed in white to make the light colours pop.

I always start models with the “lowest” costume level first, which in this case means skin-hugging leathers. I usually try to differentiate my models’ different clothing pieces with different shades of brown leather (dark brown straps on light brown pants, for example), but for these models I was cleaving to a very narrow colour palette, so nearly all of the models’ soft cloth was painted in dark brown (GW Dryad Bark).
For the later models in the army, I would also do metals at this point, getting all of the “filler details” out of the way before moving onto the eye-catching purple armor panels.
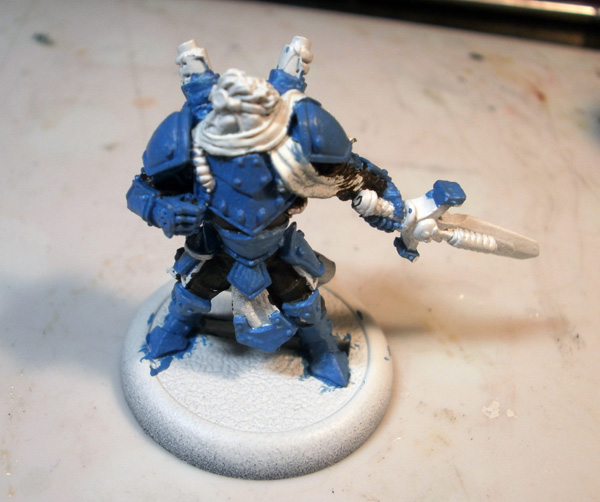
The armor was basecoated with light blue, but the test model taught me that the pot I had chosen (GW Hoeth Blue) was too dark and too bold, so I dumped some white and grey into the pot to lighten and dull it a bit. On this model I applied the adjusted blue pot as a highlight (not shown in this picture), but on later models I was able to simply basecoat straight in the lighter shade of blue and then wash straight down to purple.
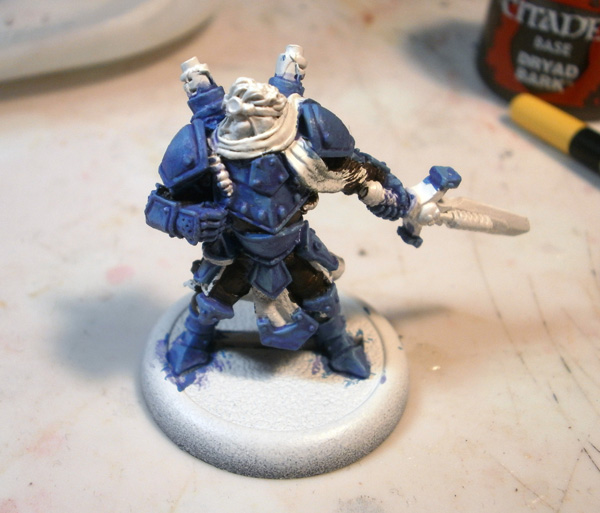
Here’s how that looked after two purple wash stages. Still completely reads as blue.
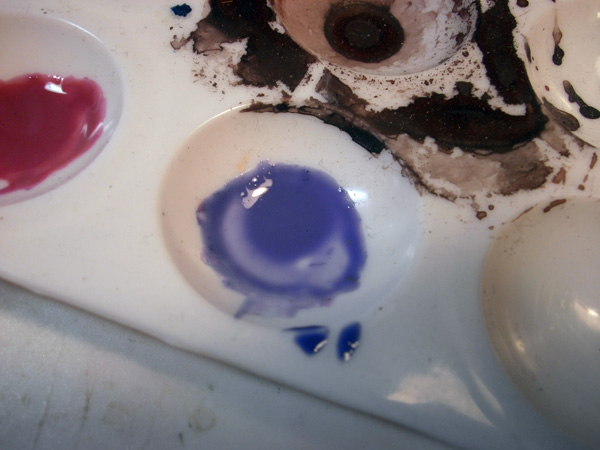
I SWEAR THE WASH WAS PURPLE THOUGH
LOOK AT IT
LOOK HOW PURPLE IT IS
WHY DOESN’T ANYONE BELIEEEEEVE MEEEEEEE
*inconsolable weeping*
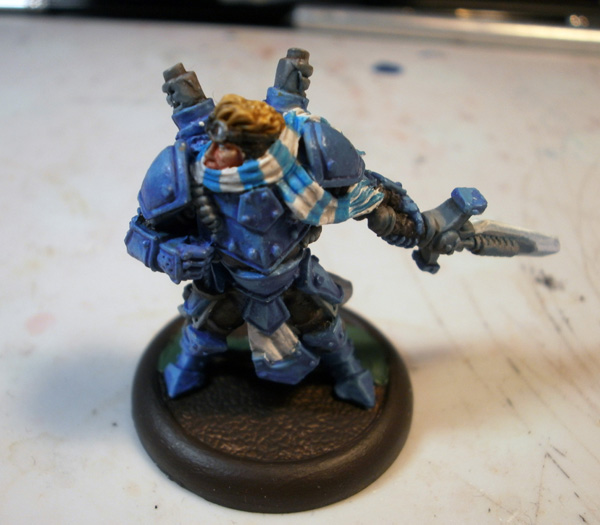
*sigh*
So in the end, the colour scheme on this model wasn’t at all what I was hoping for, but it’s what the army now looks like, so I’ll have to live with it. If nothing else, this is one of the advantages of my new army-building philosophy– if you only ever plan to build 50pts and then move onto something else, you don’t need to live with the consequences of a bad paintjob for as long as if you were completely adopting that army as a permanent fixture in your collection.
As long as we’re doing process shots, I might as well show how the basing was done. I wanted to convey the idea that the models are standing on the well-manicured front lawn of a wizarding academy’s main campus, so I based the models in three stages of store-bought fake nature:
- Dark brown rocks (Army Painter Battlefields: Brown Battleground)
- Healthy green grass (Army Painter Static Grass: Field Grass) applied over only a portion of the base, leaving rocks exposed
- A manicured line of flowers (Army Painter Battlegrounds: Meadow Flowers) along the border between rocks and grass to give the appearance of a well-tended garden
The flowers in particular were something I’ve seen many people at my store use before, but that I hadn’t yet had a chance to employ yet myself.

They come glued to a cellophane sheet. I opted to use only the white flowers to tie into my army’s colours, and also because I’m racist.

To apply the flowers, you grab a small chunk of “flower fuzz” from the sheet with a pair of tweezers, and then glue it down to the model’s base with a dab of glue. It can be hard to get the flowers to sit flat against the base, so I would then go back with a paintbrush and apply more glue once the flower fuzz was in place.
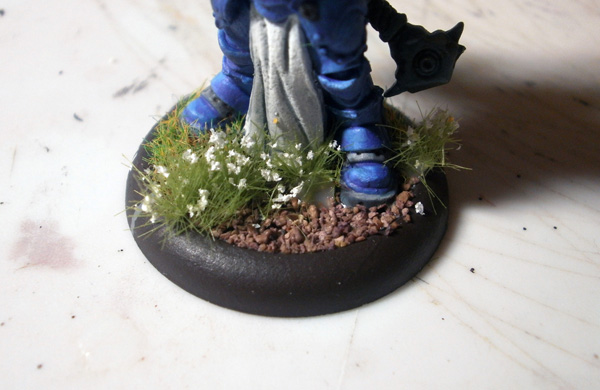
Here’s what they looked like at the end. Very pretty. 🙂
Wendolyn Corrie, Generic Girl Wizard

While the male journeyman is a bit bland-looking, I find the female Jr. model much more visually interesting, with a better pose and more even costume detailing (the dude model is too top-heavy for my liking). Like BoyJr, GirlJr received a scarf to show off her school colours.
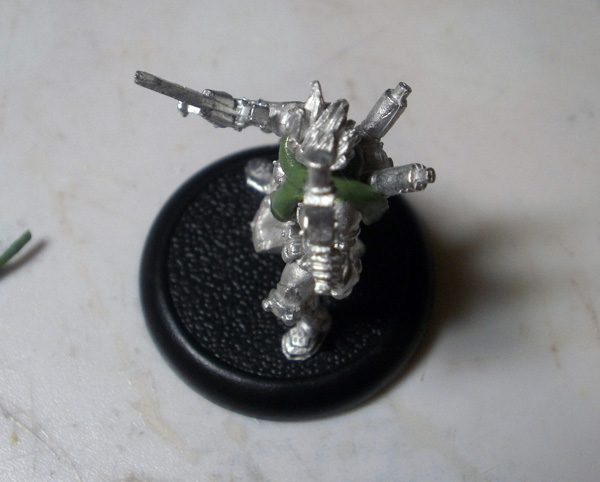
The scarving process was the same: wrap a P-shaped putty snake around the neck, then add another small snake to form the other tail of the scarf.
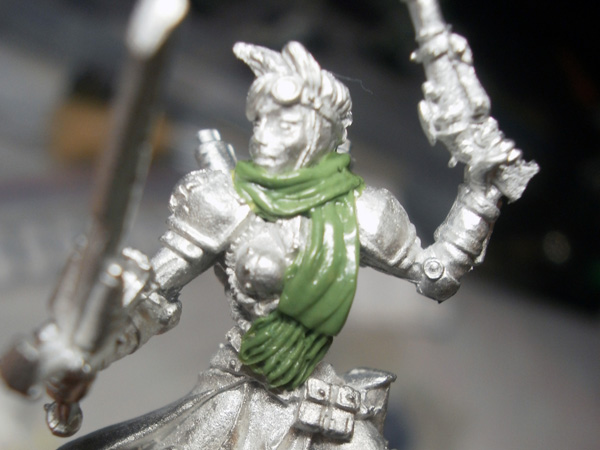
I did extensive scarf-related research and discovered that there are several different ways to tie and wear a scarf; as such, each model in the army has a slightly different way of wearing theirs. Some tie them in knots, while others like Wendolyn here opt for a simple loose wrap. Even within the models that share a scarf-lashing method, different models tie theirs at different points– some in front, some in the back, and others on the side.

This was done partially out of boredom, but in the end it helps liven up what might otherwise have looked like a boring stock costume addition. I won’t pretend that there was any attempt to make different scarf-ties reflect the wearer’s personality (I am not enough of a scarf connaisseur to know how a passive-aggressive introvert who enjoys kayaking would tie their scarf), but I’m sure someone out there will look at them and form those links anyway and assume I did it on purpose, and if that’s the case, I will gladly accept your misplaced confidence in my abilities.


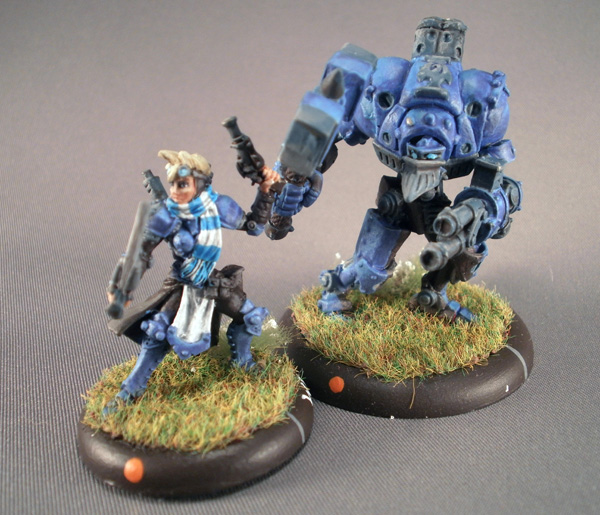
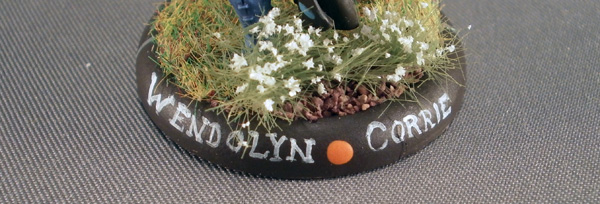
Ehh, she looks fine.
*shrug*
With Wendolyn and Millard out of the way, let’s move onto the more interesting stuff– bashing goofy models together out of spare parts. 🙂
Lady Abigail Hambledon, Formerly of the 31st Northguard Loyal Swords

I chose the most dynamic sword knight pose for Abigail, leaning forward as she dives into battle. Rather than scrounging new arms and armaments for her as I did for most of the other models in the army, I left her with the model’s stock arms and sword, and did most of her differentiation by sculpting her an exposed head.

Same basic starting point as Siege– metal wire curled into a loop, wrapped in putty, wrapped in fimo. Sculpting happens while the putty is still soft.
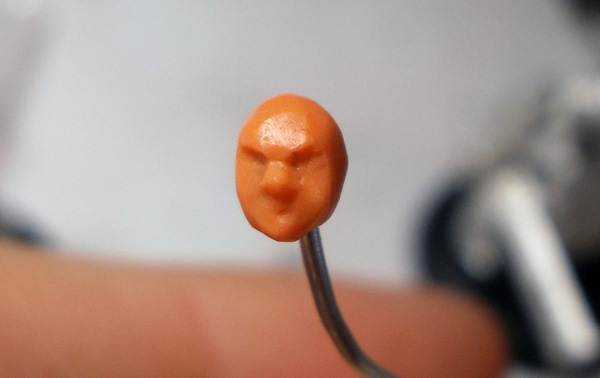
Her facial detailing also follows the same process. First we define the brow and nose as landmarks, then press rough details into place, then smooth everything up.

End result: lady face!

Hair was sculpted on next.

Lady Abigail is a Cygnaran noble, so for both elegance’s sake and due to the practical concern of needing her hair to fit inside a helmet, I opted to give her a tightly woven French braid.
Which means I needed to learn how a French braid works.
Which took me about an hour using various YouTube videos.
WHY DO YOU PEOPLE WITH HAIR DO SUCH BIZARRELY COMPLICATED THINGS WITH IT?!
BAH TO ALL OF YOU!

Here’s Abigail with her head in place and her arms posed. I opted to put her in a wide “COME AT ME BRO” stance.
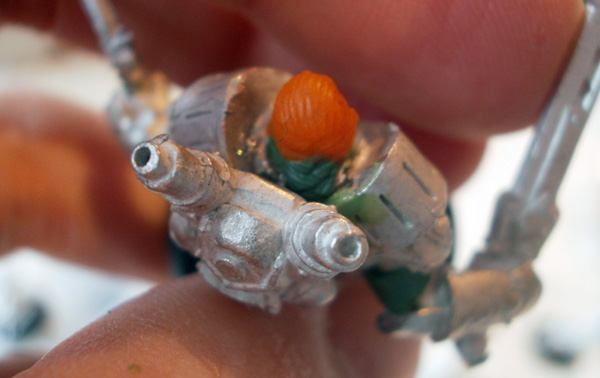
I realized after spending so much time on Abigail’s hair that it would be nearly invisible behind her backpack. Not willing to accept this, I used green stuff to make it stand out a bit more from above; I also made sure that when her scarf was applied, it ran UNDER her braid, not over it.
BECAUSE DAGNABBIT, ABIGAIL DESERVES TO HAVE PEOPLE SEE HER PRETTY PRETTY HAIR

Aaaaaaand there we go. The gun is taken from a spare sprue I bought years ago from Freebooter Minis; about half of my Child Army is wielding weapons taken from that awesome-but-mind-bogglingly-expensive-to-ship-overseas vendor (which is run by my favourite sculptor, Werner Klocke).
And then, the paint.


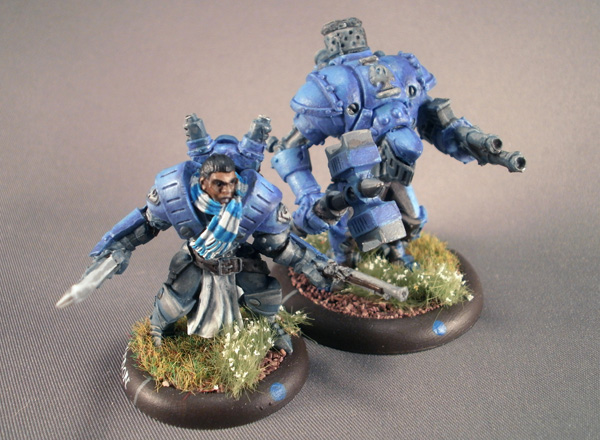
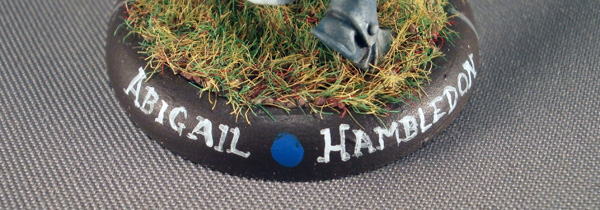
Two notes on Abigail:
- I decided that she would probably have opted to leave much of her armor in its original Sword Knight Silver, to honor her former unit.
- I finally found an awesome set of colour mixes to paint a black person! And then immediately forgot how I did it, resulting in the much less awesome colours I used on Siege! So now I’m really confused and frustrated again!
*sigh*
In the end, Abigail might be my favourite model from this army. I really like the pose, and the altered colour scheme ends up looking really nice.
Velanopokurenoran Jones, Magic Goblin
Because I still refuse to accept Privateer’s retcon. 😛
Vel is probably the model that changed the most from my original conception. Gobbers are my favourite part of the IK, but I’ve never liked the models available to represent them, because they’re just too damn big! Gobbers in the IK are supposed to be really tiny, as shown in this illustration from the IK World Guide:

Those little dudes don’t even hit Gunner Wadock’s waist, but the Gobber models that have been produced generally scale up to a normal human model’s chest or neck. I think this is done to let them be sculpted with more detail, or because sculpting them smaller would cause the moulds to tear. Or… who knows, really. But the end result is that I don’t really like the scale of the gobbers that were available to act as Vel’s base model, so I had initially planned to sculpt her entirely from scratch. This, however, proved to be impossible once the project started moving and I realized how little time I had to dedicate to her, and I frustratedly looked in my bitz box and examined my options.

These were the three models I had available to me (I have a spare of the painted one). The one on the right is nearly as tall as a 30mm human, so I just couldn’t justify using him, much as I love the pose. And while I was initially excited to base Vel on the model on the left (a Reaper “Gremlin” mini from their Pathfinder range), this model actually proved to be slightly too small, coming up barely past a normal human’s knee. So by process of elimination, I was stuck with the one in the middle– a Swamp Gobber, which is at least a bit smaller than his Field Mechanik cousin, coming up only about 8 or 10 inches out of scale for a normal IK gobber.
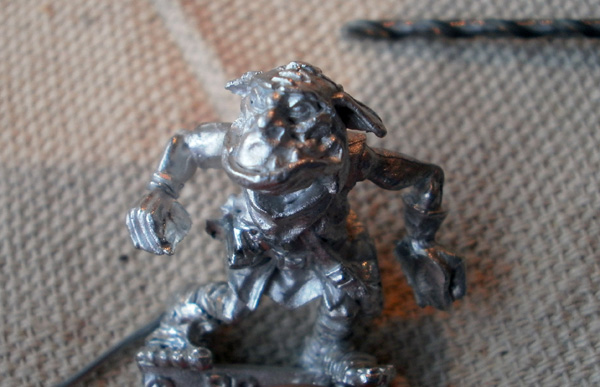
With the base model decided, I chopped off all of the extraneous detail, which in the case of the swamp gobber is a very complicated process– it normally has a large gas pocket that leads into a tube that wraps all around its body and between its legs, forcing me to chop metal off all over the damned place.
This would’ve been a major pain if I wasn’t already planning to cover Vel in armor plates.
Once I cleaned the model up, I ran into another issue: I was almost out of guns. I’ve never had an enormous stock of spare pistols, and as the last model I worked on, I had no standard-sized ones left. I had some holdout pistols that might’ve worked in the hands of a real-scale gobber, but on this out-of-scale one it just looked small and pathetic. And after those, all of my guns were huge monstrosities like Bull’s machine gun and the two-handed blunderbuss from a Boomhowler grunt.

Which looks ridiculous.
Utterly ridiculous.
Adorably ridiculous.
…
…OH MY GOD WE’VE FOUND VEL’S WEAPON

The beefy arms were a bit much, so I lopped off the shoulders and biceps and wired the forearms into Vel’s shoulders.
I have no explanation for why I decided to crop the gun out of all these photos. DAMMIT SPUD, QUIT RUINING THE PAYLOAD OF YOUR OWN VISUAL GAGS!

Armor plates!
Vel’s armor needed to be built entirely from scratch. These panels were laid on and shaped with metal tools and then smoothed with clayshapers. I’ve poked little dots all over the place anywhere I intended to place rivets; these are easier to apply when you have a little divot for them to grip than trying to get them to stick to a flat plate.

SHOULDER ARMOR
STILL NO FULL SHOT OF THE GUN
AAAAAAAAALLL CAAAAAAAAAAAPS TEEEEEEEEEEEEXT
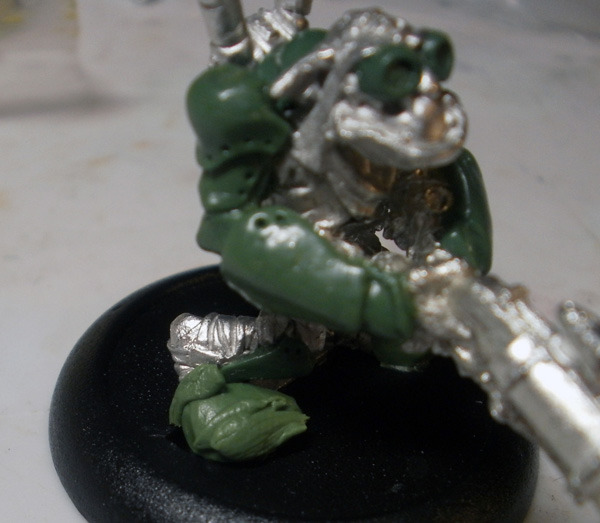
I am not going to make a Simpsons Goggles reference, because I’m above that type of petty pop culture reference.
The mess at Vel’s feet is what I’m always referring to when I talk about “applying scraps of putty”. It’s literally what it sounds like- I tear off small shreds of putty from a larger wad and then apply them bit by bit until I have the volumes I’m looking for, then smush the scraps together and shape them. You should NEVER try to just guess how big of a putty wad you’ll need and try to apply, say, and entire armor plate or a model’s head in one chunk, because that makes it hard to remove material later if you realize there’s too much (and there is always too much). Apply only small bits, and then stop when you have exactly how much is needed.
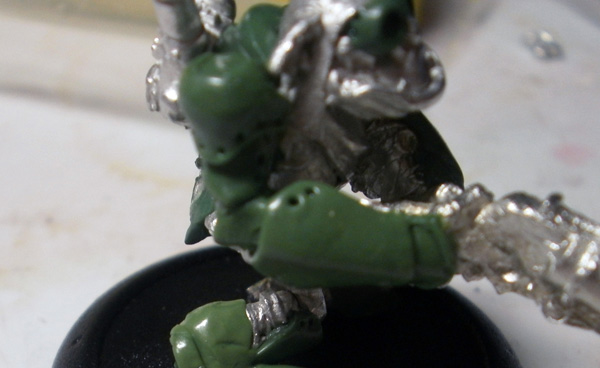
I think this was a picture of her finished boot before I cropped that out.
Now it’s a blurry shot of the same thing you just saw.
WHY AM I SO BAD AT CROPPING

And here we have Vel after the application of rivets. I’ll go into my rivet process in a later article, because it’s super annoying to do and I’ll need to set up a better rig to photograph the process.
And finally, here’s Vel in all her gobbery glory:


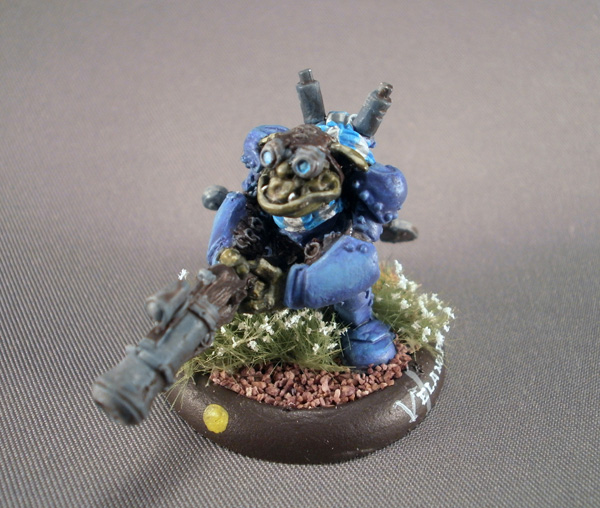


Vel’s name didn’t fit in her back arc, because gobber names are freaking ridiculous. Also on the subject of names: I decided that while gobbers don’t have last names, Vel found when she applied to Wizard School that “last name” was a required field on the forms, so she asked the applicant next to her for a “good, human-y last name”. His first suggestion of “Smith” sounded too common, so she went with his second choice.
And these, ladies and gentlemen, are the kinds of things my brain does to entertain itself when I’m forcing it through its sixth straight hour of rivet-sculpting.
Duela Abollado, CRS Journeyman

I’ve always liked the Ranger models; they’re very detailed and full of personality, from the crouching scout to the lady using the… scope… thing. Which I’m sure has a name. Which I don’t know. Which shut up.
Unfortunately, I have no interest in the unit mechanically, so I’ve picked them up. However, when I was making alternate Journeymen for my main Cygnar army way back in the day (oh, hey, did I mention that I made two alternate Journeymen for my main Cygnar army way back in the day and that this is technically my second time doing this? No? Weird, you’d think that would’ve come up before now), I decided that I would avail myself of the snappy-looking models and knock together a Ranger Journeyman, who has been ably shielding my Centurions for upwards of 5 years now.
I’m assuming that journeyman has a bad work ethic and keeps failing his final exams, otherwise he’d probably be a full warcaster by now!

Duela, however, is a much better student, and after her performance at Templecon, I expect that she’ll be on the fast track for early graduation.
So, yeah. Modeling!
The Scopey Ranger is a really nice base model, and I would end up keeping essentially the entire thing with one exception: the rifle strapped to her back. I’m trying to limit my Child Army to reasonably accurate equivalent weapons, and a long rifle might end up being confusing to an opponent. So the first thing I did (and naturally, forgot to photograph), was to go in carefully with hobby clippers and remove the whole thing, as well as the strap that holds it around her torso. This ended up being quite messy, necessitating a bit of putty cleanup toward the end.
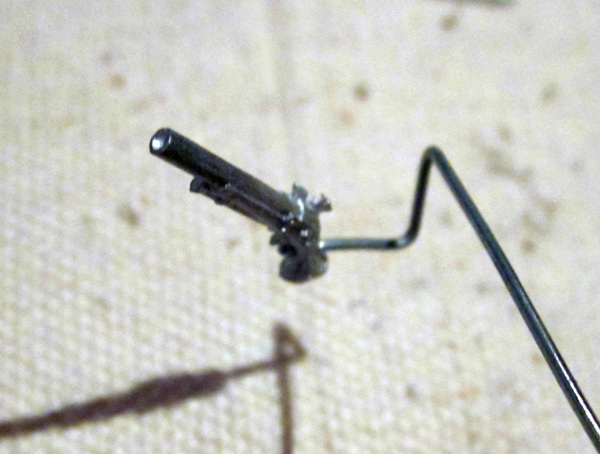
The Ranger’s stock arms were more or less useless to me, so I had to work from scratch. Here is the structure of her right arm– a wire crimped at the shoulder, elbow, and wrist, and then terminating in the handle of her gun.

For the left arm I went diving into my bitz box, and came up with Eiryss’ sword, which was leftover from another very old conversion project.
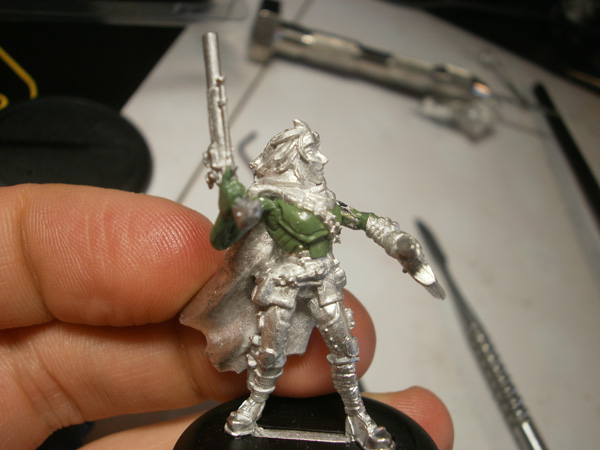
Here I’ve added some chest armor. I wanted to keep Duela’s armor very light to reflect her original training; a Ranger needs to be light on her feet and not covered in clanking, awkward plates.

And here is her arm armour, taken with the height of my photographic skill.
BONUS: Check out the back of her hand. I sculpted this armor at my local store and then carried her home in a box, wherein she fell into another model and got some of its detail pressed into her hand. Sooooo that needed re-doing later. Wheeeee. :/

OTHER ARM
YAAAAAAY SYMMETRY

This shoulder was a victim of the rifle’s removal, so I filled in the cape a bit to cover the damage.
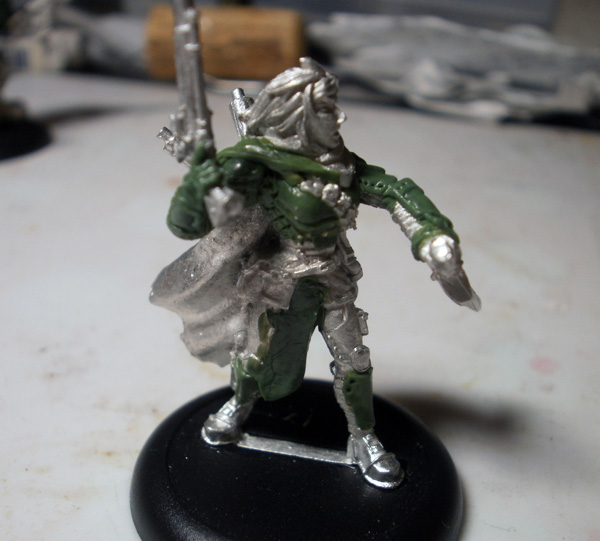
I didn’t take a picture of Duela when he modeling was finished for some reason, so this is the most complete pre-painted shot I have. Please ignore the missing tabard and rivets.
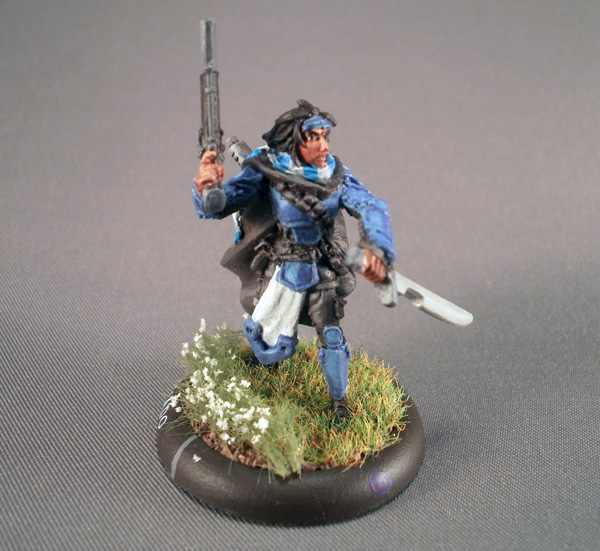
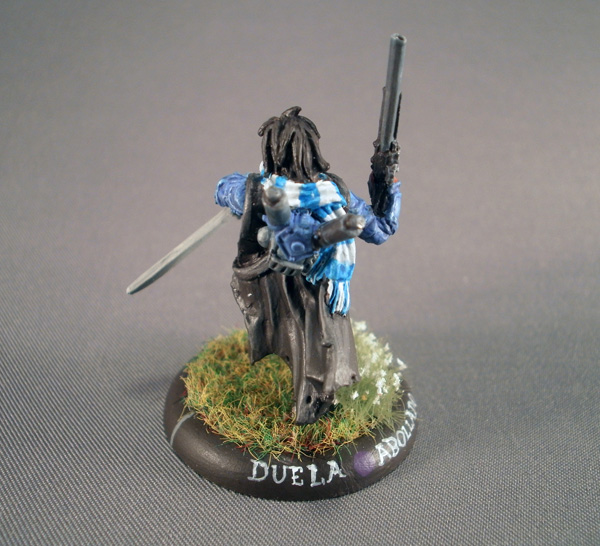

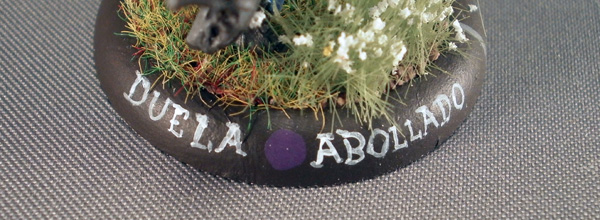
Duela’s features struck me as vaguely South American, so I painted her in sort of an earthy brown tone. The skin paint is a bit rough compared to the other models, but it doesn’t stop Duela from being my second-favourite journeyman after Abigail; something about the torso armor just sort of “works” for me. 🙂
Lt Creighton Mewes, Journeyman of the 7th Storm Brigade
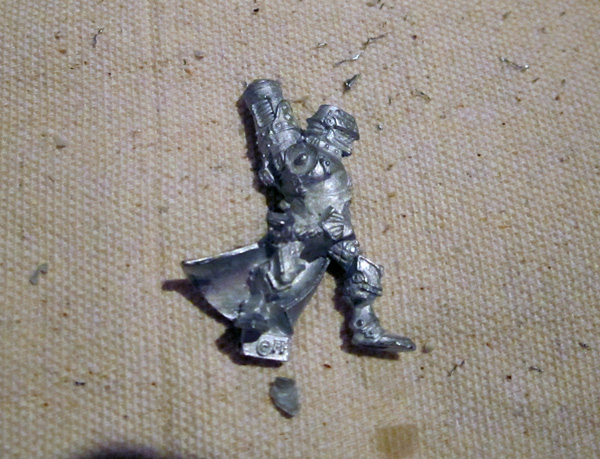
When I went bits shopping and dug through the archives looking for a Storm Knight model, I settled on this one as the basis for my Stormblade Journeyman; the others have fairly awkward standalone poses, while I liked the bold, wide stance the Stormgunner is assuming.
Then I got the model home, and realized how incredibly awkward the pose is to work with. Feet spread apart and then the torso twisted to one side and leaning back… what can you really DO with that? I had to spend about half an hour striking poses in front of a mirror to find anything even remotely realistic, but eventually settled on an “aiming down the length of your arm” pistol pose.
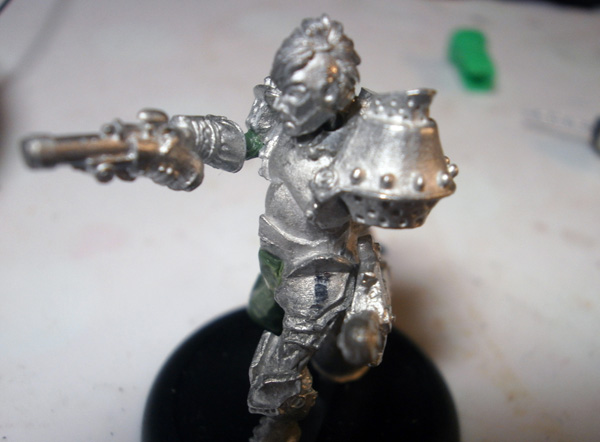
Seen here. It’s still a bit weird-looking, but I couldn’t find anything else to do with the body I’d bought.
Also seen here: the head I fished out of my bits box for this model. Where does it come from? I have no bloody idea. I’m usually excellent at identifying the source of the various chunks of metal in my divided plastic bins, but I honestly can’t remember ever seeing this head before in my life. And it’s certainly distinctive– an angry face and shaved bald on one side. But for whatever reason, it isn’t ringing any bells for me.
Do any of you know where it came from? Because it’s honestly really starting to bug me. @_@

Whatever its source, the shaved head wasn’t the look I was going for, so I added some more hair on the left side.
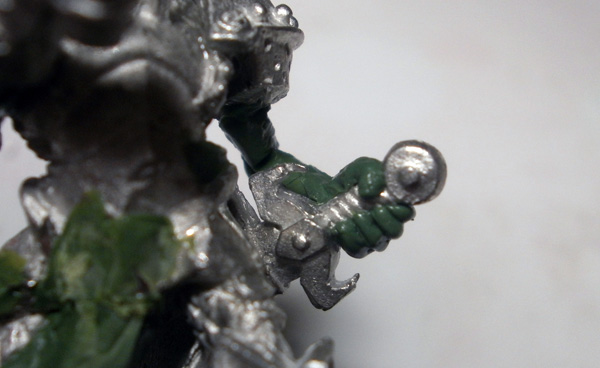
I needed something else for his left hand to be doing, but I wanted all of his concentration on his shooting to really sell the aiming pose, so I stuck a scabbarded sword on his hip and sculpted his arm gripping its hilt; ready to pull it out if necessary, but for now concentrating on the difficult shot at hand.

Here’s some arm armor.
…
…yep.
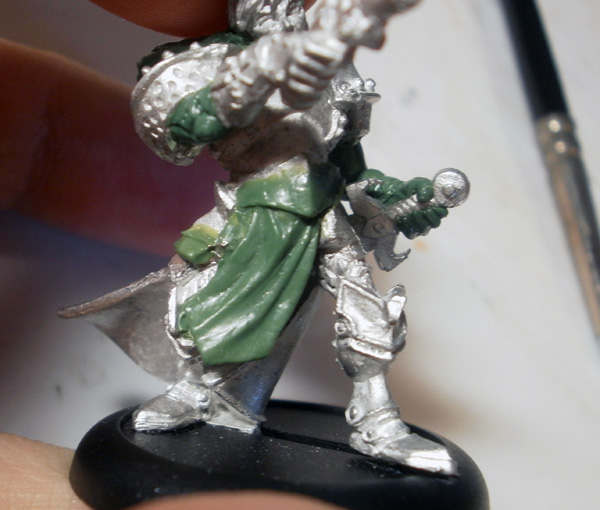
Here’s his tabard. Not the finished version, mind you– this one doesn’t have the weird metal part on the bottom yet. As you’ve already seen with the last few models, I was in panic mode by this point in the project and my picture-taking was beginning to become extremely sporadic.
No matter, though. You can see all of the sculpty bits in the painted shots:
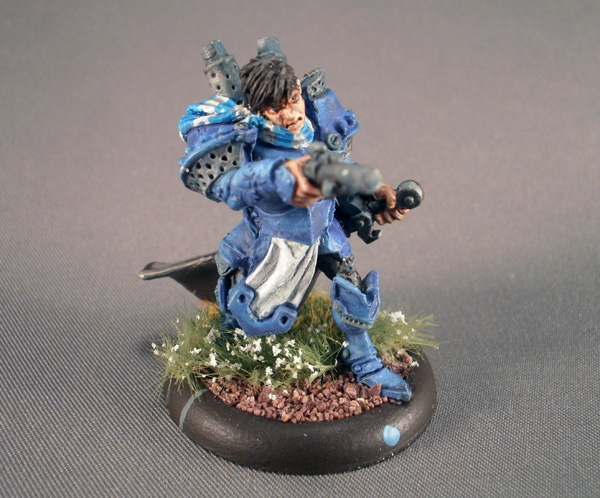
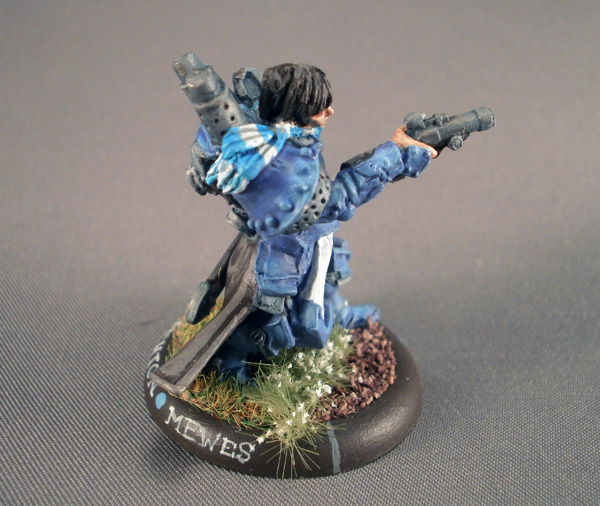
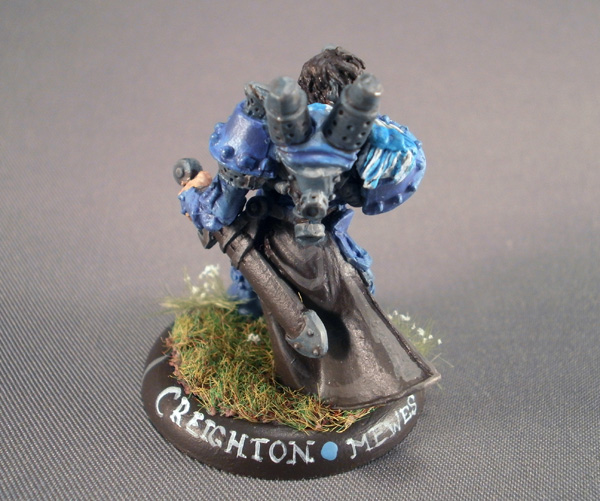
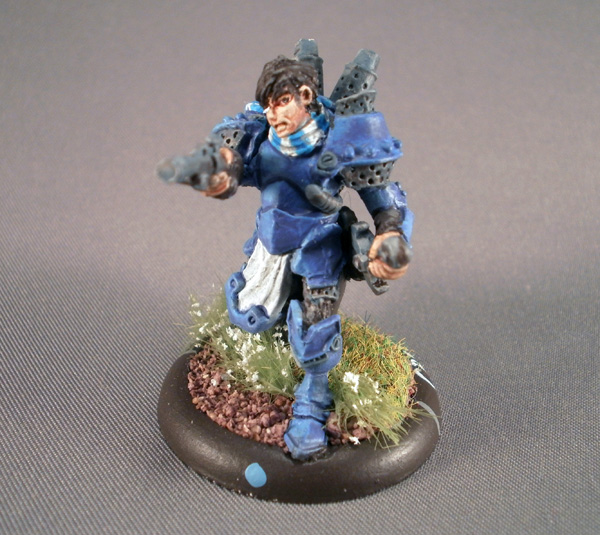

Several people told me Creighton was their favourite alternate journeyman of the bunch. I think he’s just sort of okay.
I’m writing this article, so that means my evaluation is the correct one.
Berek Toborg. I know it’s kind of racist for me to just call him “Troll Journeyman”, but… that’s all I’ve got.
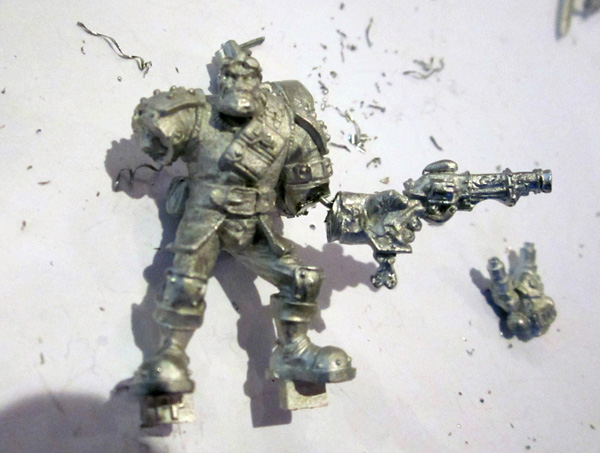
When Bull was first previewed, my immediate reaction was, “Wow, he is going to end up becoming a LOT of people’s IKRPG trollkin character models.”
Turns out, he makes a pretty solid Journeyman, too. 🙂

Let’s skip a bit ahead to where I’ve rigged up his arms. For his gun, I went with the snazzy-looking pistol usually used by Jarl Skuld. For his melee weapon, I didn’t dick around with swords– Berek here just punches people do death with his Ironclad fist. 😛

ARMOR!
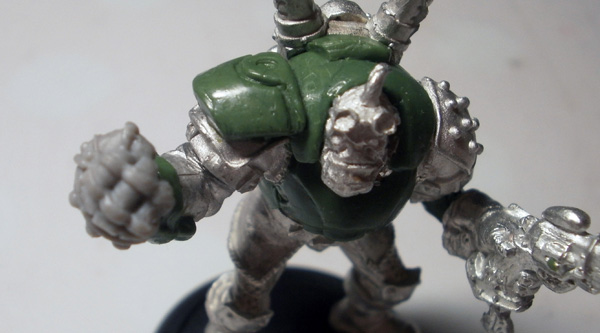
MORE ARMOR!
Berek ended up being the most time-consuming model of the entire lot, simply because he was so bloody huge and needed every single armor panel to be sculpted on (unlike, say, the Stormblade or Sword Knight who were already wearing sufficient armor plating).
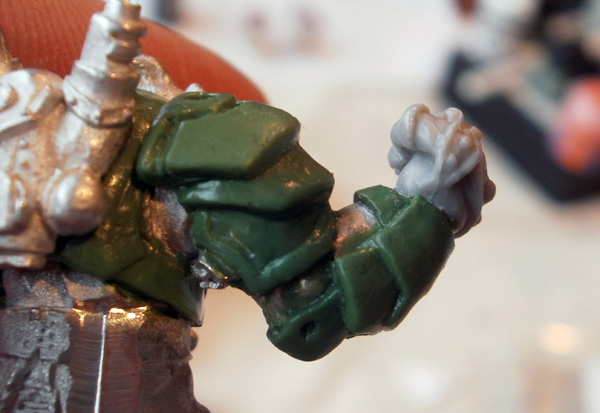
Given how much needed to be added, I probably should’ve drawn a concept sketch to help me lay out where different armor plates would go. Without that, I just sort of added whatever seemed to cover the open spaces, which resulted in some seriously underwhelming Warcaster armor. 🙁
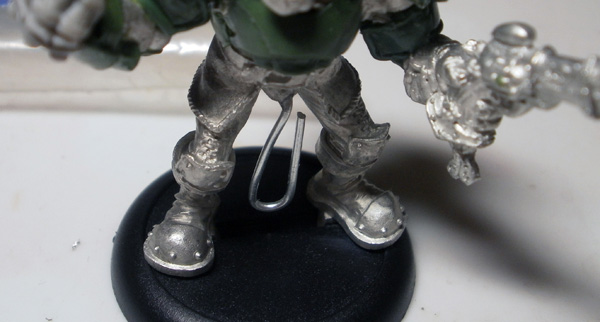
I didn’t get shots of it on most of the other models, but this is how I rigged up most of their tabards– with a wire DRILLED RIGHT THROUGH THE SEXY PARTS.

That wire gave me a foundation to add a flat panel of putty, which I allowed to set before adding the final wavy cloth (which shows up a few pictures down).
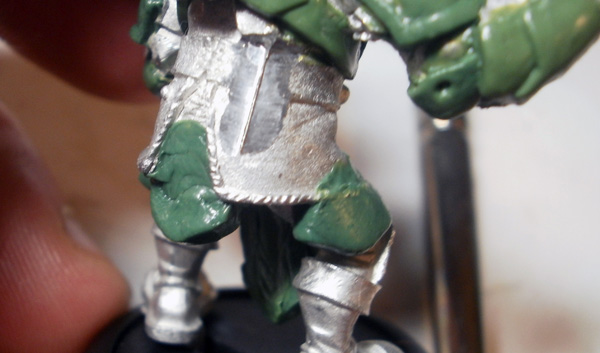
The same method is used for the back and side armor plates; I first add the small support panels seen here…
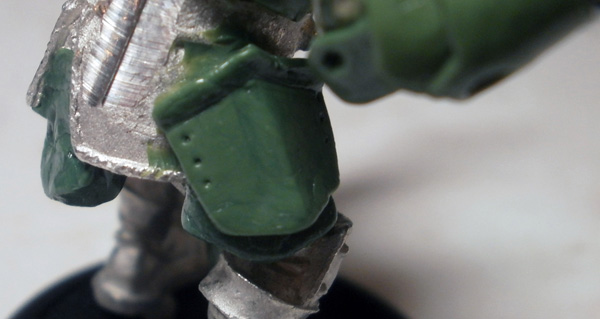
…and then sculpt the actual armor plates on top. The excess support is then cut away.

Here’s the support layer for the skirt…

…and here’s the incredibly bad top layer. I was working in a mad scramble at this point two nights before I left for Templecon (I’m not presenting these in the order I made them, in case you’re wondering), and didn’t have any time to worry about correct cloth folds or smoothing. This was purely about getting something down and calling it done.

Here’s that top tabard layer I discussed.
A few rivets later (but not ALL of the rivets, because I just didn’t have time, hence why there are some poked-in holes on the final model), he was ready for paint.

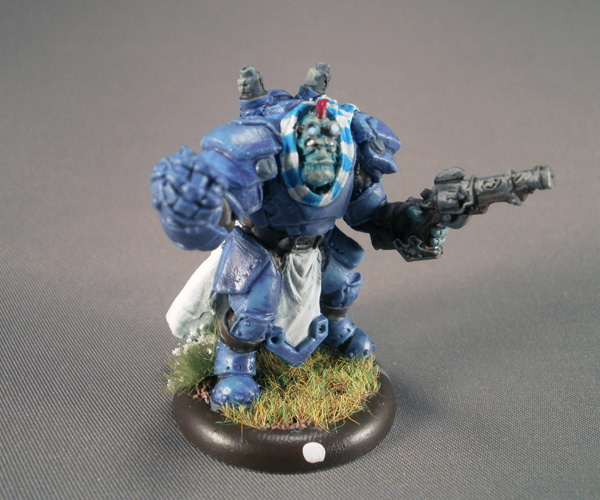


All in all, Berek is probably the worst model of the lot. I just didn’t have the time I needed to make him look right. 🙁
Samuel Watts, Redheaded Stepchild of the Black 13th
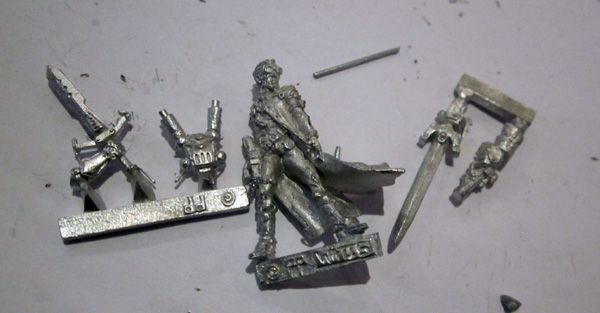
Lynch finally realized what all Cygnar players have known for years: Watts sucks, and doesn’t deserve his place in the Black 13th. He was summarily discharged from active service and booted back to wizard school in a vain attempt to make something of himself.

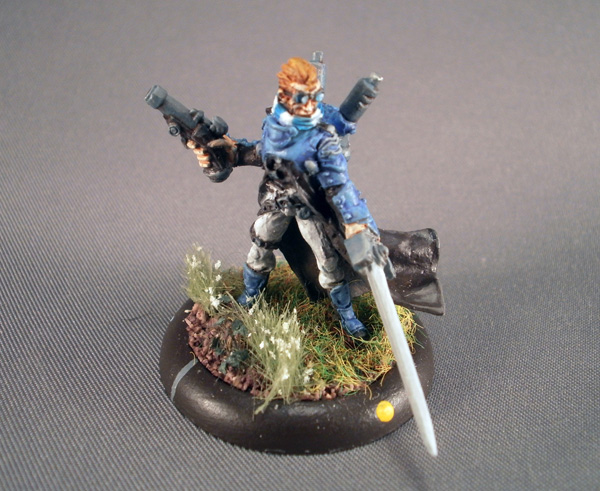
The B13 models take a lot of flak for their scale, and yes, I’ll admit that there are some issues. But seriously, look at that beautiful detailing. I don’t care if he’s half bloody scale if it means a model that looks this good.
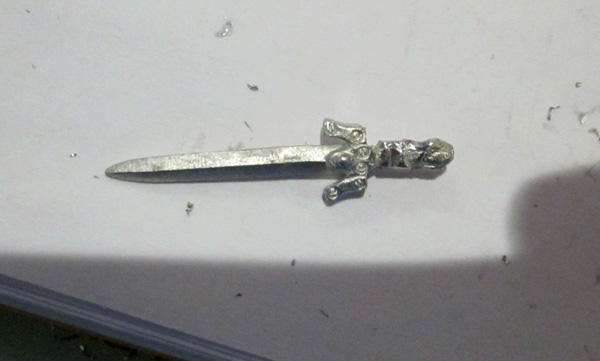
Watts’ armaments were pulled from Julian Hellstrom, the guard captain from the IKRPG model line. He has a nice, simple sword and pistol that I also used to make Creighton above.

Even with the components being out of scale, Watts still looks pretty badass. 🙂

I did my best to keep his extra armor as elegant as what he started with, but given how much of a rush I was in, I didn’t manage much. 🙁

I did my best to gradually increase the scale of the arms up from shoulder to wrist to disguise his monster hands slightly.

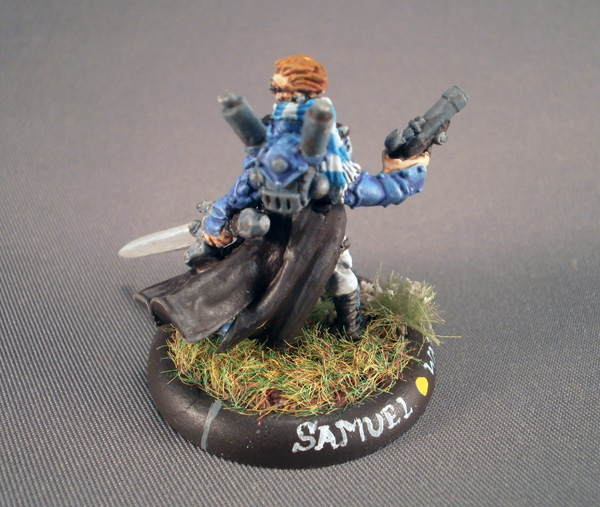

Sammy may be a useless gun mage, but he can cast a fine arcane shield.
Keep up the good work, Sammy Boy.
*tips hat*
Allison Jakes
And now, la pièce de résistance: Allison Jakes. She’s a key part of the theme list and a capable fighter on the field, but with her model not yet released, I had to improvise to find something roughly equivalent in time for Templecon.
Fortunately, I found exactly what I was after– a model that captures the beauty, grace, and martial skill of Cygnar’s favourite ginger.
Ladies and gentlemen, allow me to present the one, the only…
Bloody Allison.
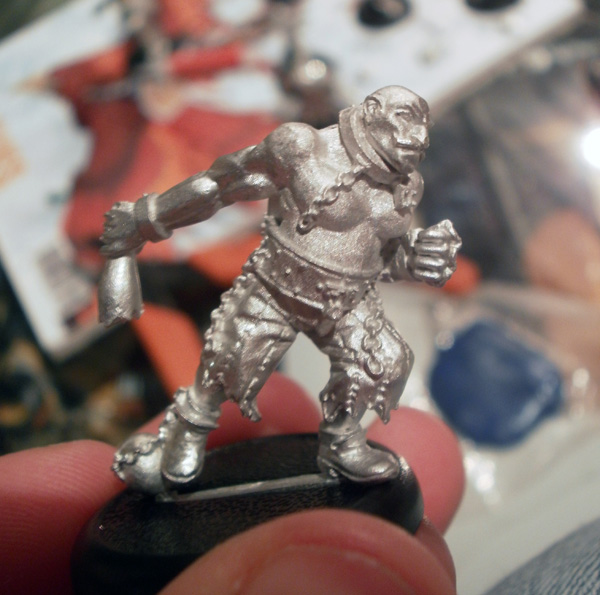


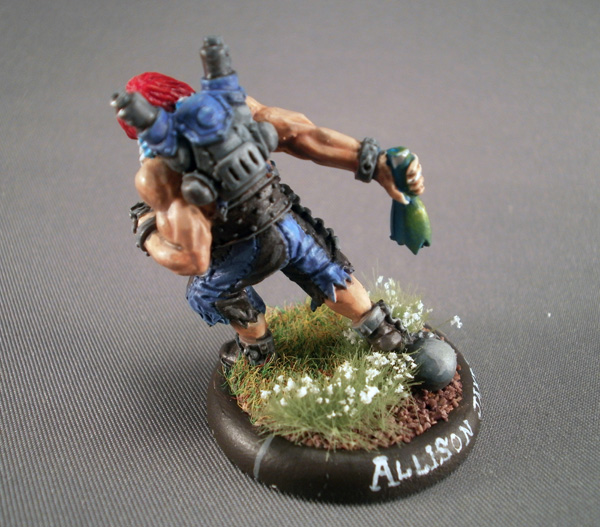
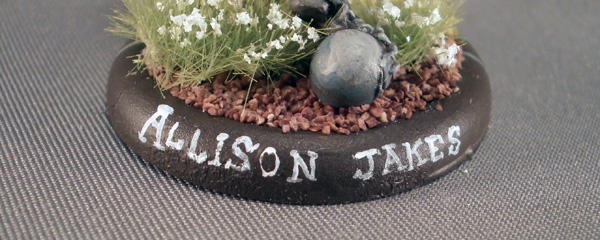
The ressemblence is truly uncanny.

I started this army on the 3rd week of December, lost a week in January, and finished painting Berek Toborg the morning of the convention’s first day. Total time was right around 5 weeks. The conversions are rushed, the paint scheme isn’t at all what I wanted, and the resulting army turned out to be a horrifically cutthroat turn 2 assassination scalpel that, much to my horror, carved a bloody swathe through the casual tables all weekend.
But despite all of its flaws, the army is done, and it’s kind of adorable, and it will enjoy a place of honour collecting dust in the trunk of my car as I move on to armies that are more fun to play.

And while it may not be fun to play, it was incredibly fun to build. Warmachine offers very few opportunities for a bitz box bodgefest, but I’m glad I found an excuse to do it. I spend so much time working on models where I’m trying to craft something that will impress people, but it’s nice sometimes to step back and dial down the expectations a bit.
Sometimes, it’s nice to just dump out a box of parts and commit random acts of adhesion without worrying too much about what it’ll look like at the end.
Sometimes the act of assembly itself is the true reward.
Thus endeth the lesson.

“3rd-Best-Toronto-PG Northblade”
….. Pardon?
It makes more sense when you remember that Chris doesn’t count and Ken is the worst PG ever.
Sweet! Reading this was soooooo much fun. I’ve totally missed your posts on Lost Hemisphere.
…I would actually like to know a bit more about the play of the list, honestly. It looks really interesting.
And I do love the models. I want my own Abigail.
1) Wait for opponent to walk forward
2) Siege + Charger them to death
If they don’t walk forward, Siege + Charger their army to death, wait a turn, then Charger their caster to death.
If you can’t shoot through their army brick, walk the Avenger forward and let it get charged and killed. Then, now that their army is split up, Siege + Charger their caster to death.
For an attrition player like me who usually flat-out refuses to assassinate even when presented the opportunity, this list is the enemy of fun. Devastatingly effective, but 20-minute games really aren’t very entertaining. 🙁
That was a lot of fun.
By the by, Goldstep, who i forced to let me read this aloud to in its entirety, says he thinks the head is a Nyss but we haven’t been able to peg it specifically.
Wow Spud, these are amazing. So sad I missed T-con this year and wasnt able to game vs them. Your orange Legion and custom succubus were one of my favorite armies to face across the table last year. (still have my succubus in my bits box in her baggie)
Btw you may think he is the worst but the Bull based JR is my absolute favorite.