

My sister had some sort of party two weeks ago and my family insisted that I go.
I checked to see if I had D&D or an Infinity event that weekend, but they were both the week before, so I was clear to attend.
“Oh, and make sure to bring a statue of me,” she said. “To go on a cake.”
Kind of a weird request, I thought, but I shrugged and knocked out some sketches. They were going pretty well for the most part, but something in the composition seemed off.
“It looks really weird to have just one person on a cake. The balance isn’t right.”
“Fine,” she huffed. “Throw someone else on there too if you want.”
“Mmkay. Anyone in particular?”
“Ehh.”
“Oooookay then.”

I dug around on her Facebook for some pictures to use as reference. There were a lot of this dude.
“Hey, will this guy be at the party? There’s a lot of reference here for him.”
She thought for a moment.
“I’d have to check, but I think so.”
I was too tired to dig any further, so I shrugged and chose a picture of him in a presentable outfit to use for the statue.
Wires
I wasn’t sure how big a cake person was supposed to be, so I drew a few sizes of stick men on a piece of paper until one looked vaguely correct. The best-looking one turned out to be 75mm tall, so I went with that.

Any good sculpt has to start with an accurate skeleton, so I dug up the armature guide I stole from Patrick Keith five years back and sized it to 75mm in Photoshop. For my sister’s skeleton, I resized it to be proportionally smaller than the male rig– I know that she’s 5’6″, and the guy looked about 6 feet tall, so her skeleton came to 68.5mm.
Usually I’ll use the same male skeleton to sculpt all of my minis regardless of gender simply because it’s hard to tell the difference at a 28mm scale, but since these minis would be over twice that size (and thus, any errors would be much easier to spot), I went to the effort of researching differences between male and female skeletal anatomy and adjusting her armature guide to match. Essentially this leaves her legs the same size as the male figure while reducing the scale of her rib cage and shoulders.

Once I was happy with the two guides, I got out my wire, clippers, and pliers and got to work.
When I sculpt 30mm miniatures I generally make my rigs in two parts:

I’ll initially make the skull, spine, hips, and legs out of one piece of wire that I mount into a cork. Then, once I’ve built a bit of clay over that core, I’ll attach the arms and shoulders as a second piece, using a wad of putty to hold them together.
This setup works well for me because I’ve always had trouble in the past getting both the head and arms attached to the spinal column without creating a massive bulge of wire where everything binds together. However, this type of wire bulge isn’t really a concern at much larger scales, as the wires will be buried under 1/4″ of solid clay, and any extra mass caused by awkward attachment points can easily be hidden.

Since I had that freedom this time around, I decided to try wiring up the skeleton the way you’re “supposed” to, with one piece for each lateral half of the body, and a separate wire for the head. The advantage of this arrangement is that the arms are hard-wired to the skeleton from the outset, which makes it MUCH easier to pose the model at the mounting stage– you don’t have to guess where the arms will end up when they’re attached later on.

Anyway, I bust out my customary 20 gauge galvanized steel wire and use pliers to twist it into shape, essentially “tracing” over the illustration to ensure correct proportions.

Once the three pieces are in good shape, I use another piece of thinner wire (26-gauge copper, I believe..?) to bind them together.

I then repeat the process to create the smaller skeleton.
With the basic structure of the skeletons in place, I need to figure out how to pose them. Simply standing side-by-side would make them MUCH easier to sculpt, but it would be pretty dull, so I look around for something more interesting.

This one seems pretty nice– a good balance of positive and negative space created by the two figures, and it’s the only one I found that really gave them anything to “do” with their hands other than leave them hanging at their sides. I’m not too keen on the weird metal heart dealie, but I figure I can work around it.
All in all, quite a nice two-figure pose.

So I steal it.

I usually mount my armatures to champagne corks to hold while I’m working, but these are far too big, so I went to Michael’s and spent $1.75 on a block of wood. I drill holes for their feet and then mount them in with a bit of white glue.
Fun Fact: My sister’s armature started out 6mm shorter than the male skeleton, but when posing the armatures I bent their feet slightly differently to reflect the high heels I was informed she would be wearing. As a result, her armature’s head ends up sitting only 3mm below his.

I then use a wad of green putty to anchor everything.
Basic Forms
With the skeletons set, it’s time to start adding mass to the figures.

I do all of my scratch-sculpting in Fimo these days, which is an awesome doesn’t-dry-until-you’re-ready-to-bake-it polymer clay. Fimo is awesome, but it’s terrible at sticking to wires, which simply slices right through the soft clay. So to get it to mount, I first wrap the wires in a thin layer of epoxy putty (which has no trouble sticking to metal), and then wrap Fimo around the putty while it’s still soft. The soft putty will then blend slightly with the inner layer of clay and then set after a few hours, keeping both firmly attached and keeping the wire from cutting its way out to the surface.

Wrapping this first layer of putty and clay around the entire figure is my first priority; this doesn’t need to look good at all, but instead simply needs to provide enough coverage to mount the later layers.

Ta-da!

Next, I start bulking out anatomy. Bulk is added one muscle group at a time, with teardrop-shaped clay lumps laid over the model and then blended together with a metal hoe tool.
To help me with this process, I keep a set of anatomy references by DeviantArt user Coelasquid taped to the wall of my sculpting desk at all times– one for general anatomy, and one specific to torso muscles— which I find tremendously helpful for laying out muscle groups over my skeletons.

At this stage the surface quality doesn’t matter one bit; I’m simply trying to put bulk where it’s vaguely supposed to go. I have plenty of time to go back later and work on detail and smoothing.

I really like sculpting butts.
I don’t know why.
It’s… an enigma.

Lady butts follow a different shape, spreading into more of an inverted heart shape to accommodate their wider pelvic bones.
You can see here how the muscle groups get applied– I’ve rolled out the vague form of her shoulder muscles and stuck them onto her back before heading in with a metal tool to blend them into the surrounding mass.

EQUAL OPPORTUNITY BUTT SHOT

At this stage the beginning bulk is looking pretty good, so I start cleaning up specific areas of the model.

The male figure has a respectable Manly Paunch™ that I endeavor to reproduce in clay.
My sister mentions that this area maybe doesn’t need to be rendered quite so faithfully, so I shave a bit off, because I have no artistic integrity.

I don’t bother modeling my sister’s leg muscles, since they’ll be completely obscured by her long party dress. I drop that on now because looking at the model’s bandy chicken legs is starting to hurt my brain.

It takes a few layers to get the volume to something that resembles her photos.

That leaves me a good foundation for the basic body forms; next up, I’ll start roughing out the shapes of their clothing.
Rough Clothing

Some quick theory about how pants work: the human leg in a standing position has concave sections on the back of the leg, the front of the calf, and around the groin. When you put well-fitted pants around that leg, the cloth will closely hug the red tension points in the diagram above, but will sit somewhat loosely over the yellow concave sections. Anywhere the cloth is loose, it will settle into folds. These folds go in two general directions: in areas between two significant tension points, the folds will stretch between those tension points, “pointing” to each one. In areas with only one major local tension point (like the front of the calf), the folds will go perpendicular to the tension point as the cloth is “crunched” upward.

The clothes they’ll be wearing are relatively tight-fitting; they’ll mostly form cylinders around the wider meat bulges, rather than billowing and bunching into complex folds. To render that, I apply clay around the narrower parts to make them almost as wide as the nearest meat bulge– so here, I build the pant cuff by making the area down to the ankle about as wide as the calf.

I lay the clay on in small chunks until the mass looks about right, then blend it into the leg with metal tools.

The same type of “gap-filling” continues up the leg; I fill in the butt crack (*giggle*) as well as the area between the butt and the back of the leg.

On the front of the leg, there will be slight folding as the cloth tents between the knee and the waist. I apply clay here to fill the concave left by the rough anatomy layer.

Cloth stretching between two tension points will always fold in a parabolic curve. Here I’ve applied the first such cloth bunch, which makes an arc from the tension point on the back of the calf to the front of the thigh.

Another one goes down between the back of the calf and the knee.

The bottom of the pant leg only uses one tension point– either the knee or the back of the calf, depending on the side– with the cloth simply dropping into “curtain folds” from there.

Later on, I’ll come back and create bunching on the front of the pant cuff to show where the shoe is pushing the cloth upward.

I use the back edge of a metal shaper tool to press the waistline of the pants into the clay.

One thing to note here that will continue to be a theme throughout the model: the outside leg is MUCH nice-looking than the inside one, because the two figures being so tightly pressed together makes it much harder to get tools into the inner areas. This is only a slight problem on the lower bodies, but will become a minor catastrophe later on once I start working on the torsos (due to the clasped arms held in front).

Speaking of which, let’s start laying out the jacket!

A lot of filler is used at this stage to account for the smoothing effect 3-4 layers of clothing would have over the anatomy stage; the shallow on the lower back gets filled in completely, while any “bumps” in the pelvic to chest area basically become a flat plane.

I use a size 4 round clayshaper to smooth the various clay scraps into each other.
I’m trying at this stage to imagine where the masses need to go, but the lack of arms makes the entire thing look very strange (i.e., it makes both figures’ torsos look much fatter than they actually are), so I decide that it’s time to bulk those out to prevent any further optical ullisions.

As before, I use a layer of green epoxy putty as my base layer over the wire…

…and then cover it with thin sheets of clay.

In my haste to bulk the arms out, I end up making what would later turn out to be an annoying mistake:
Because I linked the two hands together in a straight line from the arms, the clasped hand pose I would later sculpt would end up with a wad of wire and putty underneath that I didn’t have time to remove.
But I didn’t realize this yet, so I just filled it all with putty and clay and ploughed heedlessly ahead.
:/

The arms on the back are much easier than the ones in the front, because the back ones are essentially flat against the other torso, so I didn’t need to worry about rendering the inside. As opposed to the front arms, which require me to bend and twist my tools into weird positions to reach the interior. Blech. >_<

Add clay, smooth, blah blah blah.

I apply a few thin layers of clay to blend the new arm shapes into the torsos.

RANDOM TANGENT: I start to notice around now that the ostensibly smooth wood block I bought is actually not all that smooth. Constantly handling it for a week is making the skin of my left hand a bit raw, so I decid to sand it down. I delicately wrap a plastic bag around the minis and tap it shut on the bottom to keep dust away from the clay, and then do my best with a sanding block for 20ish minutes to get the bumps and grit down to something more manageable.
The end result isn’t perfectly smooth, but it is an improvement.
Next time I’ll know to do this before I start. >_<

I mov around the model at this point doing general cleanup and sectioning off more of the clothing. I define the jacket sleeves and the inside of the lapels, and do some very rough edging on the front of my sister’s dress to see how the cloth patterns would drape over the model.

Next, I look at the hands to figure out how they would work. I initially thought to do a “hand cupped in hand” pose as seen here, but it looks awkward to me, so I make a note to look for alternatives.

This is also the point where I first notice the problem with the hand attachment, though I haven’t yet realized how hard it will be to solve. 🙁
The rough shapes of the male figure’s clothes are looking pretty good, so I move onto my sister’s outfit. I turn the mini around from various angles and compare it to the reference photos I have, adding bulk wherever it’s missing and removing it where it shouldn’t be. Here I’m working on the butt silhouette, which turns out to be too narrow from the side.

There’s a lot less “roughing out” to do on her dress since it’s mainly just a big tube, but I take the time to edge out the dress back and work on her BEEFY BACK MUSCLES a bit. 🙂
The bodies are coming along pretty nicely, so I decide to move on to the last bit that’s still at the skeleton stage– the pretty pretty faces!
Heads

The “skull” on a sculpting armature is rarely actually skull-shaped– rather, it’ll be some variant on a flat plane with eyeballs popping out of it.
Someday I’d like to try working from an actual skull just as a fun exercise, but this time around I just don’t have time to entertain such follies.

So, yeah. I stick a wad of putty down to the flat rectangle, then stick the pre-built eyeballs into the wad. The idea here is that despite the lack of an actual skull for these to sit in, you want them to be at the same separation from each other, height from the shoulders, and distance forward from the base of the neck that they would be if I actually rendered the skull fully. This requires a lot of guesswork while looking at anatomy references, but I think I got them located approximately where they should be.

Once the eyes have cured into place, I get to work building the rest of the head around them. The reason the eyes are done first in a hard-setting medium (instead of adding them with clay like the rest of the model) is to give an immovable reference point that keeps everything else lined up while you work.

The first layers of clay on the head end up approximating the shape and mass of the skull and some of the deeper muscles. Here I define the mouth line as an additional reference to help lay everything else out.

Honestly, I consider just leaving them like this.
The resemblance is uncanny.

Alrighty, let’s start bulking out the skull. Here I’m building the upper and lower jaws with a scrap of putty laid over the mouth.

Next, I build the cheekbones underneath the eyes.

Then the brow.

This all gets blended together and compared to the reference photos to see where additional mass is needed.

I fill in a basic neck to help me figure out the size and placement of the chin, and bulk out the top of the head to give it a more natural rounded shape.

Some more work on the neck.
The general form at this stage looks okay, but everything is too flat, lined up more or less perfectly with the protrusion of the eyes. Comparing it against the reference photos, I know I need to add more mass to correct this, bringing the mouth and brow further out from the eyes.

I start with the mouth, building the upper lip out until it sits far enough forward from the skull.

A little worm shape fills in the lower jaw.

And then a tiny bead is used to make his chin.

The brow is next, needing to jut out about as far as the mouth.

A smaller worm shape is laid on to make up the upper lip, and a second (not pictured) for the lower lip.

Smoothing it all out, I keep comparing to my reference photos to ensure that things are where they should be.

Eyelids!
I really hate doing these. They’re super fiddly. >_<

I use an Angle Chisel clayshaper to smooth the eyelids into the rest of the face and define the open eye shape.

Cheek meat is added with a pair of small blobs.

The cheeks are then continued down around the mouth.

Everything’s a bit crooked and needs a lot of smoothing, but we’re not quite at that stage of nitpicking yet– first we have to add the last major facial feature: the nose.
I start by just creating the bridge and blending it into the face. I have to be careful not to push too far and wreck the fiddly eyelids.

Next I create the bulb of the nose by adding another tiny clay bit.

The face is coming along pretty well, but the neck and shoulders need some bulking up. Here I attach pieces that will complete the jawline and blend into the neck.

These bits fill out the neck at the base and let it blend into the shoulders.

Turning the model around and comparing it to the reference pictures, the brow still sits too far back, so I add another thin strip to give it more definition.

We’re getting close. 🙂

Rudimentary shirt collar!

His cheeks are a bit too small and pinched, so I add thin strips on top to make them larger and blend them more into the side of his head.

I also go back and widen the eyes, as I’m getting a bit leery of his devious squint.
I’M ONTO YOU, SMALL CLAY FIGURINE! I KNOW YOU’RE JUDGING ME FROM BEHIND YOUR DEAD GREEN EYES!
@______@

This is an ear.

This is an ear attached to a head.
*shrug*

After a bit of smoothing work, I think he’s looking pretty darn good. 🙂

Alrighty… all of those steps I just went through?
It’s time to do them again.
Ugh.
>_<
SUPER FAST-FORWARD MODE ENGAGE

Mouth bit!

Eyelids!

Cheekbones and more mouth bit!

AHHHHH FROGPERSON
@_@

Brow!

Smooth mouth bit!

More brow!

Mouth shape!
Cheeks!

Upper lip!

Lower lip! Also neck!
AHHHHHH SALAMANDER PERSON
@_@

This is seriously creepy
WHY DID I TAKE SO MANY PICTURES OF THIS STAGE

Cheeks! Vertical bit of cheeks around mouth! Bridge of nose!

Nose bulb!
More upper lip!

Lower lip!
Jawline!

More nose!
Cheek again, apparently!

Ear!

TA-DAAAAAAAAAAA!
Wow, that one went way faster. Super Fast-Forward Mode is awesome! 😀

Alrighty, the faces are looking pretty good, so let’s bulk in the hair. To keep it from being too poofy, I apply his hair in very thin strips.

As with everything else, I blend the strips together with a metal tool and smooth with a clayshaper.
Overall it looks pretty good, except that it rises up too high in the back.

To fix this, I just give him a bit of a shave with a knife.

Ta-da!
I’m saving the fine detail of their hair for the very end– if I sculpt it now, I know I’ll just bump it as I work on the rest of the model and have to re-do the parts I smush.

Sandy’s hair goes on in the same way, except that I want hers to have a bit of volume, so I use bigger clay chunks.

Her hairdo is going to be fairly complicated, but like with the other figure I don’t want to do it yet in case I damage it later.
So, while we wait for that…
Back to the Hands!
I’ve had some time to think about the hand post while I worked on the heads, and decide on intertwined fingers:

This feels like a better fit for the rest of the pose.

To model this, I first start by turning his hand lump into separate fingers. I make a cut in the middle of the hand, which is then extended to the end of the hand.

I then cut the resulting halves into quarters, and round the fingers a bit with a clayshaper to give them some definition.

To make room for the other set of fingers, I use a metal tool to spread the dude’s fingers apart, then clean up again with a clayshaper.

Thin clay snakes are laid between his fingers, then connected to the back of her hand.

Twenty minutes of smoothing later, the hands look pretty good…
…from the top. From the bottom, they still have that awful wad of connective mass that I can’t get rid of now and will ultimately forget to remove after baking in my mad scramble to finish.
Ah well.
Hopefully nobody will ever turn the figures upside-down. >_<

His other hand is pretty straightforward, and follows the same process. I first turn the hand block into separate fingers…

…then separate and round them. I’ll come back later and add the thumb… not sure why I skipped that at this point..?
While I was working on this hand, I noticed that Sandy’s silhouette on the mini doesn’t quite match her reference photos; I made her waistline too flatly vertical.

To correct this, I simply shear some mass off the torso and waist, and apply it to the top of her hip.

Some quick surface repair later, it looks much better. 🙂
Clothing Detail
Alrighty, from here on out we’re going to be jumping all over the place to patch up whatever random bits and pieces need correction and detailing.

The dude’s silhouette has some issues too, with his shoulders looking too narrow and slumped. I add quite a bit of extra clay to make them taller and wider.
(ALSO: At some point I apparently gave him a shirt and tie. Also, apparently I detailed her dress? I don’t have pics of either of those things. I can only conclude that they were done by burglars who broke into my apartment and did some sculpting while they were looking around to determine if anything I own has monetary value)
(SPOILER: they left empty-handed)

Continuing the theme of “Spud finally actually looks at the reference photo and makes the jacket the way it’s supposed to be”, I add some clay to shorten the Shirt Aperture.
Which, shut up, is totally a real term.

The back goes down too far, so I trim it. The sides also bulge out too far, so I trim those too.

Which requires some cleanup afterward, but gives him a much snappier overall silhouette. 🙂

The Pants Aperture is, as it turns out, not a thing at all, so I fill it in.

I later go back and add buttons. I don’t remember if there are photos of that step, so I’ll just mention it now.

Happy with the shape of the jacket, I add lapels and the top edge of the suit vest.

And then the other lapel!
I’m not sure why this required a sideways photo.

After adding the thumb, it becomes clear that his left hand is too flat, so I bulge the back of the hand out quite a bit. This makes for a much more natural pose.

His suit is looking relatively complete, so the only major item left to do is the folding and billowing of her dress.

To create these folds, I employ a large number of clay snakes.
PICTURED: One clay snake.

Snakes are draped onto the dress, smushed into the surface with metal tools, and then smoothed by rolling a #4 Round clayshaper over them for a really long time until the surface is super-smooth.

The dress folds follow the same general logic that we covered in the pants section– because of the billowing nature of the skirt, the only real tension point that applies to the cloth is her waist and butt. Thus, all of the folds will start small at the tight portion at the top and grow larger toward the bottom.

Stopping the folds at her butt visually communicates the relative areas of tight and flowing cloth.
YAY LEARNING!

So, yeah. Lots more folds are added.
Oh, something I forgot to mention: that blue stuff! That’s a sheet of craft foam I stuck under the bottom of Sandy’s dress. When I mounted the models onto the wood block their feet were raised slightly above the surface. This wasn’t a big deal for the dude, but it was going to result in the dress dropping too low (essentially, through the floor plane). The blue foam is just a temporarily raised floor to help shape the skirt, which will be removed before baking.

I spend two entire nights just rolling the folds out into a smooth, silky surface.
Roll roll roll.
Roll roll.
Roll.
…
… roll roll.

Yaaaay! 😀
I add a few extra parabolic folds toward the top to show the cloth sagging slightly between the tension points at the front and back of the waist.

Alrighty, we’re on the home stretch now. Sandy’s right hand is still an oval blob at this stage, so I add some extra clay to fill it out.

As with the previous hand-behind-figure’s-back, this one looks weirdly flat on my first attempt, so I add some extra clay to make the knuckles rise up higher, arching the hand.

Once smoothed together, this looks much more natural. 🙂

And then the process you’ve seen three times– divide, round…

…splay, clean up.

As I’m looking around for more details to clean up, I notice that the pants in the reference photos hav a sharp pleat on the front, so I add a pair of clay snakes to create those.

First I smooth them into the rest of the pants…

…and then I shift them around to match the waviness of the existing cloth folds.

Matching pleats are also added on the back.

Sandy mentioned that she’ll be wearing our grandmother’s pearl necklace to the party, so I modeled that on. I’m going to admit here that I took a bit of a lazy shortcut– I should’ve spent more time creating and adding individual clay dots for each pearl, but I was running out of days before the event and got a bit impatient, so I just strung a clay snake around her neck and divided it up with the tip of a knife.

This has two problems– first, not all the divisions are the same size. And second, these don’t really look very round.
But I’m out of time and have other things to worry about, so I just leave it.
And that’s why I suck. ;_;

With nearly all of the figures’ detailing complete, it’s finally time to detail the hair. I consult my multitude of reference photos to figure out how and where his hair parts and flows, and then use an Angle Chisel clayshaper to delicately press lines into the hair blob following the same pattern.

I give him slightly mussed bangs for that devil-may-care rebel look all the kids are so crazy about these days.
Also pictured here: Ladyhair! Sandy told me to do her hair “like in the pictures”, but when I look at said pictures…

…they’re either from a low frontal angle that shows nothing, or a side angle with her bloody arm in the way. >_<
When I ask her to find me a picture of some other person on Google Image Search with the same hairdo for me to use as reference, she declines, and simply offers a description:
“It’ll just be ‘up’.”
Gee, thanks. That is, like, super helpful.
So, whatever. What I can make out in the side photo makes it look vaguely like a basket weave, so I just dig around until I found a picture of someone with vaguely similar-looking basket weave hair.
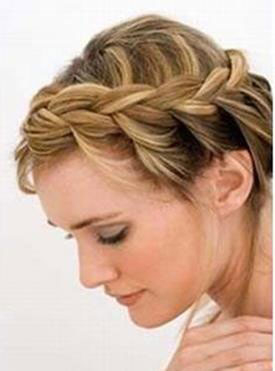
Meh. She declined her opportunity for anything more precise.

Using that picture as my guide, I press the braids into Sandy’s hair lump to get the overall pattern linked together.

The front is the only part I can clearly see in the reference photos, so I model that how it appears there, with braid chunks that I assume weave into each other on the top of the head.

Once I have the lumps all weaving together, I delicately add strands to them.
Oh, and that weird worm-looking thing on the back there? That’s her Hair Dealie:
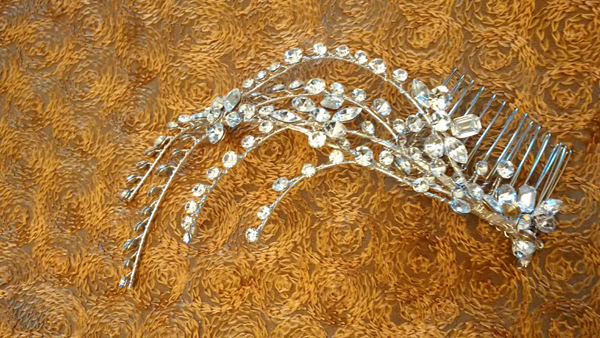
I don’t know what it is, but my mom told me to include it. So I throw it on the back, figuring I’d paint it silver and then create the gems with Water Effects later on.

At this point I do a final cleanup and detailing sweep, and find that I’ve completely neglected to turn the guy’s wooden clogs into actual shoes.

There we go. Much better!

Oh, and I forgot to add a seam on the pants, so I add it with a Flat clayshaper.
And… that’s pretty much it.

Hey look, it’s those buttons I mentioned earlier!
SEE THE BUTTONS?
I TOTALLY MADE BUTTONS!
…
…alrighty.

Here’s the back.

I remove the craft foam spacer so that it won’t turn into a puddle of toxic sludge when baking.
Sculpting Complete!


Paint & Mounting & Stuff
And then I painted them.

Regular readers will not be shocked to hear a familiar assessment:
“Ehh, the paint’s fine. I don’t consider myself much of a painter.”

The figures need to be on a base, but I don’t have time to sculpt one, so I go back to Michael’s and buy this vaguely classy-looking grooved wooden circle.
Here you can see the circles of white craft foam I traced around it for reasons that will be apparent in a moment.

I was told to incorporate Mackenzie plaid into the figures, so I wrap this ribbon that has been provided to me around the base. But the ribbon is too wide for the narrow base, so I need to create a “booster seat” from the above-pictured white foam to make it all fit.

Once that’s all rigged up, I stick them down to their base.
Now, usually when I show you nicely-shot pictures at the end of an article, it’s of the fully completed model I’ve just walked you through. But today, I’m going to show you pictures of a very very nearly completed model, because there is one more detail that I was unable to add at the time I was photographing these in my lightbox: Base Scatter.

See, the white base I’ve found is just a bit too big, as a result it looks a tad empty with the figures standing on it. I fixed this the day of the party by gluing cedar and Tiny White Flowers to the base, which made it look awesome.

But as I said, these finishing touches weren’t in place until the day of the party, at which point I no longer had a decent camera or lighting. As such, all of the pretty photos below will lack the sort-of-necessary greenery, and will therefore look a bit odd.
Try to ignore it, I guess. :/
Pretty Pretty Painted Pictures


All Done!
So, yeah. All in all, I think the cake statues came out pretty nicely.

The party was okay. There were cupcakes and a lot of drunk people and an 18-month-old baby that, and I’m not kidding here, danced for four solid hours.
Afterward I drove the dancing baby home.
It was pretty cool.
Model looks ok, hope the stats are decent…
Seriously excellent work.
My man! You rock, Spud.
Now I want a cupcake
I want a cupcake too. Gluten free please.
Absolutely lovely!