
Infinity models are very, very pretty.
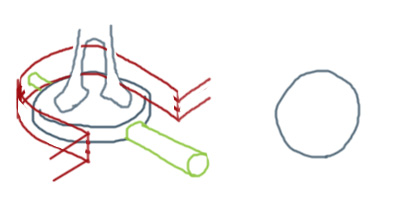
However, they are also very, very brittle, both because they’re sculpted to be a bit thinner than the “heroic” scale minis most other companies produce, and because a couple of the factions are saddled further by a veritable forest of these f@#$ing things:

Ugh.
They’re extremely frustrating to attach (the ones on heads are side-mounted with a reasonably wide contact point, but most back antennae have only a teensy-tiny peg and hole to hold them in), and when you do finally manage to get them on, they snap off at the lightest touch.
This makes gameplay difficult enough (though you eventually figure out where each model’s safe “gripping position” is), but storage is downright impossible. I’ve traditionally rigged up model storage out of hand-cut furniture foam, making space for minis in one of two ways:

However, neither of these methods works for an Infinity mini. If you lie the model down, the antennae are crushed immediately. If you stand the model up, you snag them on the foam on entry and exit. I tried a few different foam arrangements when I first bought my Space Men, but they were all a total failure, so I looked for other solutions.
What quickly became obvious was that I needed to secure the models by the only point where they were guaranteed not to have fragile bits: the bases. However, this is pretty challenging– to hold a model only by its base, you either need to grip it from underneath (using either magnets of velcro), run something through it, or squeeze it from the top. I’ve seen really inconsistent results from other people’s attempts at magnetizing bases in the past, so I set about brainstorming how to make the other methods work.
I went through three or four different designs, but eventually I came up with two methods I thought might work:
With this design, there would be a series of slots with brass rods protruding from the ends, and each model’s base would have a corresponding hole at the correct height. To put a model in its place, you would slide it over that row’s rod; the rod pulls it down to the bottom of the box and stops it from wobbling, while the slot stops it from wiggling back and forth.
Unfortunately, while I kind of liked this one in theory, it required a LOT of very precise drilling that I didn’t feel confident I’d be able to do, so I scrapped it.

This is the design I eventually went with. A wide slot allows the base to slide into it, while a slightly narrower slot set right on top of it holds the base down from the edges of the top face.The narrow slot still needs to be fairly wide to accommodate models’ feet, but this shouldn’t be a problem as long as I only overlap by 1-2mm on either side.
This one still required a fair amount of precise work to build, but I felt like it was more manageable to make precise jigsaw cuts than to drill precise rod holes, so I picked up a storage box and went ahead with the plan.
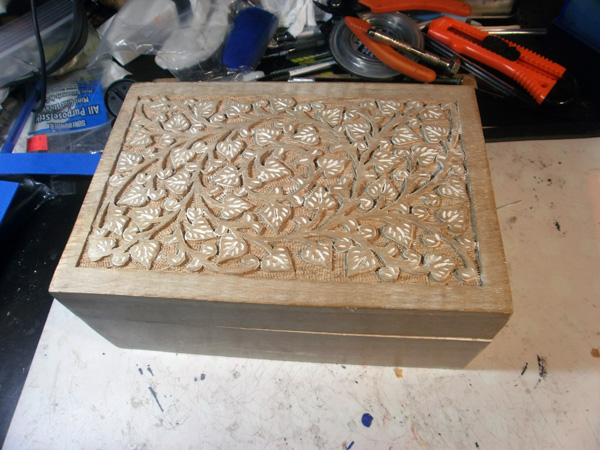
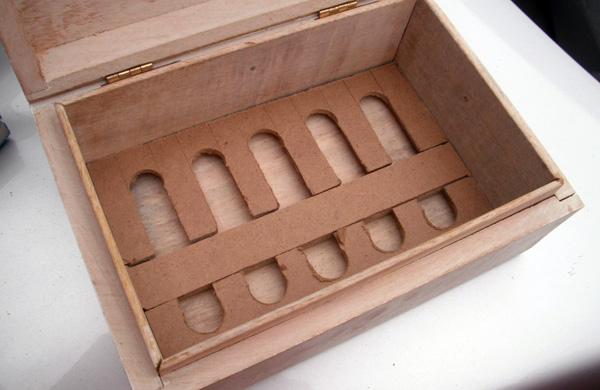
Here’s the box I chose. It comes from Homesense, echoes one of the main colours of my army, and is OH SO VERY PRETTY.
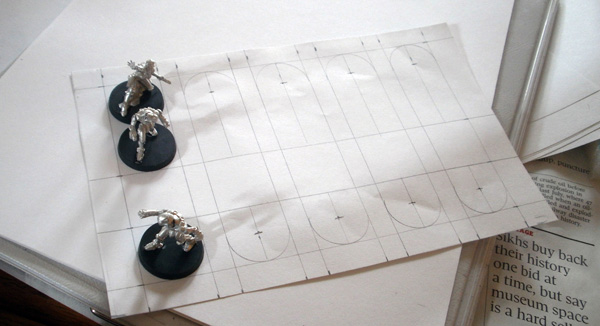
Once I had the box and its dimensions, it took me almost two hours to carefully plot out the size and relative positions of the storage rows.

This layout would give me room for 15 models, which was plenty enough for all the models I owned at this point. And naturally, limited space would prevent me from buying additional models, so it made sound financial sense as well.
This self-control mechanism has proven to be somewhat less than effective in practice.
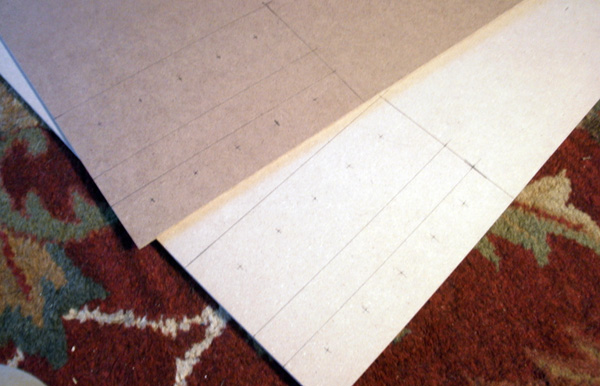
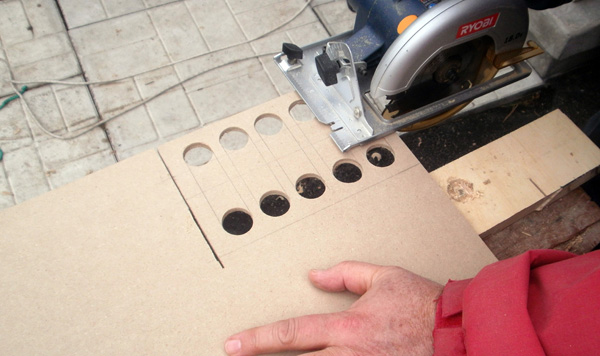
Once I had the designs, I superimposed the drawing over my two MDF sheets (one in 1/4″ MDF for the wide slots, and one in 1/8″ MDF for the narrow ones) and transferred the center of each rounded end where I would be drilling, as well as the cut-out area in the middle where models would drop in and out.
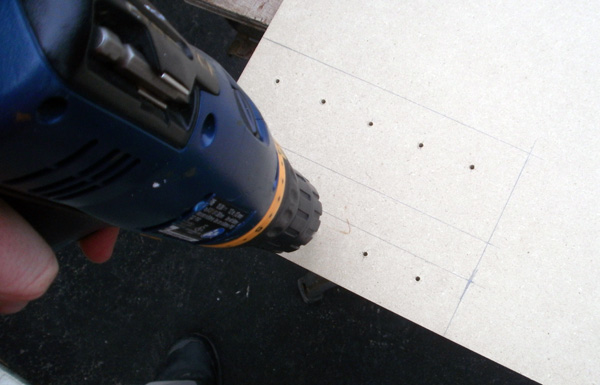
I pre-drilled each hole with a small bit to ensure precision.
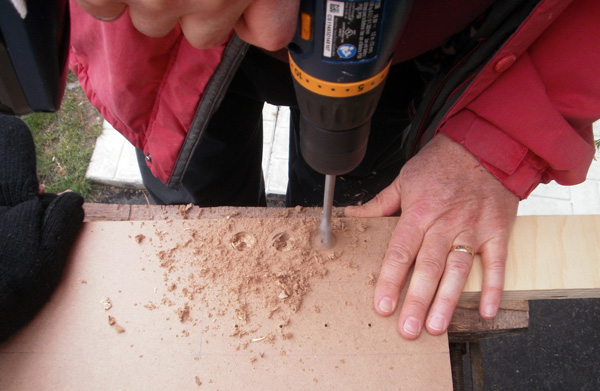
Fun fact: Spud hates power tools because sawdust is gross. On the other hand, FatherOfSpud loves them, and was a construction contractor in a former life, so he’s far more accurate with them that Spud could ever hope to be.
Thus, both parties agreed that it would be better if the majority of the wood modification duties were farmed out to more capable hands.
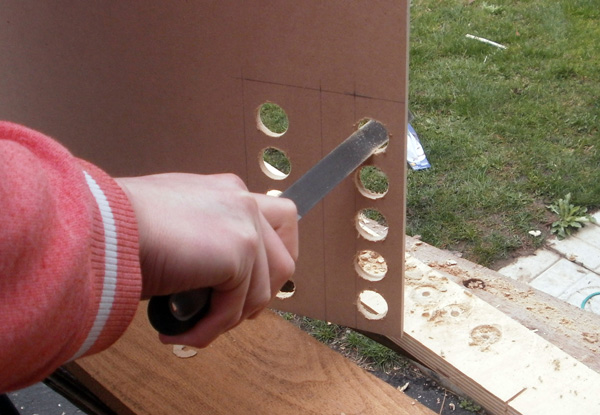
These holes would make up the ends of each row. Once they were drilled, Spud cleaned them out with a file.
In order to turn holes into slots, the pieces between them would need to be removed.
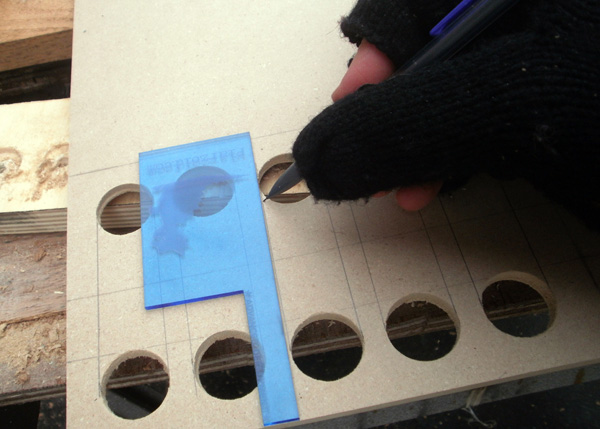
As you can see, Spud used a stray piece of plastic someone had inconsiderately foisted upon him to draw the lines connecting the edges of each hole.
FatherOfSpud then got to cutting.
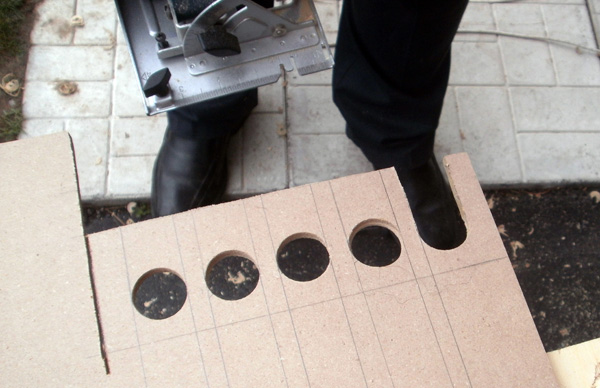
First the two rows were cut apart, and then the row edges were taken out with a circular saw.
SUCCESS!
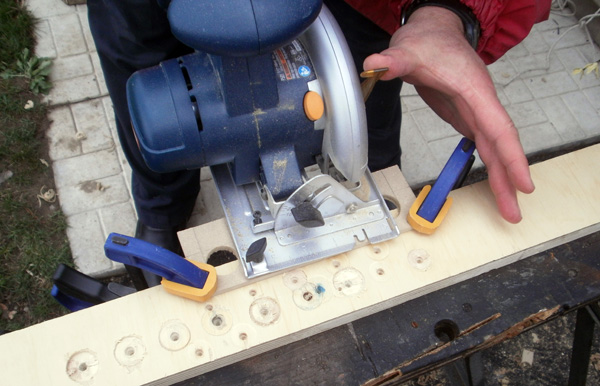
The side with two slots was easier to cut because there was more meat to work with; on this side FatherOfSpud could barely to see what he was working on under the saw’s deck, but managed the task nonetheless.
It really bears repeating that Spud would not have achieved the same result here. Spud has been trying to operate circular saws since early adolescence and the attempts have always ended in fire and blood.
Here’s the second layer with the narrower slots.
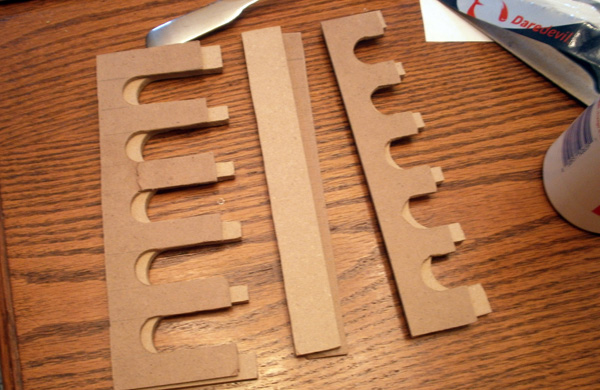
And here are all the bits and pieces. The wide slots are done in the thicker MDF to let the top layer rise high enough to clear the bases.
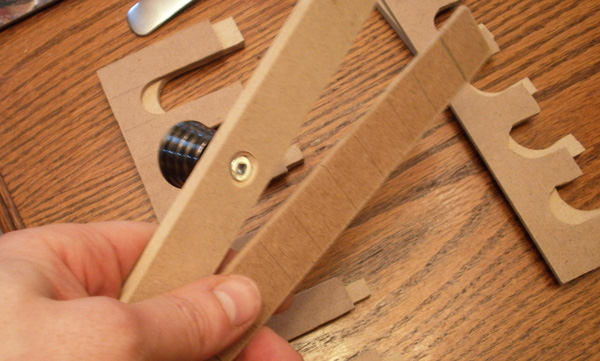
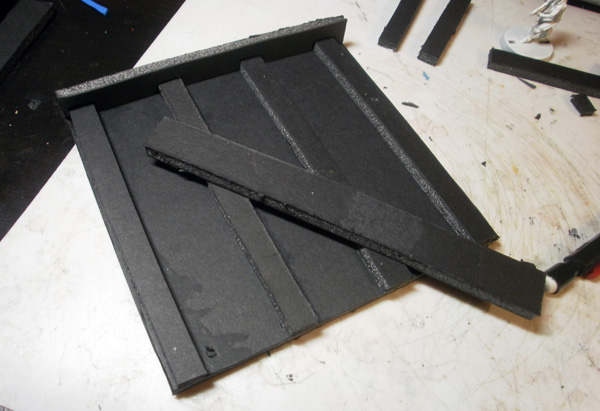
The center strips were kept and turned into a stopper. Here Spud has put a drawer pull in the center of the thicker piece and sunk the screw head, and then finally used the other strip to hide the hardware from view. Because is a classy m**********r.
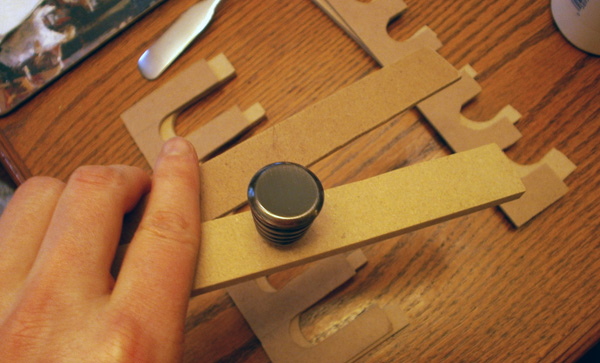
CLASSY.

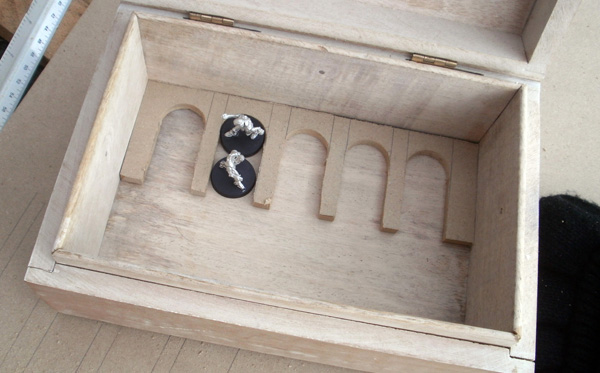
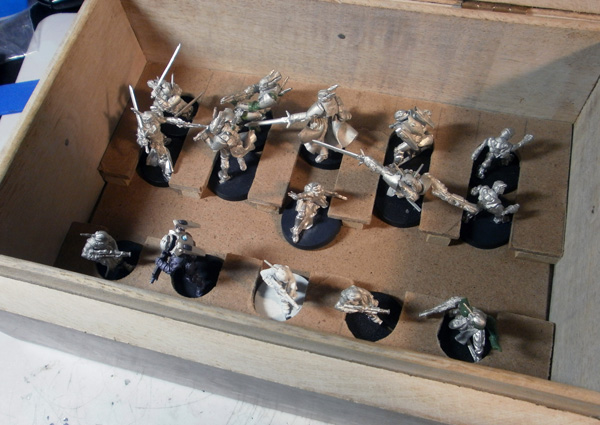
Everything was then glued together with Weld Bond glue, and the models were slid into place.
When the models are in storage or in transit, the stopper is left in place. This keeps the models from sliding into the center area, keeping them nice and snug within their slots. The slots themselves keep the models from jostling back and forth, and the top slot stops them from rocking.
And thus, the models are held firmly in place without needing to touch their Brittle Spanish Antennae.
SUCCESS!
To put models in and out, the stopper is lifted out; this allows models to slide into the “aisle”, where they can move in and out of their rows.
The box above took about 4 hours to design and assemble, and the result is absolutely perfect for my needs. However, as previously mentioned, my initial “Ehh, I probably won’t buy more models” plan turned out to be pretty naïve, and I quickly expanded to the point where I needed more room. I bought a second copy of the same box, and set about making a base-hugging slot system for it.
However, at this point I no longer had access to FatherOfSpud’s tools, so I needed to come up with something that used the softer, knife-cuttable materials I had at my apartment.
Which basically consists of, “crazy amounts of foamcore, craft foam, and insulation foam”.
ApartmentOfSpud is basically a Foamporium.
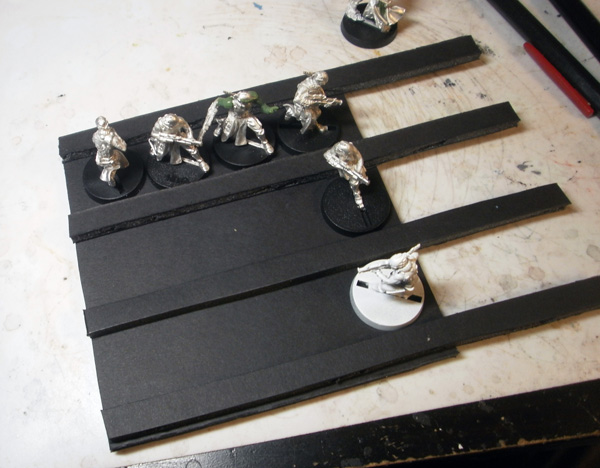
The foam version of the storage system used the same principle at the wood version, but had a simpler construction– rather than cutting out Menorah-shaped rows of slots, I just cut out rectangles of foamcore and glued them at the correct distance from each other.
Then, a fatter set of strips was glued down on top to pull down on the bases, and we were done.
Completion time for the foamcore version: about an hour. 🙂
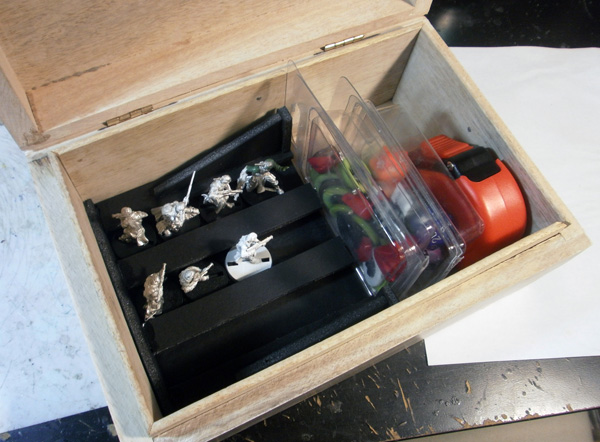
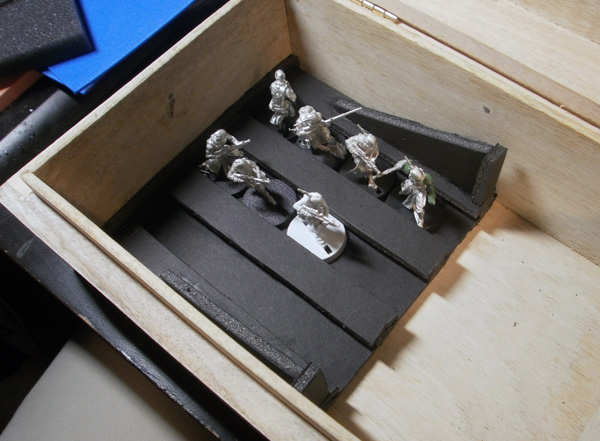
The upright angled pieces are there to hold my accessories (tokens, dice, etc) in place. I keep them in a pair of blister packs, and the uprights push against them to keep them from falling on my models.
Between these two cases, I have storage space for 27 models. Given that I currently have 23 models and no plans to buy any more for this army, I’m confident that this will suffice in perpetuity.
Shut up, I’m serious this time.
Oooh, very nice. I remember your furniture foam solution from posts on Lost Hemisphere, and I always wanted to try it. In the end though I got lazy and went the magnetised base + metal toolbox route. It works fairly well for small base troops, but anything bigger and with stuff sticking over the base is a right pain, and tends to slide around.
I like this new approach. But what happens if you get something on a larger base? 😉
Has Spud or Father of Spud considered using a jigsaw instead of a circular saw? It would eliminate the blind cutting…
FatherOfSpud was mistreating his jigsaw, and it came crying to Spud for protection, begging for sanctuary within the Foamporium where FatherOfSpud couldn’t hurt it anymore.
Spud, being pure of heart, swore that it didn’t need to be scared anymore and escorted the poor little thing to its new Forever Home.
Those look fantastic! Also, I’m glad you found a use for the plastic that was so inconsiderably forced upon you.
I’ve long sought a solution to the grip-it-by-the-husk… er… -base problem. This certainly gives me some new ideas.
You are productive in ways I’ll never be…