
Saturday

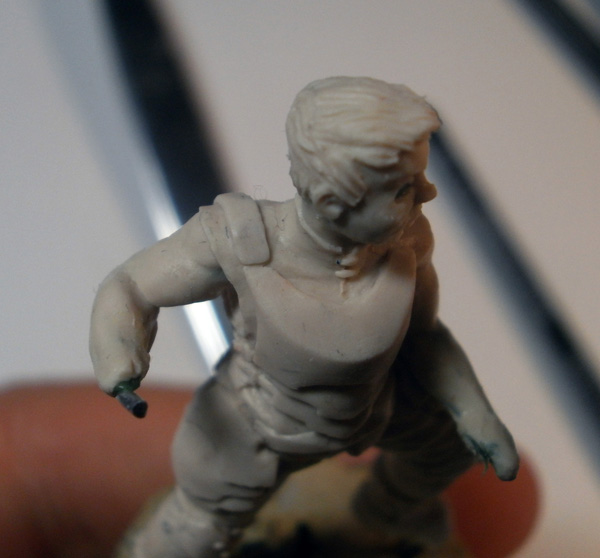
It was painful to apply clay over the thighs, as they were the most distinctive part of this particular character’s musculature. I crossed my fingers and hoped her bulk was still communicated through the layers of cloth and steel.
It is a minor tragedy every time I need to cover up layers that I like, and the pain of each is experienced as if for the first time.
Let it never be said that I have not suffered for my art.
;_;

The upper plate that I had created for the boots ended up working reasonably well on the kneepad as well, and at that point, I had sort of tripped into a visual motif that could be replicated elsewhere. So as I moved up to the hip plates, I shrugged and decided to shape them in a similar manner.
Facebooks!

Saturday 1pm: Got off to a bit of a late start this morning because it turns out that my bed is comfy, but the hip plates are now on. I realized that I’m not going to be able to finish the lower body armour at this point since there’s no wire support right now for the loincloth and I don’t want to risk bumping anything when I add it, so I’ll probably leave that area incomplete for now and then add the loincloth and associated plates after the model’s been baked.
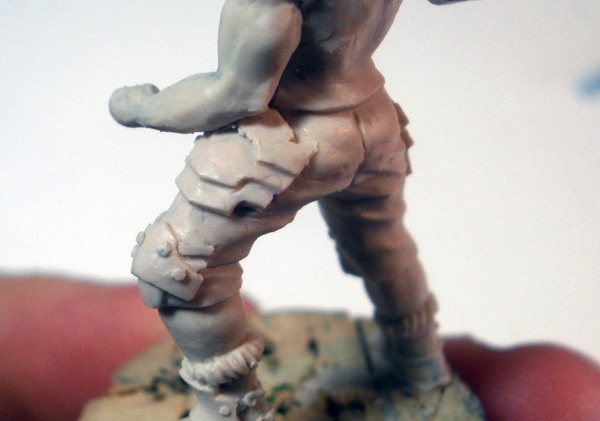
Copying the plates to the left leg was a bit more challenging, as the arm got in the way pretty badly. In this shot you might be able to spot how I initially made the hip plates much shorter than the initial set on the right set, which required me to smush the clay back into a blob, add some more at the top, and then re-sculpt the divisions between the plates.
The freedom to undo and redo like that is the primary selling point of Fimo. You don’t have to settle for bad details just because your putty is halfway hardened– you can keep working at something until it’s actually done right. 🙂

Once I was happy with the two sets of hip plates, I added a belt to hang them from. Ordinarily I would sculpt loops and buckles onto this piece, but given that it would be almost entirely covered in thick plates at the end, I left it as a simple band.
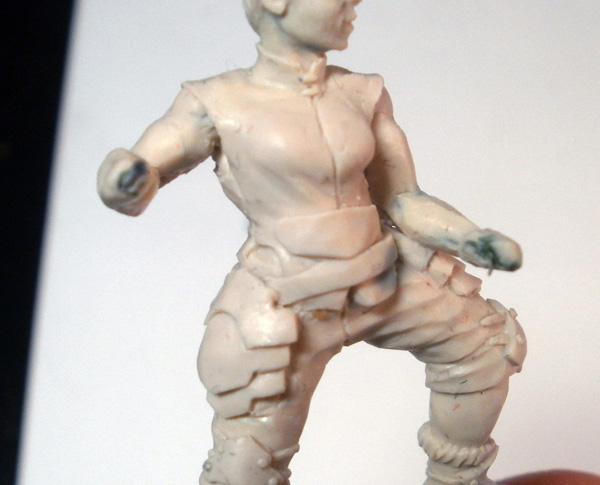
First belly plate!

Second belly plate!
I decided to keep the visual vocabulary of the lower body plates going, which led me to reshape the bottom of each of these plates into a small angled outcropping.
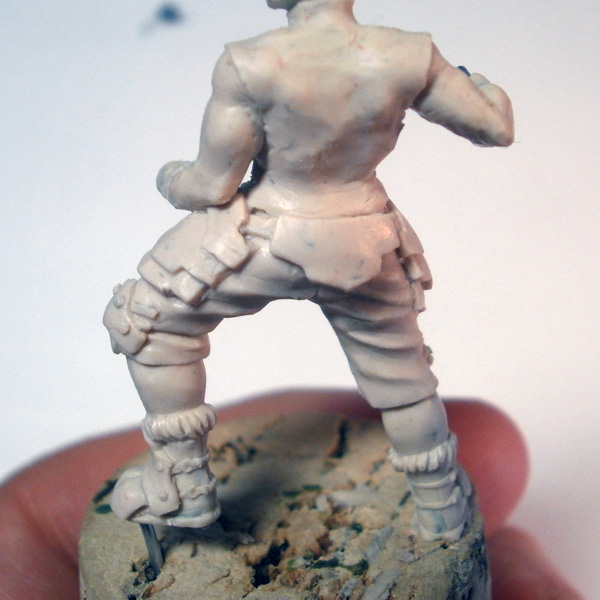
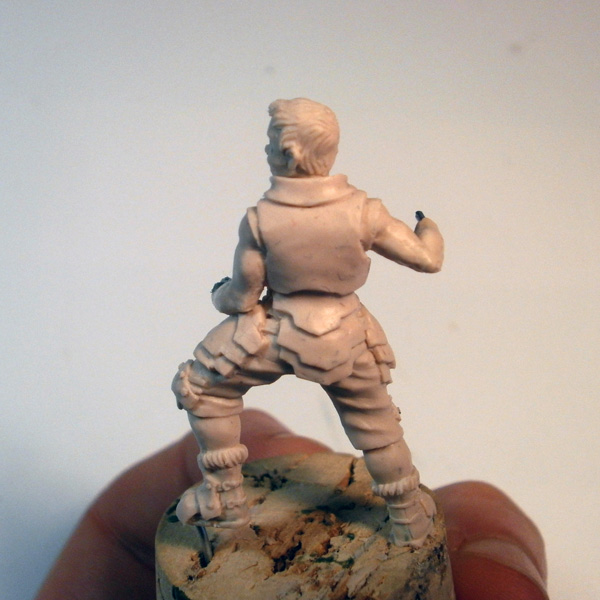
Before going any higher on the front, I turned to the back to add butt and lower back plates.

The lowest such plate hangs below the crotch of the pants, so I had to reinforce it with some extra material underneath.

I really like the way the plate on the lower back curves inward– the same sort of dual curvature that I liked on the ankle piece.
Yes, Spud is easily amused by simple shapes.
DON’T JUDGE ME
Facebooks!

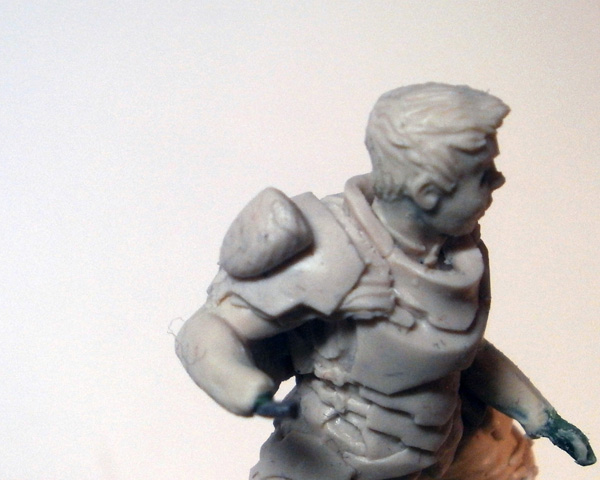
Saturday 3pm: Midsection plates (front). She’s really starting to come together now! 🙂
I made an artistic decision to leave her sides unarmored, purely so that the various layers (skin, cloth, leather rigging, and plating) can all be seen at once. This would certainly be a very bad idea in real life, but given that my personal aesthetic already discards helmets because bare heads are more fun to sculpt, I don’t think this increases the suspension of disbelief too much.

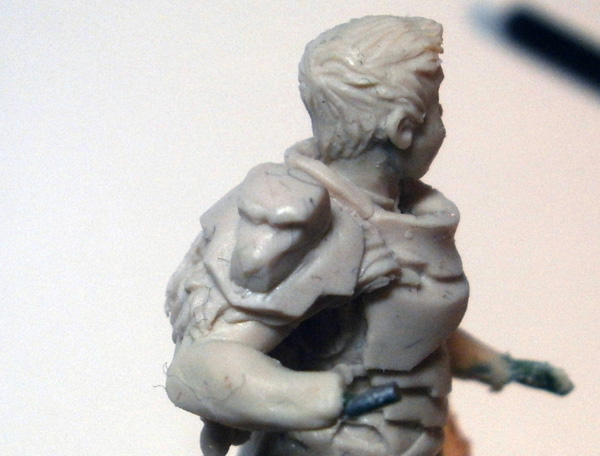
Saturday 3pm: Midsection plates (back). As I work through the different plates, I’m giving some thought to how each one attaches; the two butt plates are part of her belt, while the concave lower back plate (as well as the two belly plates on the front) will hang from the breastplate.
Yes, it’s important to plan all of this out– knowing which pieces attach to which other ones tells you where to put straps and rivets.
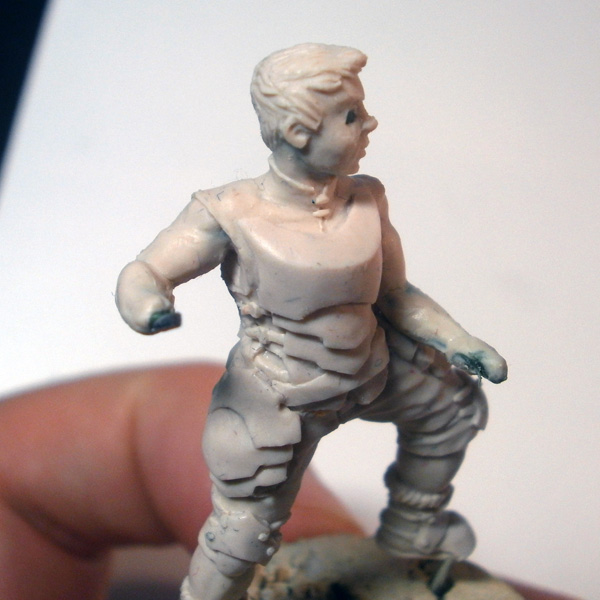
I created some straps to hold the lower back and belly plates together, and then laid on the forms for her breastplate.
Next, I added material for the back plate. I didn’t spend much time on the back piece because one of the next steps would involve completely smothering it with a fur shawl.

Next I started adding the gorget. This part was kind of a nightmare to set up, because it was going to be a thin strip of freestanding clay with no support behind it; I wanted to leave the neck largely open to show the neck of the tunic underneath. I do this type of thing on a lot of my models, and it’s probably just sculptor’s vanity– I guess I like to leave traces of my lower layers visible past the higher ones so that people can appreciate the work I’ve done.
Maybe if they see that, finally they will love me.
…
…maybe?
;_;
Facebooks!

Friday 5pm: Added the breastplate and gorget. The gorget is proving to be fairly challenging to shape, as there’s no structure behind it to hold it up. I’m hoping to use the extra mass of the fur mantle to reinforce it and allow me to go back and clean up some of the wobbly parts…
Back plate. It’s horribly asymmetrical, but given the amount of clay that’s about to go down on top of it, it really doesn’t matter. It’s there as a thickness marker so that the shawl sits in the right spot, and little else.
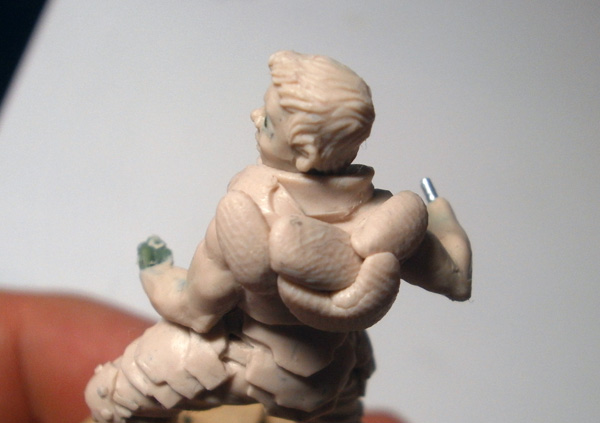
The shawl was going to be a thick, shaggy triangle of fur that anchored on both sides vaguely around the collarbone. The back required a lot of clay to create the needed volume, but even this wasn’t an excuse to apply one huge blob– as always, it was put together with a fusion of many small chunks.

I smushed these pieces together to get an idea of where the shawl would end on every edge. It hangs much lower on the left side because she wears a huge asymmetrical shoulder pad there, which requires some padding to keep it off her skin.

Hopefully that will give me enough material.

On the left side I wanted to leave her beefy arm exposed, so the shawl was kept tightly confined to the space over her armour.

Once I was happy with the general shape and thickness of the shawl, I started the tedious task of creating the fur texture. This was done entirely with an Angle Chisel clayshaper; I would dig the tip in just underneath the “fur spike” above, and then draw it down and back a short distance.
Rinse, repeat.
Fur is often suggested as a simple texture for beginners (“lay out a sheet of Green Stuff, wet it, then stab it hundreds of times with a pin”), and there definitely are ways to get a reasonable result for minimal effort. However, if your goal is quality, then there’s no trick to make the job blow by– you really do need to just sit there and delicately work every little detail with all the care and patience you would afford to the face or hands.
It’s boring as all hell and takes forever, but it’s the only way to end up with a texture you can really be proud of.
Facebooks!

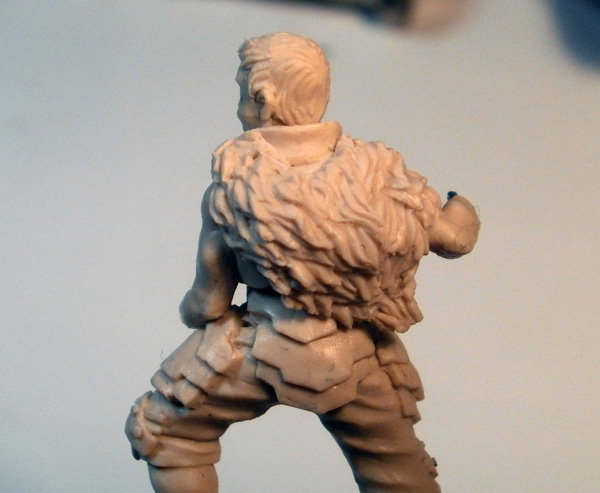
Saturday 8:30pm: Fur mantle (front). The mantle leans more toward the right side to provide padding for the large shoulderpad that will sit there.

Saturday 8:30pm: Fur mantle (back). Sooooooo tired of swoopy fur chunks. >_< The mantle was originally going to hang a bit lower, but I decided that I liked the plates on the back and wanted to leave them visible.
Once the mantle was roughed out (I would later go back and clean up every single fur chunk), I applied some material to make up the shoulder pad.

More material was piled on, and then I smoothed everything out.
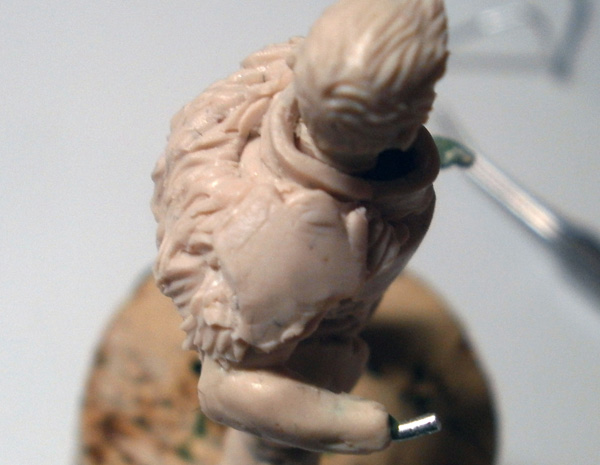
And then the path was cleared for… the Engoatening.
Goat head!
The horns were rolled out as tapered clay snakes on my vinyl mat, and pre-curled before being lifted onto the model.

It was quite difficult to get these attacked to the head and then smoothed out– there wasn’t much supporting them on the front-most part of the curl, so they were quite wobbly and slide around a lot while I was working on them.
Facebooks!

Saturday 10:30pm: THE RAM LIVES!
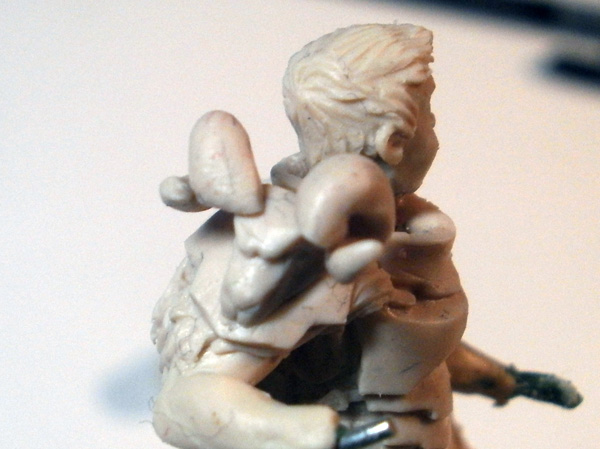
This was actually a huge pain in the ass to sculpt, as it’s a big wad of wiggly clay with no support anywhere within it; as a result, it would constantly lean and slide away from wherever I was working. I *think* I got it back to roughly the center of the shoulder plate, but if I had something like this to do again, I would definitely bake the model first and then add the head afterward with wires dropped in for support.
Facebooks!

Saturday 10:30pm: And with that, the main body is more or less done. 🙂 There’s still a fur loincloth still to be added, but that will happen after baking so that I don’t damage anything while sinking the necessary wires.
Despite my gloomy prediction from an hour ago, I’m now thinking that there might actually be a way for me to get this mostly finished before I have to leave at noon tomorrow. It will all depend on whether I can finish the hammer tonight; if I can, it is theoretically possible for me to sculpt the hands tomorrow morning.
(Damn you Dan, filling my pliable brainmeats with foolish hopes… *shakes fist*)

Back shot of the model with the various layers all coming into shape. I’m really pleased with how it’s turning out. 🙂
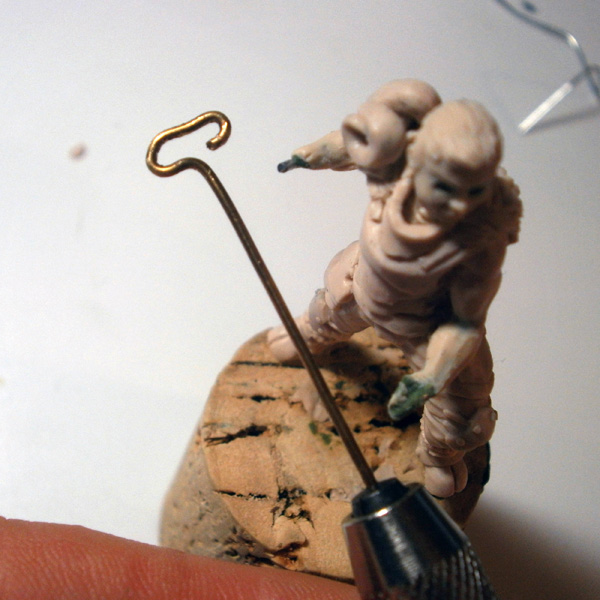
With my newfound resolve to sorta-finish the model by the end of the weekend, I got to work creating her weapon before bed on Saturday. Her sledgehammer would be created around its own (much simpler) armature, composed of a twisted length of brass rod.

As always, putty was wrapped around the metal to allow the clay to adhere.

Her hammer’s head takes the shape of a charging ram, with its nose down and horns raised. Using my design sketch as a reference, I applied clay over the metal and putty in the approximate shape I had laid out.

This turned out to be pretty fast to detail. My original design had called for a simple round attachment point to transition the hammer head to the haft, but when I was working on it I realized that it was the perfect position to add some tucked-in Goat Feet to give it the appearance of flying through the air mid-headbutt.
Totally better this way. 😀

I wasn’t confident in my ability to add a layer of putty AND a layer of clay around the haft and have the end result come out smooth, so I opted to do it with only a single putty layer. I rolled out a putty snake of the appropriate length and diameter and pressed it around the brass rod.

I did what I could to smooth it out. The result was… kind of a reinforcement of why I use clay these days. :/

I used a knife to press a spiral grip pattern into the putty, and then added some tiny clay strips to the top and bottom of the grip.
Facebooks!

Sunday 1am: Hammer done-ish. Probably the last update for tonight. Going to spend some time cleaning up the lines on the head and haft, both of which are a bit wobbly at this stage.
“Name me ten old man characters in fantasy and sci-fi. Now name me three old women. The second list was a lot harder, wasn’t it?”
Much harder.
I came up with Zhaan from Farscape (actress was 47 when the show started), McGonagall from Harry Potter, and Ripley (Weaver was 30 when they filmed Alien, and nearly 50 for Alien 4).
Thin pickings.
This is freakin’ amazing. If/when you get casts made, definitely count me in.
Her underlying physique is conveyed very well; I think you nailed your goal of “fantasy armored muscle pixie”. The hair cut does a lot to solidify that. The fur on her cloak is phenomenal – as a painter, I hate it when texture is phoned in. I just as tedious to paint each strand (I imagine, never having sculpted fur), but the effect is incredible when done. Bravo for taking the time to do it. Also, the ram on the hammer is one of my favorite parts, along with the thigh armor.
Do you have any plans to try your hand at a bust? I think you’d have a lot of fun in that kind of exercise, both academically (muscle, structure) and artistically (conveying character with only the head as the medium).
Holy Crap, Spud! I love to read your stuff but 7 pages at once… is there any way you can post shorter installments? Even if you write it all up at once I’d rather get a page a day over a week than what you’re currently doing. I haven’t even made it all the way through your last post yet (the orange one) even though it was really interesting. Please? Think of the children!
Actually, the length of the articles hasn’t increased that much– I average about 7,000 words, and this one is only a bit longer at 10,000.
The only real change that happened with the sudden appearance of pages (which I added to the blog in September) is that I’m now trying to give people a mechanism to remember their place in case they need to come back and finish later. As opposed to before, when I forced people to wade through 7,000 words all on one gigantic page.
So *actually* this is me being a super nice guy.
You’re welcome. 😛
As for releasing in installments, I’ll probably never do that. I personally can’t stand consuming any sort of entertainment in delayed chunks– for example, I only watch TV shows once they’ve been cancelled. When I start a story, a movie, a show, or whatever else, I want to do it knowing that I will be able to finish the entire thing at whatever pace fits my own schedule.
So, yeah. I hate it when installments are foisted upon me, and so I would never do that to all of you nice people.
<3
You’re my new hero!
I’ve been hunting for non-ridiculous female minis since 1990. I’ve managed to find a few in all this time. Not nearly as many as I would have liked. They all had things wrong with them. Whether their poses made them look like they were holding their bladders, or it looked like the sculptor simply glued two bb’s to the chest of the model to make breasts, or they looked fine, and then I realized they weren’t wearing trousers.
Later in life, I learned to sculpt things like pants and shirts on to the models myself.
Sir, you have created a masterpiece! If you ever create copies and would like one painted up, I would consider working on this model a true honour.
P.S. Have you let your inspirational subject know about this? She’d probably be thrilled on the quality, and I think this would make her day
Yours most sincerely, Robert
54mm is a scale people game in. Just saying…