

Welcome back!
Today we’re talking about the only good thing that currently exists in the world: the chibi Foreign Company I put together over the first three months of 2020. In Part 1, I complained about how a global pandemic is hurting my feelings, and then droned on for 8,000 words about how I made the first three (and honestly, probably the easiest three) models in the army. In this installment, I’ll move on to some slightly more complex models with actual, yaknow, faces.
As with the first installment, the writeups in this article will contain a lot of generic text that describes common steps that are repeated between all or most of the ten models I made. So anywhere you see text wrapped in
you can be confident that the text is likely something you’ve read before that can be skipped right over.
Alrighty, enough preamble. ON WITH THE SCULPTING!
The Professional
Avicenna was a bit of a challenge to work on right off the bat because as far as I’ve been able to determine, this is the best photo we’ve ever received of her concept dossier:

*squints*
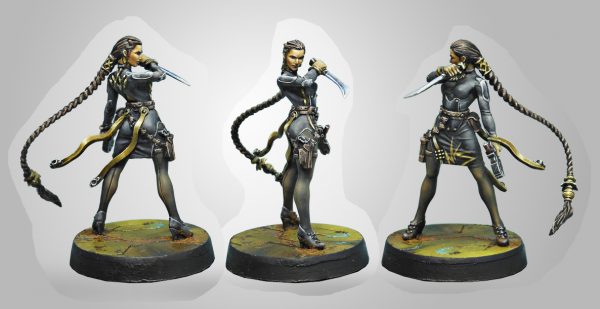
Fortunately, I was able to get most of what I needed from some decent-resolution photos of the studio model. However, there are some minor elements that are a bit hard to make out from these images, so if anybody has some clearer shots of the dossier, please put them in a time machine and send them back to January Spud.
Thanks!

Chibi falls under a lot of the same principles that drive cartooning and caricature– you’re trying to look at the character and pull out specific features to over-emphasize in the costume and personality. In the case of Avicenna, this boiled down to:
- Competent doctor
- Hair for days
- Not a white person
When I originally started drawing my concepts for the army, I drew the characters with no noses, or at most, the slightest suggestion of a nose. However, I found that not including noses on the characters made it really difficult to portray the different ethnicities of the helmetless characters in the army. After doing a bunch of trial sketches, I settled on an approach where models would have a fairly large nose bump, but it would be featureless (no nostrils) and blended into the surrounding cheeks. This kept the overall feeling of abstraction I was going for, while still giving me the tools to emphasize different facial features on different models.
We’ll get into it more a bit further down, but the short version is that my models have noses because Avicenna’s concept sketch looked weird without one.
Avicenna’s pose is very much on the comedy end of the continuum– she’s disdainfully looking off at a wounded soldier off to the side, sighing, and snapping on a surgical glove. 🙂


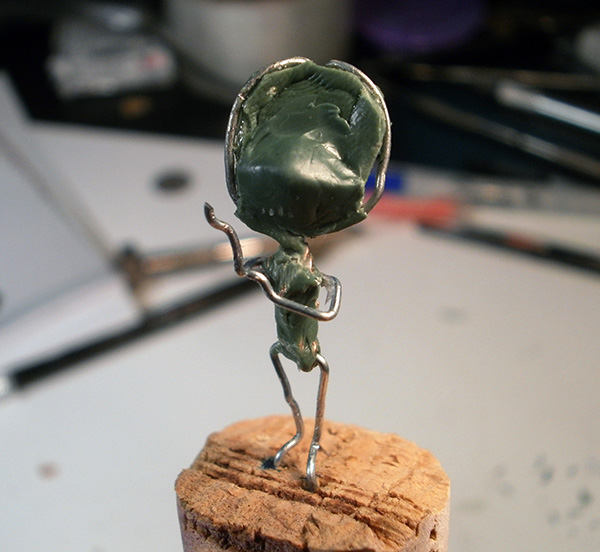
The first layer of Fimo is immediately applied directly over the still-soft putty. Once again, it’s pressed into place using metal sculpting tools; clean surfaces aren’t terribly important at this point, since many layers will be going on top.
Clay is added to the model in shreds and slabs to arrive at the desired thickness for each part. At this stage I’m still working entirely with metal tools, as the ability to quickly jam bits of clay together is far more important at this stage than getting clean surfaces. You don’t need very much clay to bulk out an arm or a leg, but the sheer size of chibi heads mean that they’ll invariably require huge amounts of clay to be stuck on.


And now: HOW TO MAKE BUTTS.
Step 1: Apply the butt pies

Step 2: Make the pies into a butt.
This concludes the two-part series, HOW TO MAKE BUTTS.

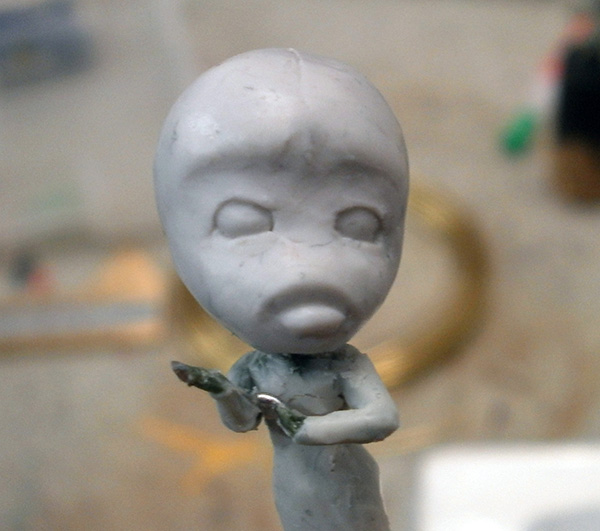
After building the requisite bean shape for the head, I start the face by pressing circles for the eyes using a piece of brass tubing. I then use a metal tool to fine-tune the eye shape with a flatter bottom, and dig a small amount of material out of the edges of the resulting eye shape.
On a normal-scale head, the bottom of the eyes would fall vertically on the center line of the head; with a chibi model you want to make the cranium proportionally larger to make the models look more child-like (which, like… does everyone know that babies have different head proportions? Because they do. The tops of their heads are way bigger, which results in their eyes being lower on their face. Chibis usually borrow that proportion, as it’s a cheat code to force the observer’s brain to activate “DAWWWWW SO CUTE” circuitry against its will).

The mouth barrel is built up by laying down clay snakes above and below the mouth…

…and then blending them into the surrounding face. Note that these aren’t the lips yet– they’re the meat that the lips will later sit on top of.

The eyes are given a more expressive shape by laying clay on the top and bottom of the eye. These will go in different positions depending on the facial expression you’re trying to convey.
In Avicenna’s case, the facial expression I’m generally veering toward is a slightly more bemused variant on… well, this. 😛
The clay bits are then blended into the face to form eyelids.

The same process is used to slowly build out other areas of the face, including the eyelids, the eyebrows, the cheeks, and the jowls around the mouth. Go find yourself a creepy diagram of facial muscles if you aren’t familiar with where the masses for each of those goes.
Avicenna’s face ends up taking me a fair bit of work to slowly develop; my first attempt isn’t expressing the attitude I wanted, but it’ll take me a while to figure out exactly what the problem is. That’s one of the quirks of the human brain– we’re all hard-wired to know what a face looks like, and we’re hyper-tuned to notice and reject faces that are almost but not quite right. So you can instinctively recognize that “there is a problem”, but figuring out specifically what the problem is and how to solve it is not part of that evolutionary wiring.
As a sculptor, that means that you spend a lot of time working on partially-built faces that your brain wants you to run away from in terror.
You’ll, ah… you’ll want to suppress those urges. That’s lesson one. ~_~

I have some elements of the desired expression here– the slightly concerned eyebrows, the mouth dimpled onto on one side, and the slightly suspicious raised lower eyelids. However, overall the expression isn’t really gelling yet.

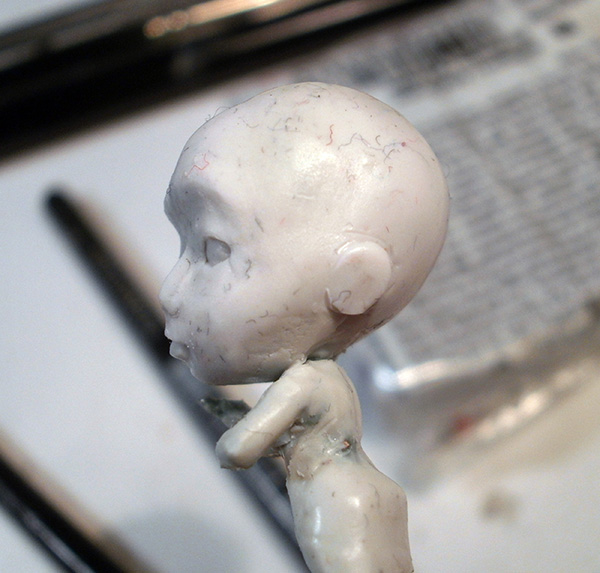
To give myself some more time to ponder that situation, I take a few minutes to build the nose.
A blob is planted in the center of the face to create the main bump of the nose, and then that bump is heavily blended in every direction, leaving just the suggestion of the bulb and the bridge.
In Avicenna’s case, I gave her a slightly longer bridge to convey her middle eastern ethnicity; it doesn’t look like much here, but on later Caucasian models, the bridge will end somewhere around the bottom of the eyes.
It’s a subtle detail, but it helps the army to feel a bit more varied. 🙂
To create ears, a blob of clay is cut in half (to ensure equal size on both sides) and stuck down in line with the eyes, about 2/3 of the way toward the back of the head. The blob is blended with a hard edge on the top, back, and bottom, but is smoothed flush going toward the face.
I didn’t get a good picture of it here, but I apply very simplified detailing inside the ear with a round clayshaper; you can see some pictures of it a bit later on.

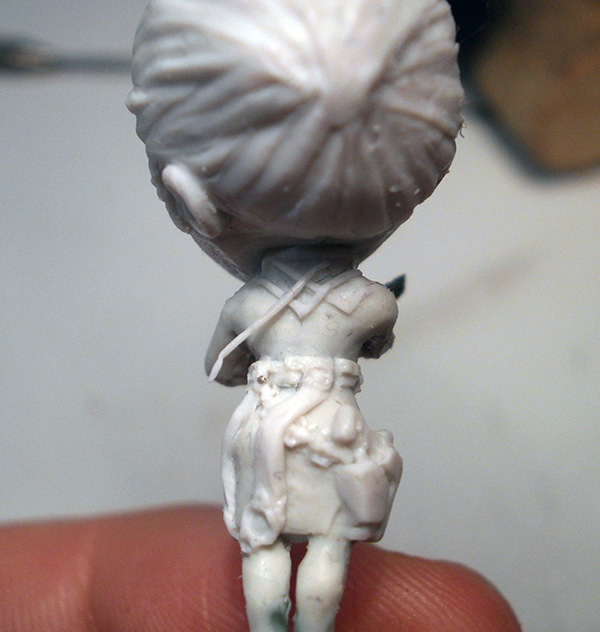
The foundation of the model’s hair is applied with long, parallel strips that follow the direction of the hairstyle.
In Avicenna’s case, her hair largely flows from front to back, and is then pulled tight and tied into an impractically long braid.

I join the clay strips partially together with a metal tool, but I don’t blend them flat– instead, I form them into a hills-and-valleys texture to show the direction of the hair.

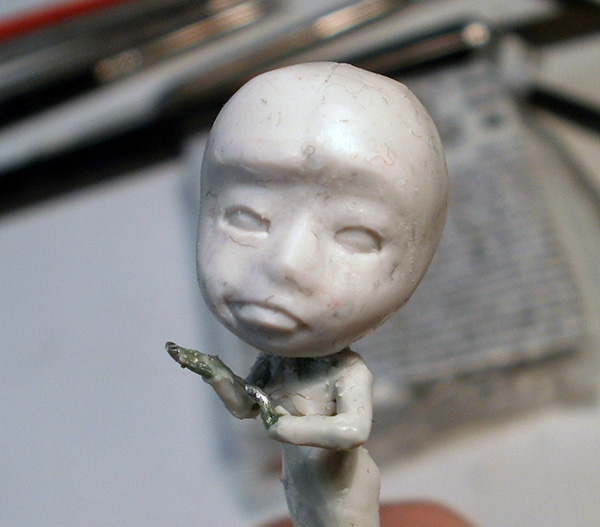
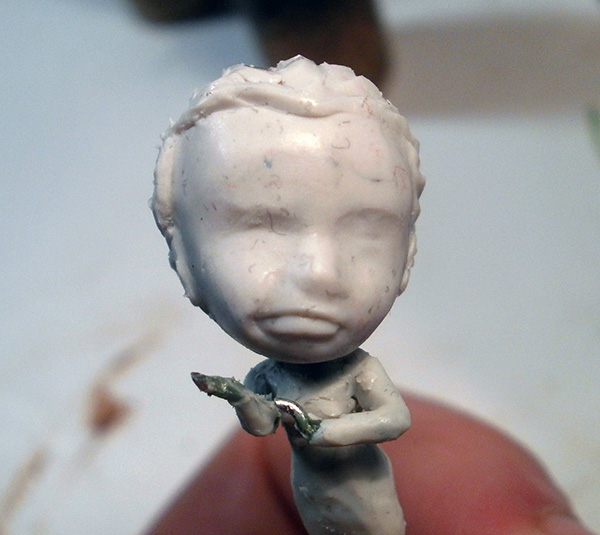
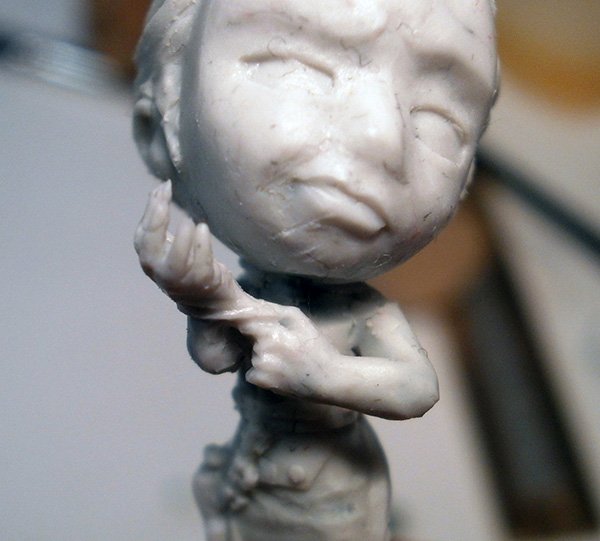
Back to the face! After continually trying and failing to fix Avicenna’s facial expression, I realize that part of the problem is that I didn’t build the masses right– her eyes are too sunken in, and need to be pushed outward.
Also I did a s*** job on the eye shapes, but let’s pretend that the lack of material was the bigger issue… 😛

Somehow this is worse. So, so much worse. @_@
This time around, I spend some time making sure that there’s enough mass where it’s needed– I connect the brows to the bridge of her nose, and bring her cheeks and the eye sockets further forward.

What you’re looking at is “slightly under-blended clay on the bottoms of the eyes”.
What your brain thinks you’re looking at is “lady with the skin flayed off under her eyes”.
I’m just sorry enough to apologize, but not quite sorry enough to remove the picture.
I’m… medium sorry.

I keep working on the face for quite a while. This second pass is going better in that it actually looks vaguely like a human being, but nailing down the specific facial expression is giving me a lot of trouble.
However, this is the kind of trouble I actually really enjoy– playing around with facial expressions is very fun for me, and I find the experimentation of, “Maybe push this muscle a bit over here… no, not quite right, maybe to here instead” to be really engaging.
So, I’m not there yet, but I’m having fun picking at it. ^_^
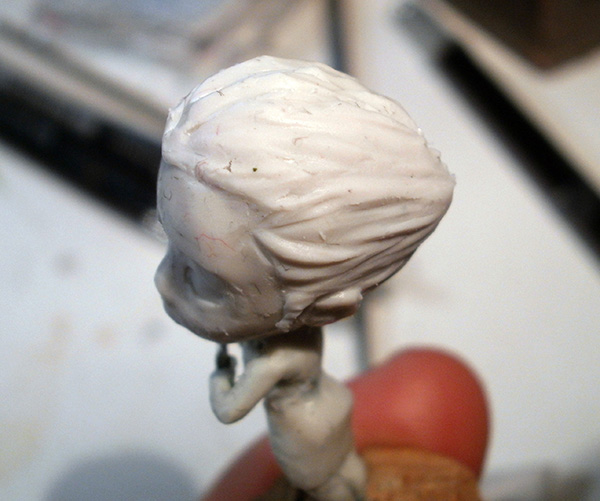
I take a break from the face to let the ideas simmer in my brainmeats, and move to detailing the hair as a change of pace. I use clayshapers to break up the even trenches and rises, making them narrower and making masses from one rise blend into the next row over. The direction of the hair continues to flow mostly front-to-back, but I pull some more complex areas like the way the temples flow into a triangle straight from the studio model.
I’m not really inventing anything new here; I’m just trying to be a competent and respectful mimic. 🙂
So, weird observation: I don’t think I have any pictures of the early stages of building Avicenna’s outfit? Like, the volumes of the skirt, or the front flap, or her pocketed belt. I’m pretty sure I took the pictures, but the camera I’m using has this annoying file naming scheme that goes “current date + image number today”, but it bases the image number on files that it can currently see on the SD card. Sooooo, if I empty the card midway through the day, it starts over from “1”. Which means that if I take pictures off multiple times in one day (which I do quite often), I have to be very careful not to overwrite the older pictures with the newer ones.
Which… I apparently clicked incorrectly at least once, because I’m definitely missing files.
*sigh*
Anyway, here’s her nearly-complete holstered pistol. I guess go look at the process for a different model if you want to know how it was built, because the details of this one are lost to time. ;_;

I guess we can pick up from here. *shrug*
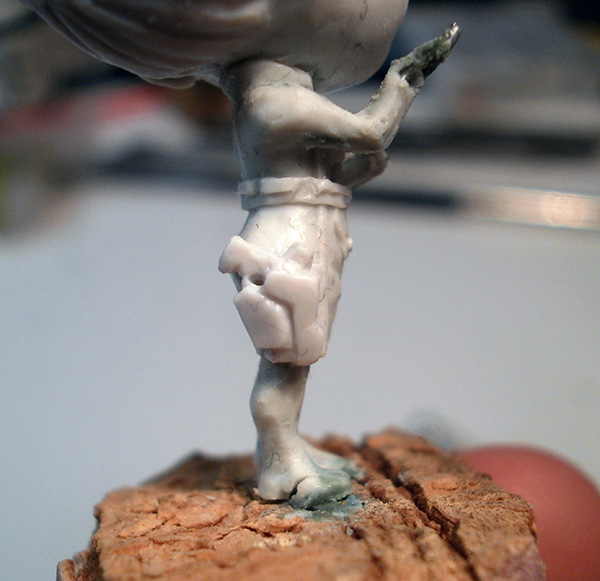
Avicenna’s pistol is suspended from her belt by a really weird triangular chain thing. I’m really not clear on what that’s actually supposed to be, but it’s relatively straightforward to sculpt, so… ehhh?

To build it, I lay down a clay snake and flatten it into a strip. I break the strip up using a knife at regular intervals.

I use a metal tool to press down the gaps between the… loops, I guess? Then, I use the same metal tool to press the loops slightly down on the sides, leaving a raised strip running down the center of all three segments. I poke holes in the loops with a metal pick, and then clean everything up with clayshapers.
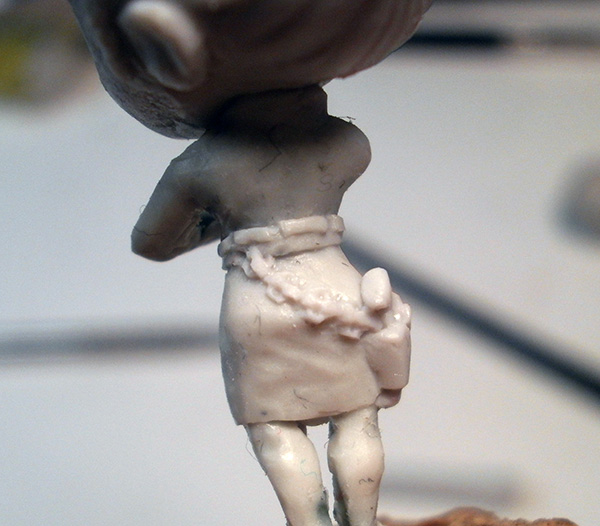
I then repeat the process on the back, ending up with a pretty decent triangle… chain… thing.
…
Look, I have no idea. Let’s just move on. :/

Next up on the Weird Detail Grand Tour: these criss-crossed angled metal bits!
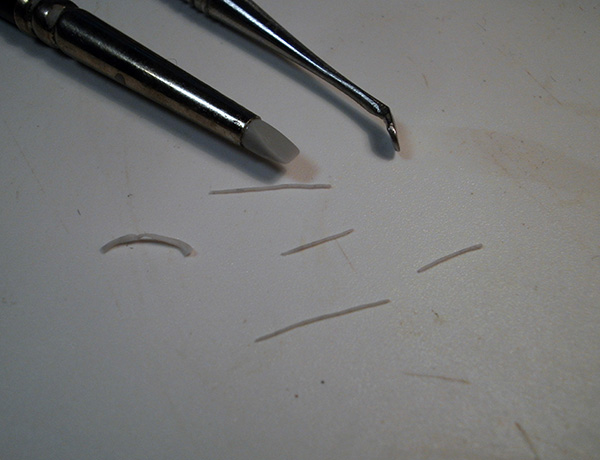
There isn’t a lot to these– they’re just going to be very, very thin clay snakes pressed down at specific angles to each other. I roll out a few inches’ worth of tiny snakes in advance before I start applying anything to make sure they’re all roughly the same width.
The pattern looks complicated, but it’s actually pretty straightforward– the one on the far right goes on first, and then the one in the middle goes on top of it, and then the one on the far left goes over both of them. I expected them to criss-cross and braid over and under each other, but from what I can see on the blurry concept and the blown-up shots of the studio model, that doesn’t seem to be the case.
So, that’s easy enough. ^_^

I don’t have a lot of specific details for you about what finally made the “skeptical sigh” face work– I just picked at it slowly, moving bits around, adding and removing clay, for like three hours in between all the other details until it looked right. Literally googling “skeptical face” was also a big help. 😛
Oh, and hey, check out her cool sweeping hair bit. I like how that came out. 🙂 The process is pretty much what you’d expect– lay down a clay snake, press the edges down with a flat metal tool, and then smooth it with clayshapers.

Alrighty, time for the hands! The right hand followed a different procedure than most of the other ones in the army, because I didn’t start with a mitten and cut it apart into fingers. Instead, I laid down just the palm and knuckles of the hand…

…and then cut a thin clay snake into short segments to form the fingers…

…which were manually placed down on the knuckles. This method is much trickier than the split mitten method, but it’s the only way I know to make really cleanly separated, free-standing fingers that are fully splayed apart from each other.

The reason I don’t always work this way? It’s really hard. 🙁
The fingers have almost no strength whatsoever, so any time you breathe hard in their direction, they start bending over. I had to be extremely careful as I worked to only ever touch the base of each finger where they join into the knuckles, and avoid ever touching the raised fingers.

The left hand, which would be gripping the base of the right glove, was done with the more standard method.

Some extra clay is added to bridge the gap from the right wrist to the grasping thumb-and-forefinger of the left hand, creating the stretched “snapping” pose.

The left glove is given a straighter, looser cuff edge by smoothing down a clay snake on one side.

I seriously love this pose. <3
Hey look, it’s shoes!

Avicenna’s shoes have three small straps across the tops, so I rolled out a very narrow clay snake and cut it into short segments.

I laid three segments across each shoe and flattened them, then added just the tiniest dot of clay to the end of each shoe to form the… button? rivet?
Whatever. The nubbly bit.

Alrighty, now the interesting part: ALL THAT HAIR.
The actual Avicenna model’s hair doesn’t quite go to the ground, but directly translating the original model’s ponytail length isn’t quite going to work here– a ponytail that stops at her feet will look correct relative to the body, but will look really short relative to the head. I’m basically running into an issue where the severely distorted scaling– with objects being way too big on top and way smaller on the bottom– is called attention to because part of the model is going to travel continuously from one end of that distortion to the other.
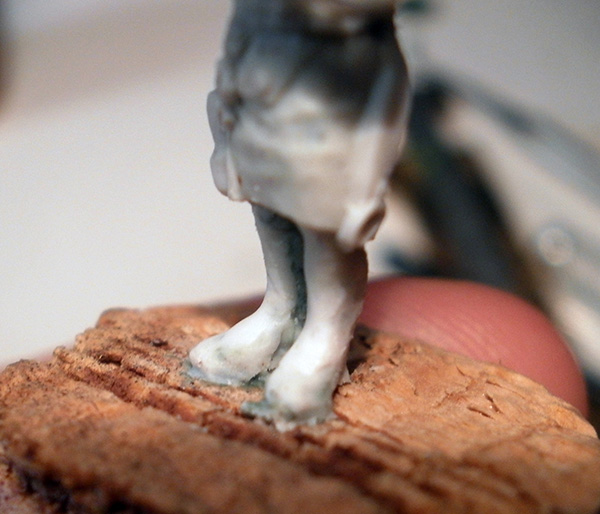
I decide that making the ponytail “correct” relative to the head is more important, and use calipers to measure out a length that drops below the ground plane for the model.
Don’t worry, I’m going to account for that. It’ll be fine. 😛

The ponytail is going to need a pretty substantial wire support. I wasn’t sure if my super-thin copper wire would be strong enough, so I tried using my next-thinnest wire– 20-gauge brass. However, this turned out WAY too stiff to work with. I did some experiments, and figured out that the thin copper wire is just barely strong enough if I twist two lengths of it together fairly tightly. Still springier than I’d like, but I should be able to work with it.
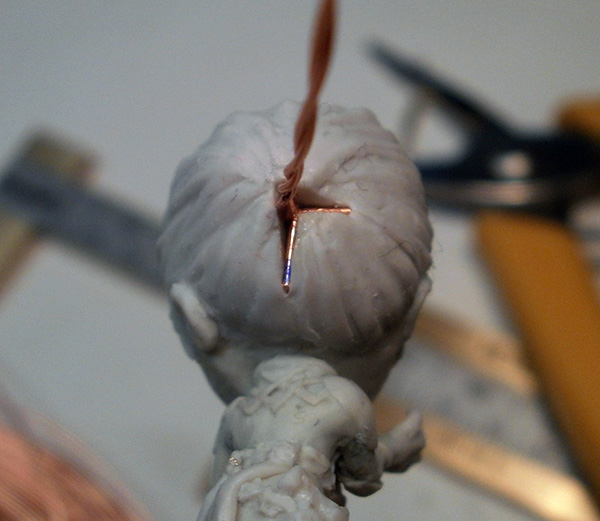
I bend the ends of the wire into an L-shape, then cut perpendicular slots of the same size into the back of Avicenna’s head where the directions of the hair strands all converge together. I press the wire L into the slot, then press it all closed using clayshapers.

A bit of cleanup later, Avicenna is ready for her first bake!
(I wouldn’t be able to start on the braid yet at this stage before baking, as I need the clay around the base of the hair wire to be cooked solid to hold the wire in place. Pretty much any amount of pressure applied to it right now will twist it right out through the soft clay).

Once the model is baked and the hair wire is firmly stuck in place, I apply an adhesive layer of Green Stuff around the entire wire.

I didn’t get a photo of it, but I apply the clay around the wire by spiralling a long, thin clay snake around the wire, and then squishing and smoothing it into a continuous cylinder.

Braids are a bit tricky to sculpt, but they get easier once you look closely and decode how the pattern works. Basically, you put a diagonal line in from one edge, which extends about 2/3 of the way toward the opposite edge. You then come in from the opposite side with another diagonal line, spaced to start where the previous one ended, and again stopping 2/3 of the way toward the original edge. You just keep hopping back and forth like that, making 2/3-width diagonals, until you’ve gone the full length of the braid.

Once you’ve applied the weave pattern to the top, continue the diagonal lines around the sides to the rear. Then, use clayshapers to round off the various segments that you’ve created.
The underside will have the same pattern as the top, but with the direction of the diagonals reversed (so, the “arrows” pointing up instead of down).
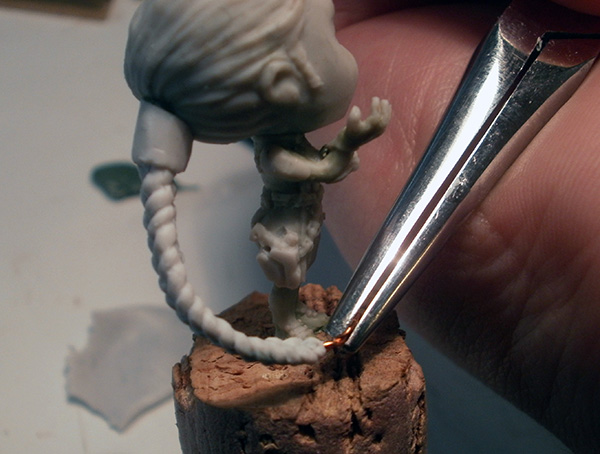
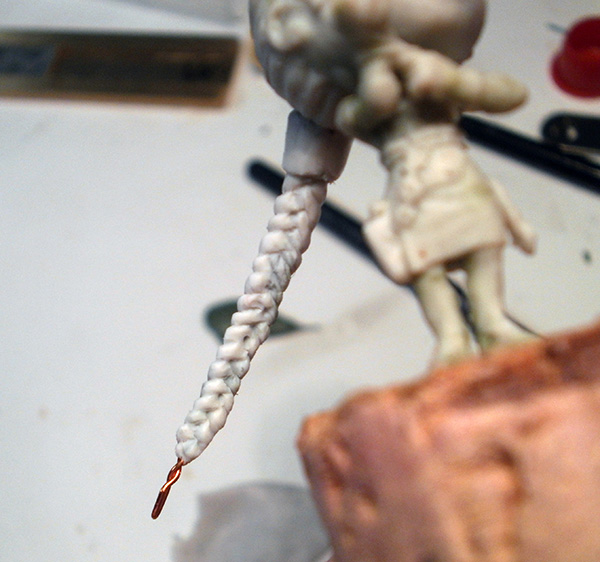
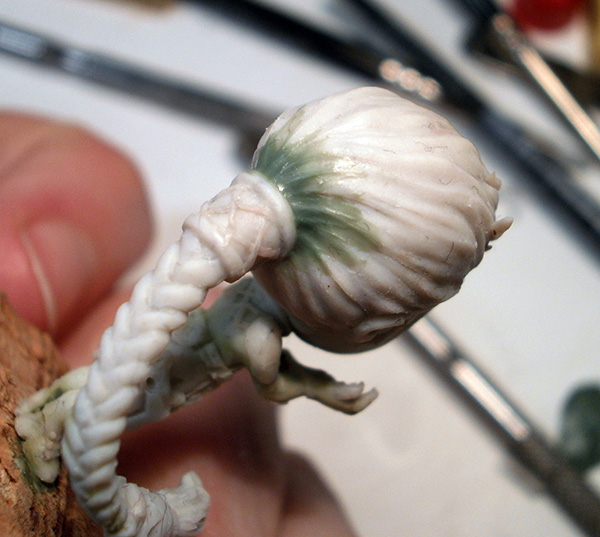
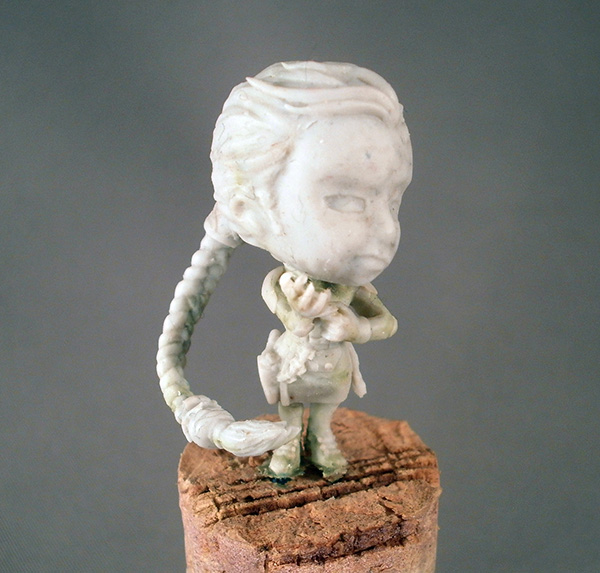
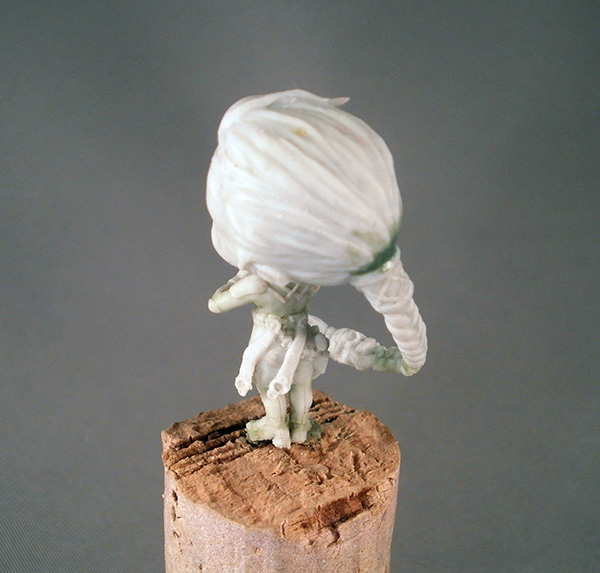
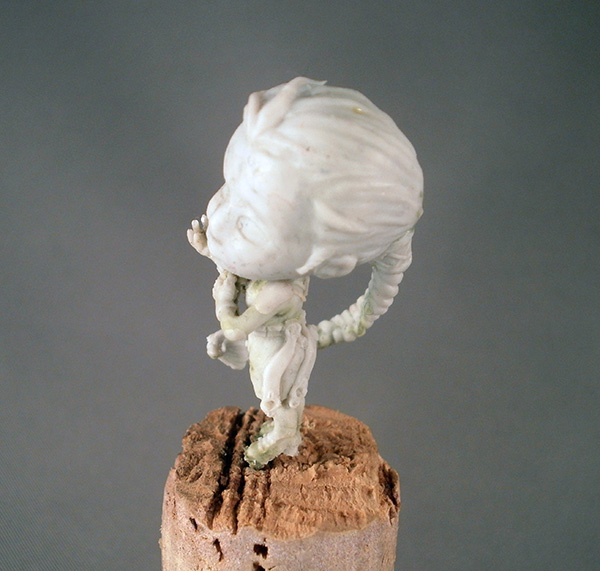
Once I finish cleaning up the braid segments, I grab the tip (which I’ve left exposed as bare wire for just this purpose) with pliers and gently pull it toward the front of the model. Note that I went pretty quickly through the braid construction to ensure that the putty inside isn’t quite hardened yet when I do this; I want it to harden into the curved shape, not the flat shape it was originally applied in.

More adhesive Green Stuff goes around the bare end of the wire, then more clay. I shape the clay at the very end into loose tassels of hair, and leave a large round blob for Avicenna’s… large round hair thingie.
LOOK, HER COSTUME MAKES NO SENSE. SHE’S COVERED IN THINGS THAT SERVE NO PURPOSE AND ONLY LOOK NICE. WHO EVEN DOES THAT. >:(

Oh look, more purely decorative baubles.
BOOO JEWELLERY. EVERYONE SHOULD JUST WEAR JEANS AND A HOODIE YEAR ROUND LIKE SPUD.

Aaaanyway. So, she has a big metal hair scrunchie, I guess? As you saw a moment ago, I dug some material out of the center to drop it down, and have now smoothed off that rough clay. I then apply an overlapping pattern of diagonal clay snakes all around the cylinder in much the same way I did on her shoulder decoration.
And… some more cleanup later, she’s ready to bake!
Oh, random post-baking item: the hair scrunchie came a bit away from the rest of the hair when I was working on it, so I had to apply some filler Green Stuff after she was fully cooked to bridge the gap. You can see this type of last-minute Green Stuff patch on a few of the models– it’s a quick way to cover your various “oops”es. 🙂
Aaaand, she’s done!


You can see her fully painted on the last page (and, spoiler: she’s my second-favourite model out of the entire 10-model project <3 ). But for now, let’s check out a model that only ended up in the army because of weird Fireteam restrictions. 😛